DIY Strawberry Heart Valentine Box
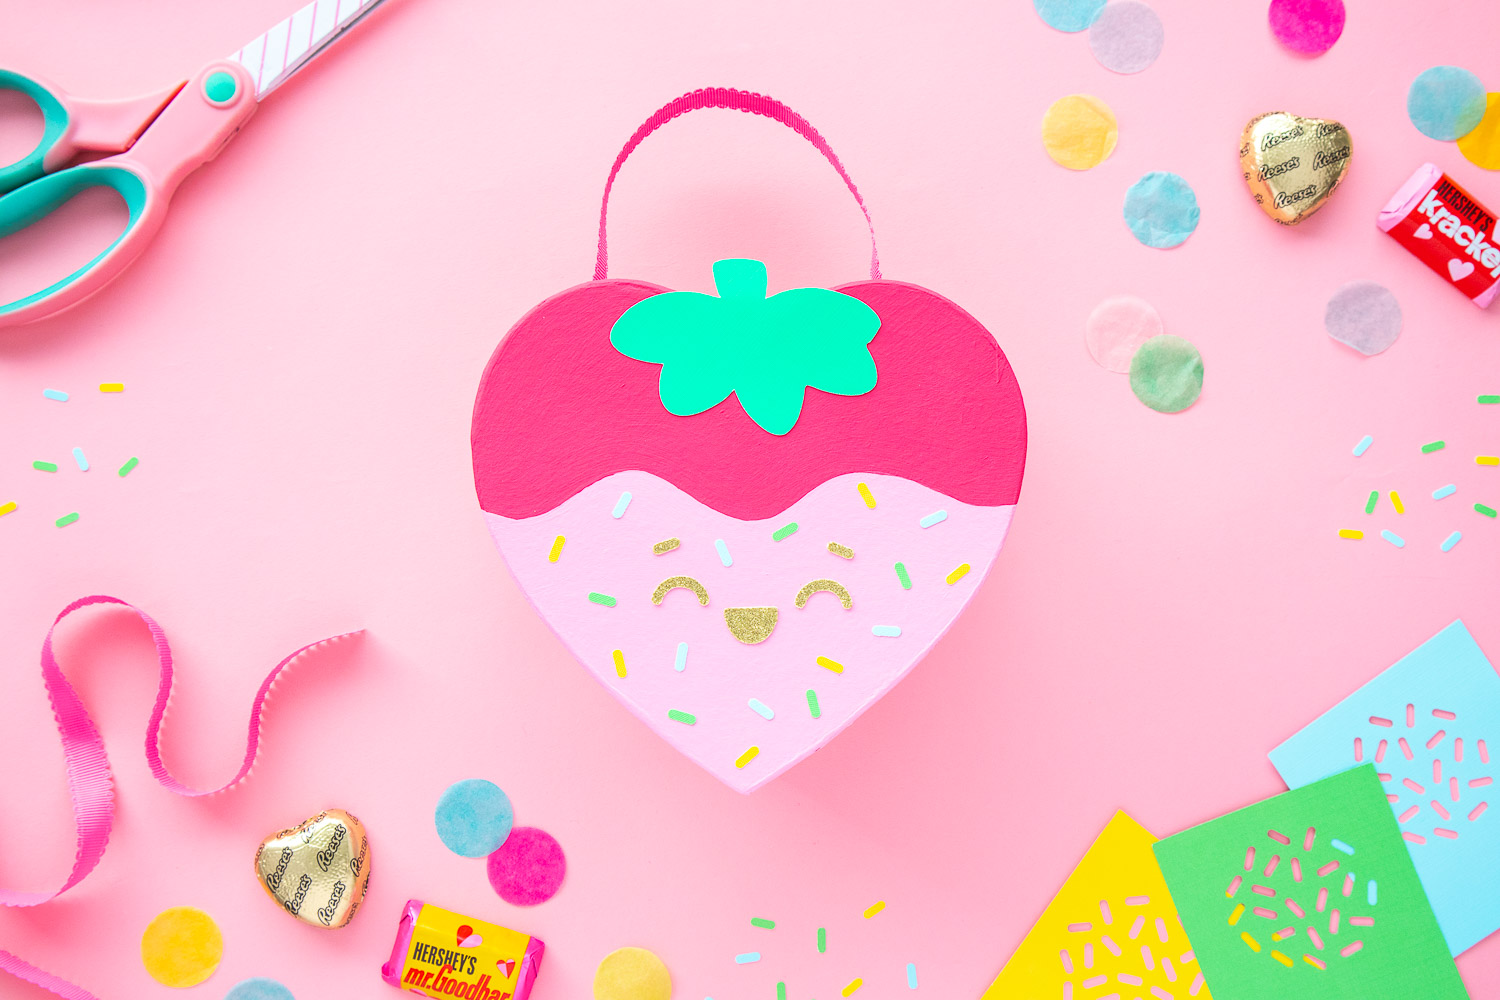
This DIY strawberry heart Valentine box is one of my favorite Valentine’s Day crafts ever! I’m obsessed with sweet treats and anything kawaii (“cute” in Japanese) so I combined my love for them into this box inspired by chocolate-dipped strawberries. In case you can’t tell, it’s a PINK STRAWBERRY dipped in PINK CHOCOLATE and covered with COLORFUL SPRINKLES! And if that wasn’t cute enough, I added a super cute glittery face and a ribbon handle! This berry sweet box can be used as a Valentine box, gift box, party favor or even a stylish mini bag.
Keep reading for the step-by-step tutorial!
Some of the below links are affiliate links and if clicked, I may make a small commission at no cost to you. As an Amazon Associate I earn from qualifying purchases.
Materials
Acrylic paint (I used dark pink and light pink but feel free to vary the colors to suit your unique taste!)
Green cardstock
Assorted color cardstock
Gold glitter cardstock
Sprinkle paper punch or hole punch
Pencil
Flat paint brushes
Scissors
Cricut machine (optional)
Sprinkle paper punch or hole punch
Tweezers (optional)
Pink ribbon
Instructions
If you want a quick look at the process, check out my Instagram reel here!
The heart box I used was 6” x 5.5”, but you can adapt the below instructions for whatever size heart box you have.
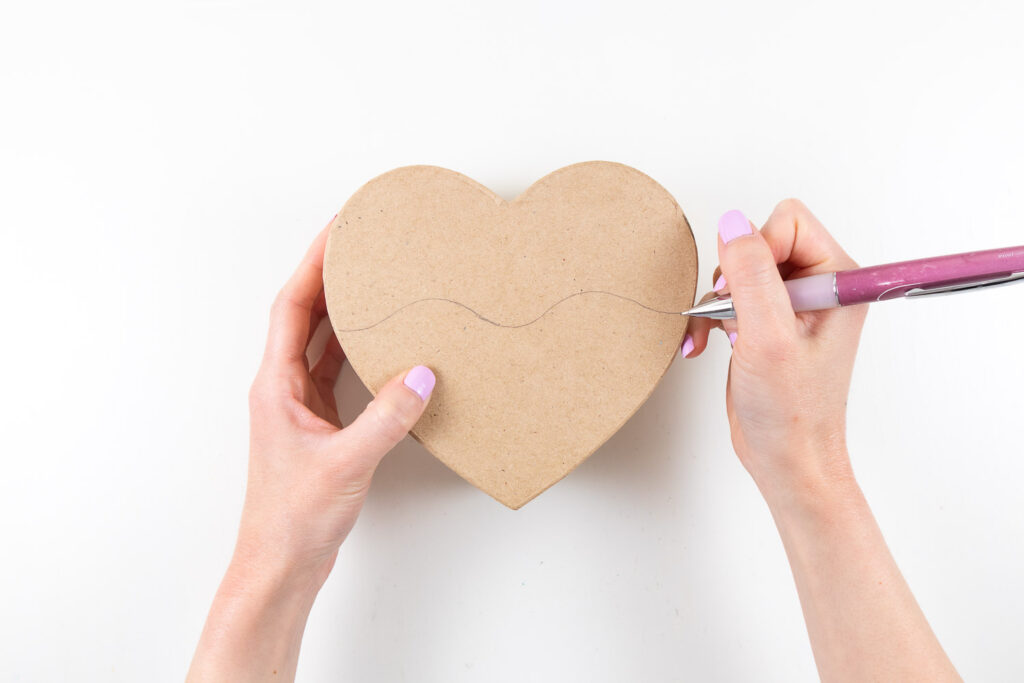
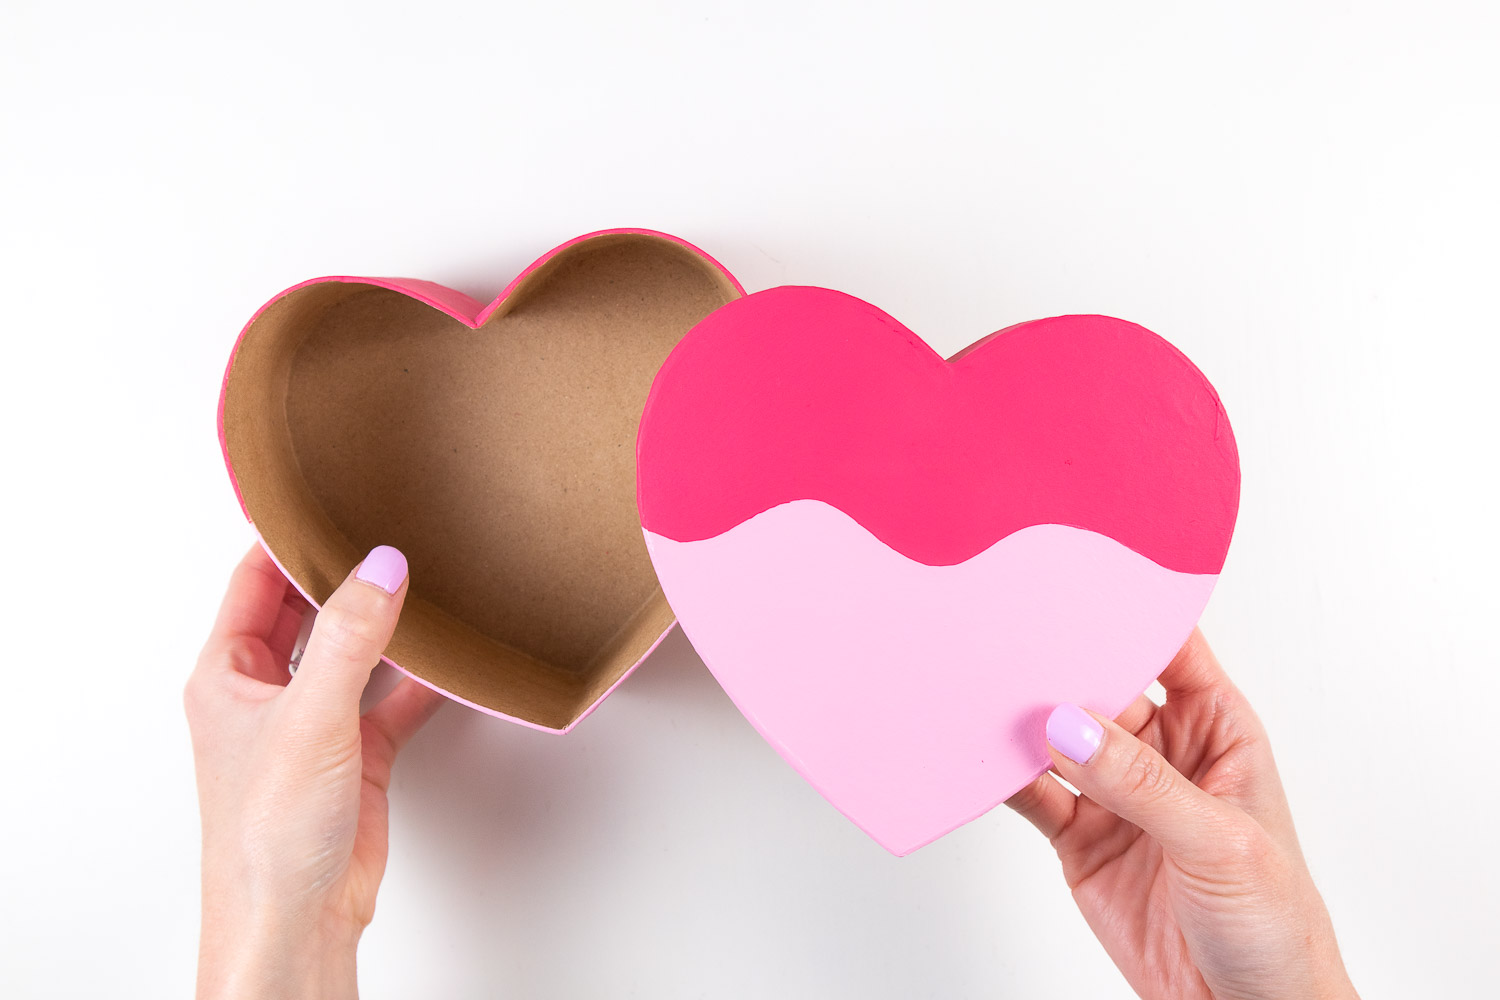
1. Draw a wavy line around the heart box
With the lid placed on the base of the box, use a pencil to draw a wavy line across the lid, sides and back of the box. The wavy line on the side of the lid should meet the wavy line on the sides of the base. This line will be the divider between the strawberry and the chocolate dip.
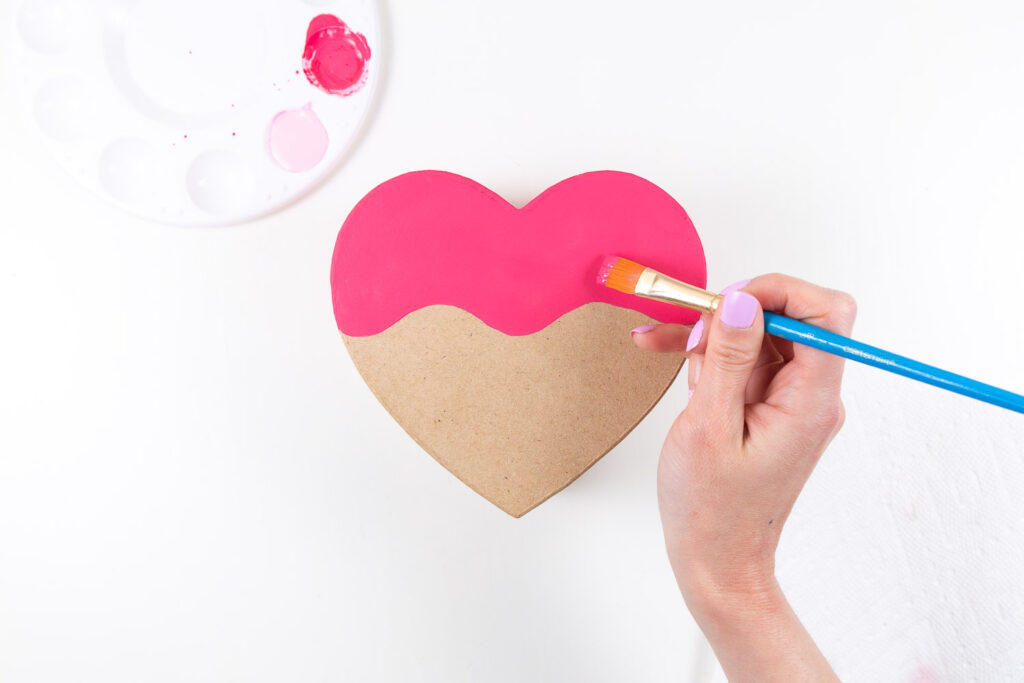
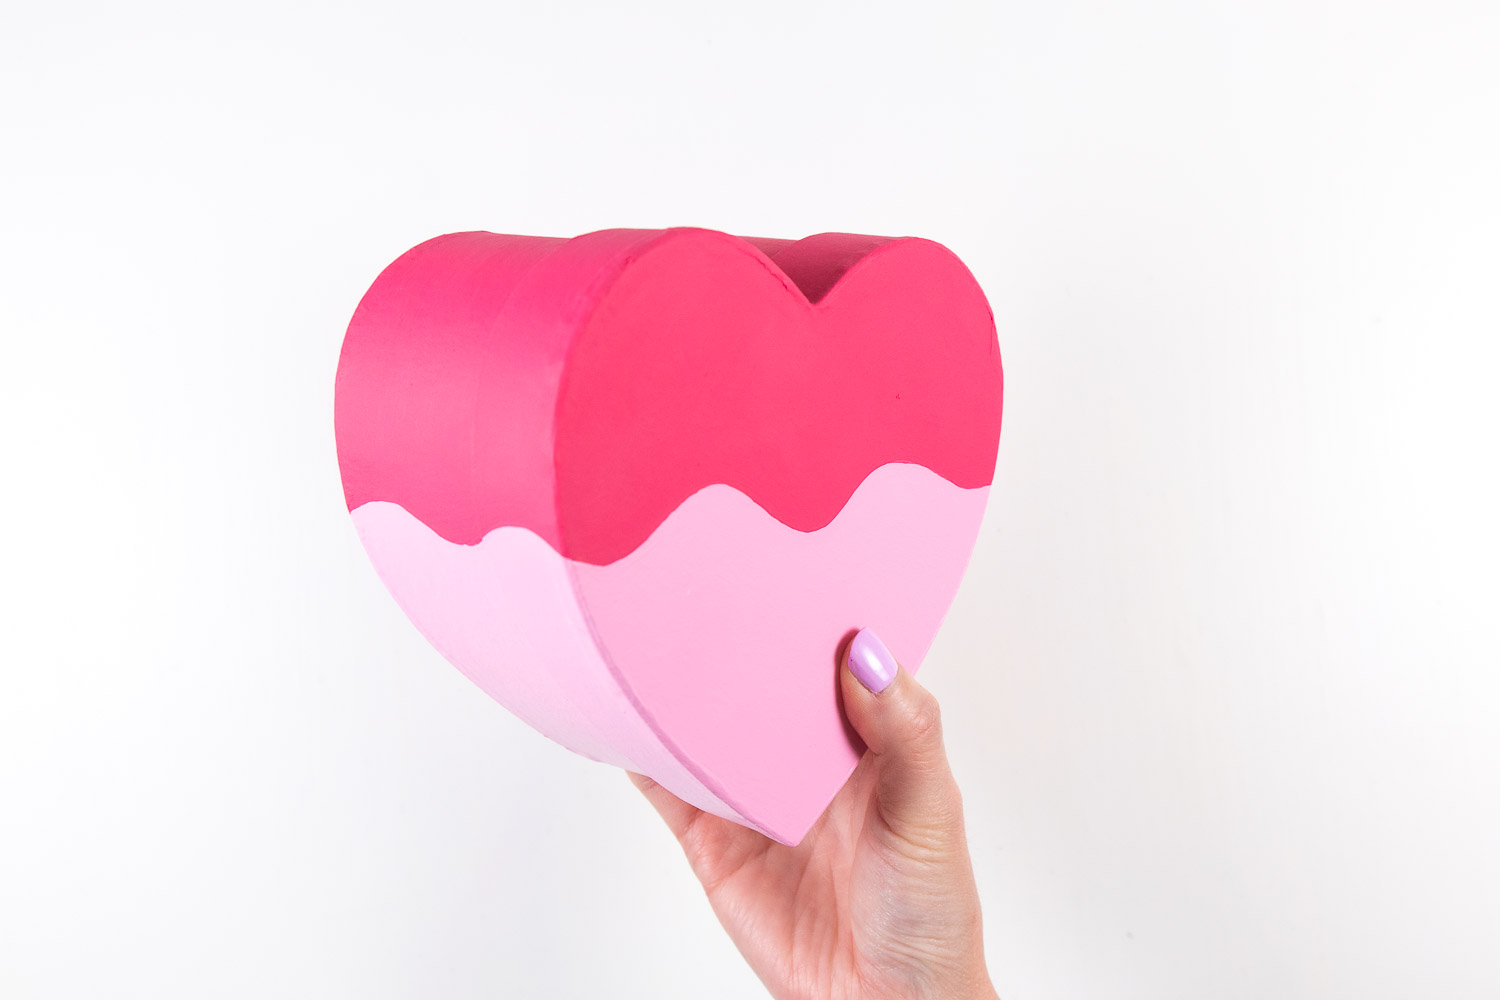
2. Paint the strawberry part
Separate the lid and base of the box. Paint the top half of the lid and the base (above the wavy line) with dark pink paint. I used two coats to make sure the box wasn’t showing through. Allow to dry in between coats.
Tip: Use a hair dryer to speed up the drying process.
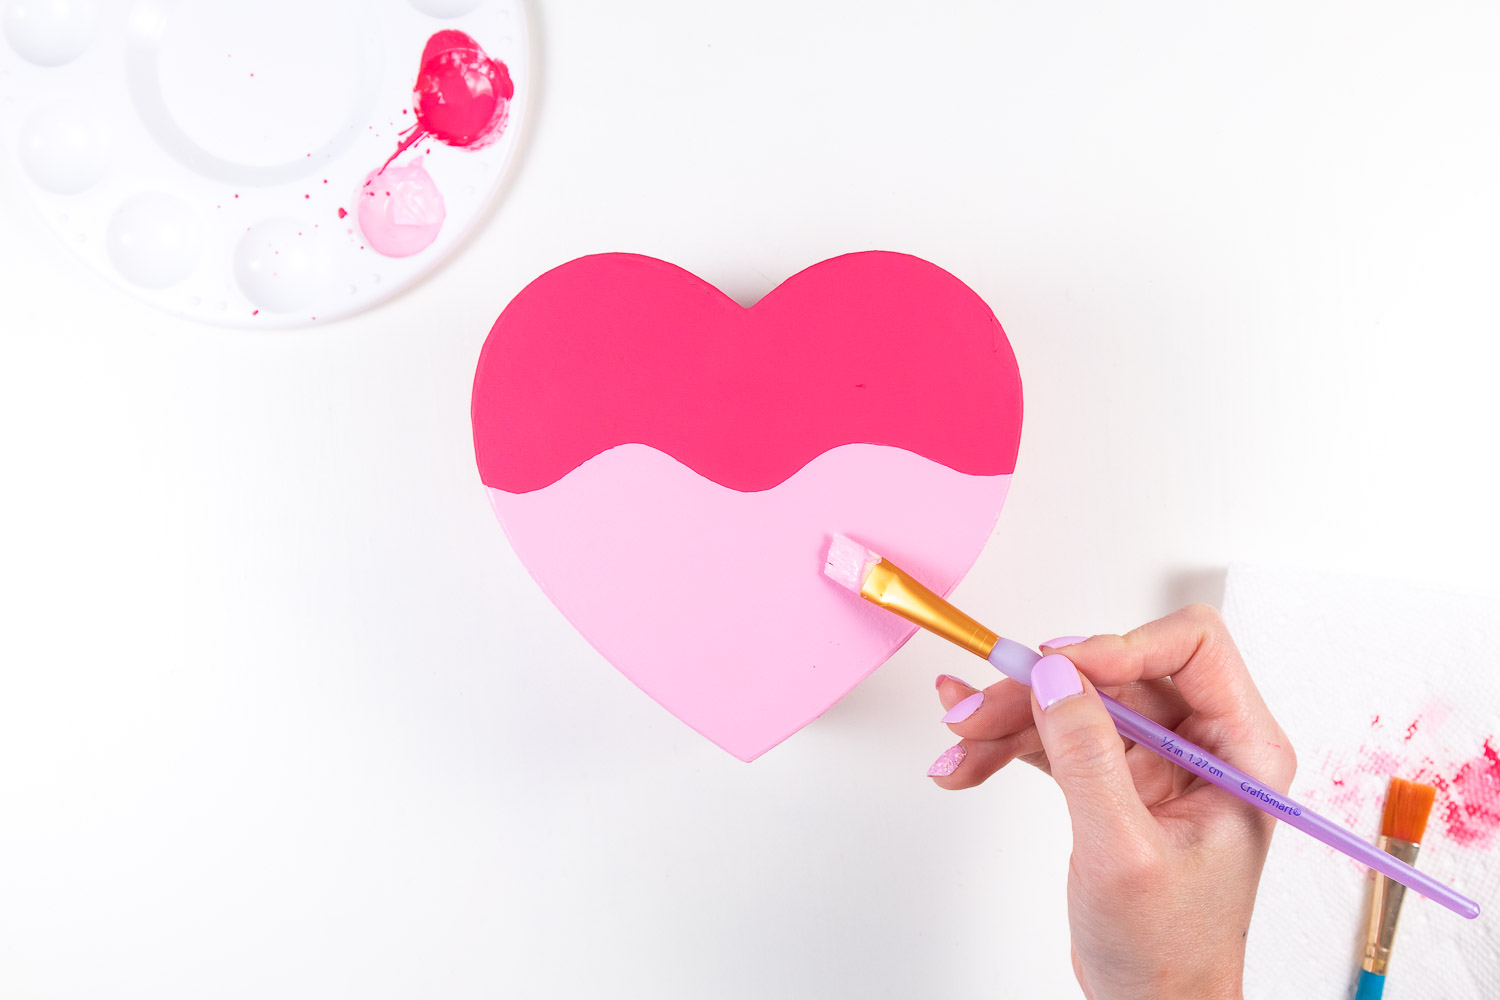
3. Paint the chocolate dip part
Paint the bottom half of the lid and the base (below the wavy line) with light pink paint. I used three coats to make sure the box wasn’t showing through. This may vary depending on the paint you use. Allow to dry in between coats. The paint should be completely dry before moving onto the next step.
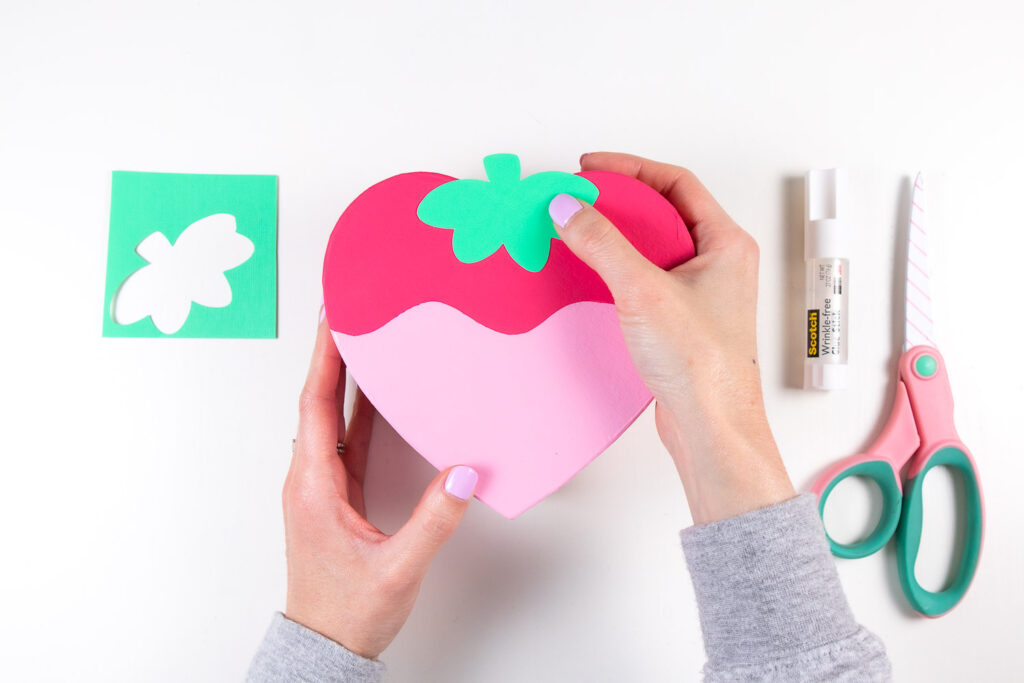
4. Cut and glue on strawberry leaves
Cut out a stem and leaf shape from green cardstock as shown. You can do this by sketching the shape on the cardstock then cutting it out OR using your Cricut to cut out the shape. (I already had this strawberry leaf uploaded to Design Space for a previous project so I used that.) Test out the position of the leaf on the top of your box. Then once you’re happy with the position, use your glue stick to attach it.
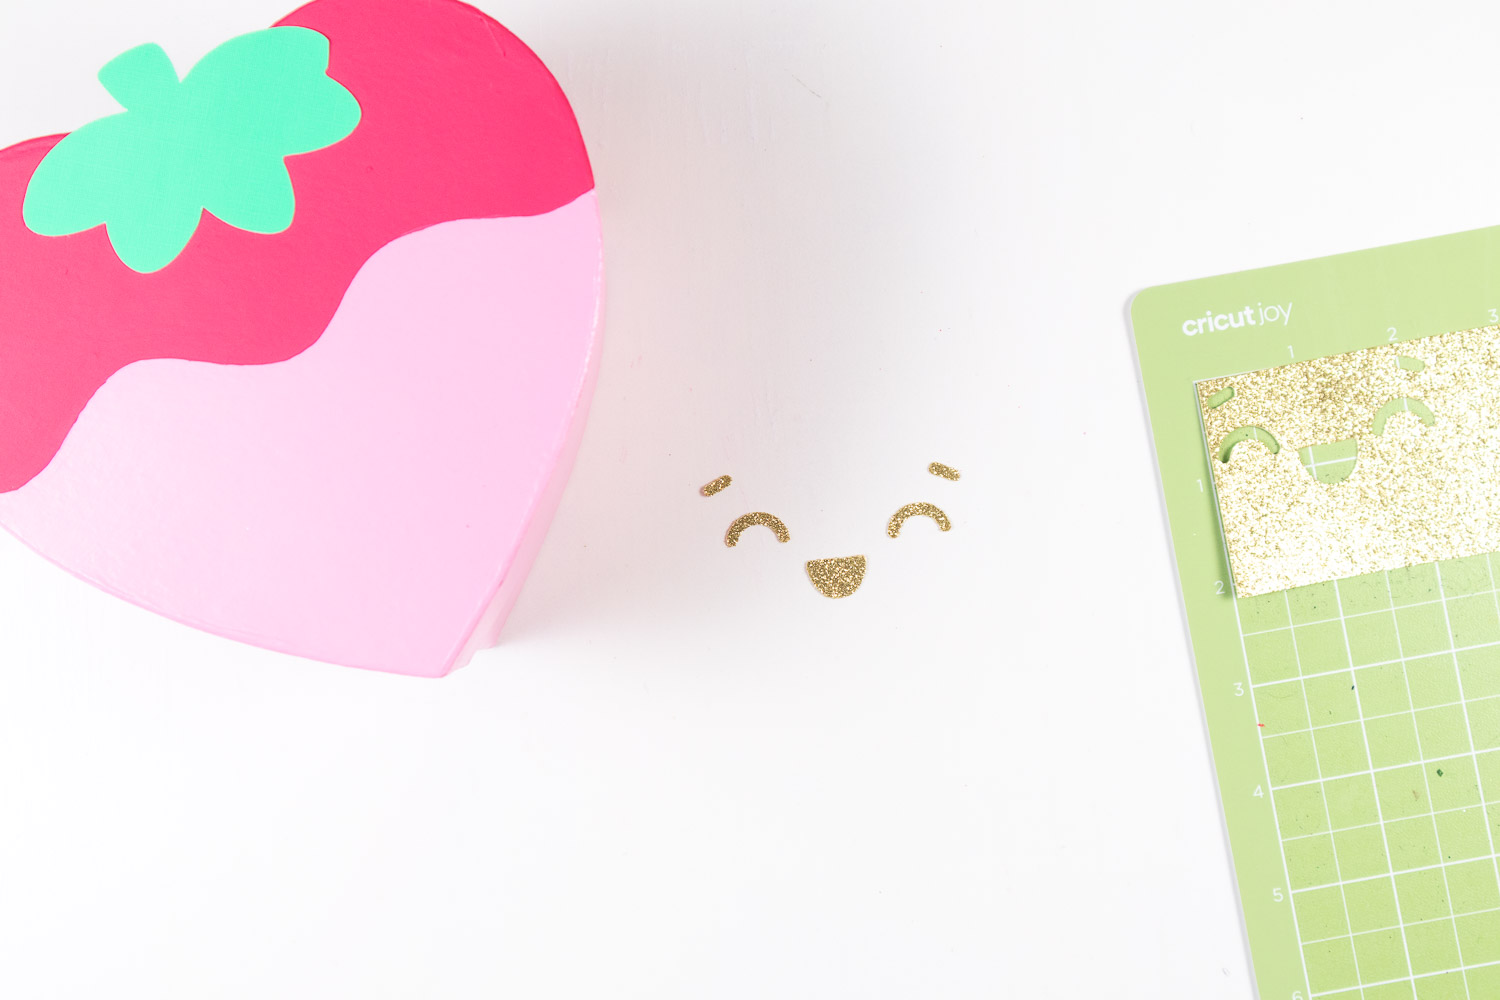
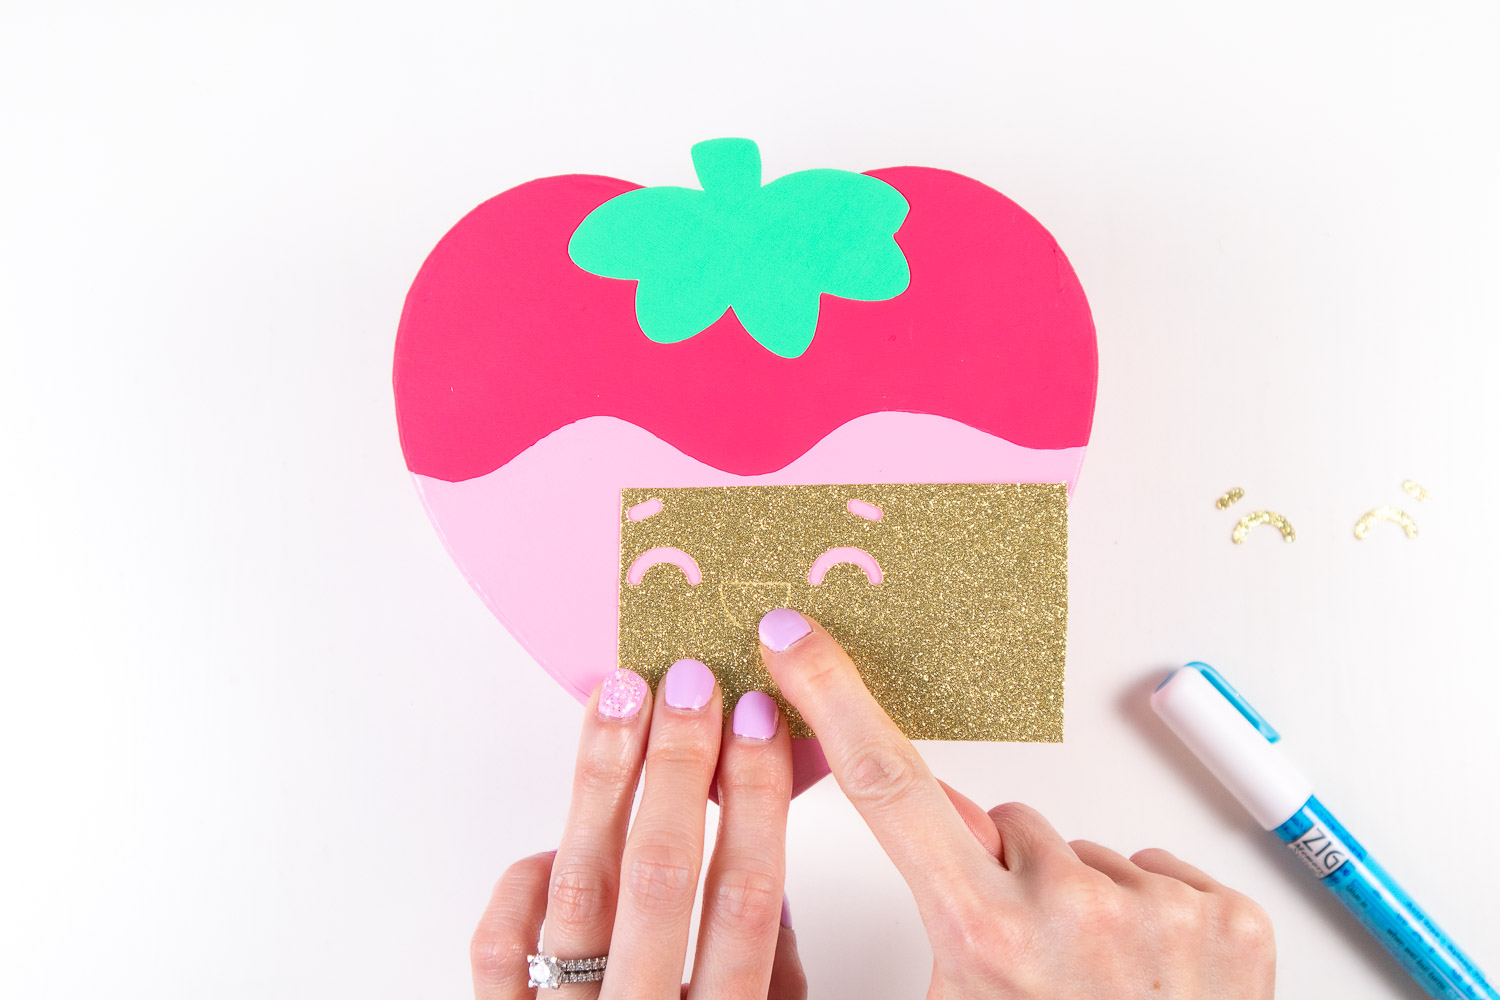
5. Cut and glue on face pieces
Decide what facial expression you would like your strawberry to have then cut it out from gold glitter cardstock. Again you could sketch the face on the back of the cardstock then cut it out OR use your Cricut to cut out the pieces. I found this cute face in the Cricut Design Space Image Library by searching “joyful kawaii face”. Test out the position of the face pieces on the chocolate dip part (bottom half) of your box. Then once you’re happy with their position, use your glue stick or glue pen to attach them.
Tip: If you used your Cricut machine to cut out the face, save the negative space remaining after your cut. Place it onto the heart box then glue the face cut outs in the openings. This takes the guesswork out of positioning the pieces!
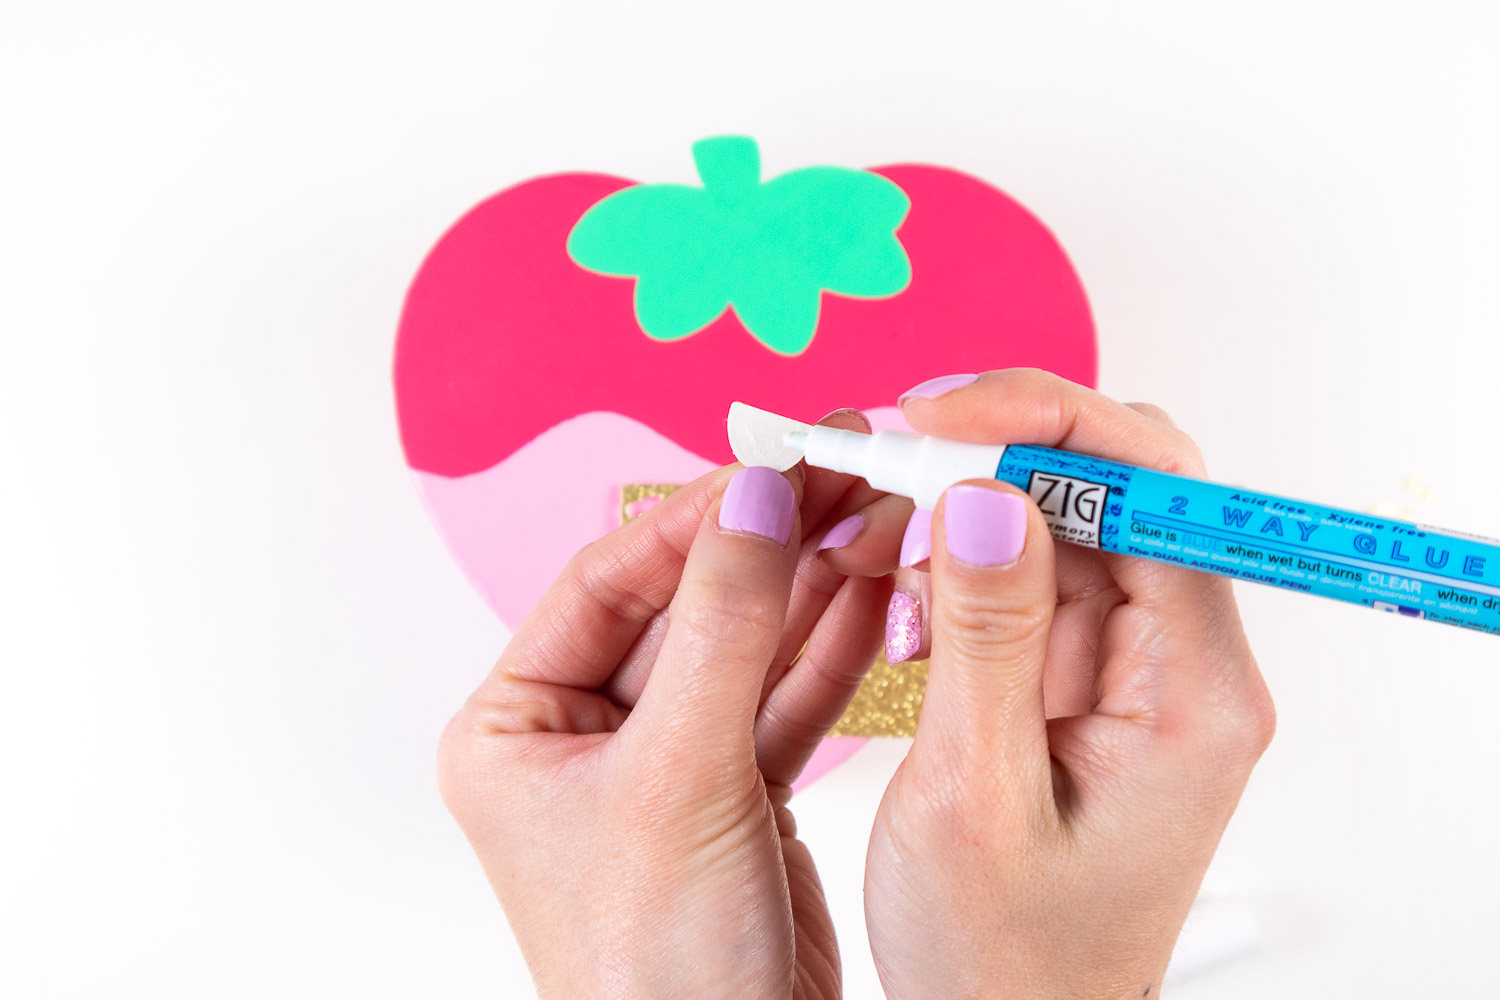
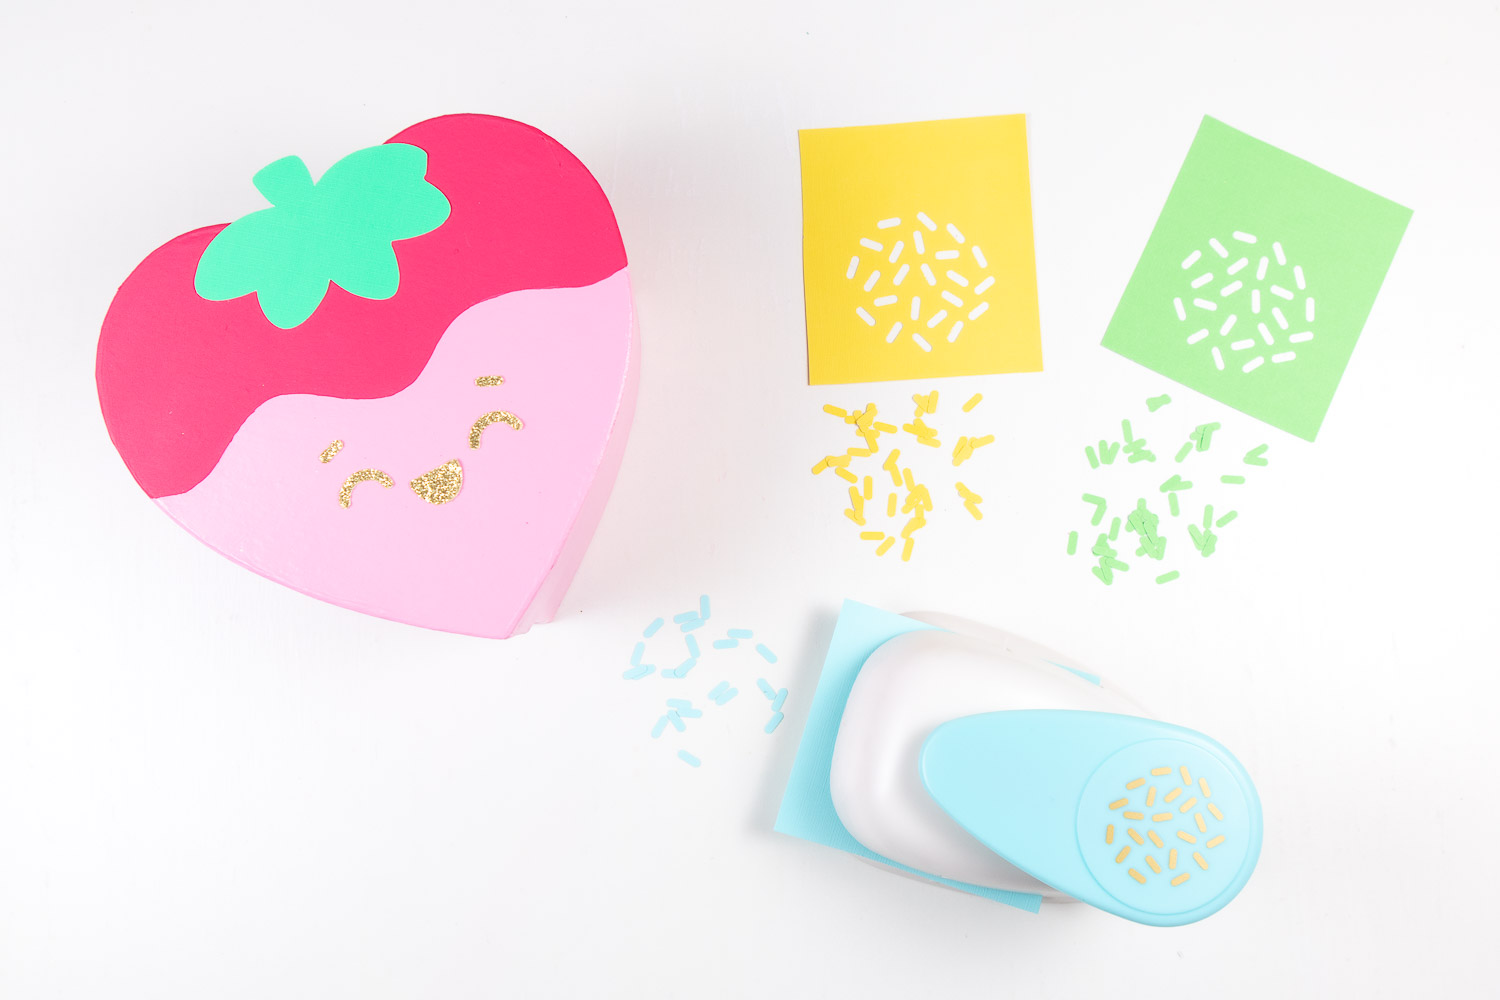
6. Cut and glue on sprinkles
Place lid back on the base of the box. Cut out sprinkles from assorted colors of cardstock. There are several options for cutting out sprinkles:
- Use a sprinkles paper punch. Mine is a We R Memory Keepers punch they no longer make. The sprinkles are about 5/16” long.
- Use a fun hole punch. The set I linked in the materials section comes with three different shapes that would look super cute as sprinkles!
- Use your Cricut machine to cut out sprinkles. Search “sprinkles” in the Design Space Image Library.
- Cut them out by hand. This is the most time consuming option!
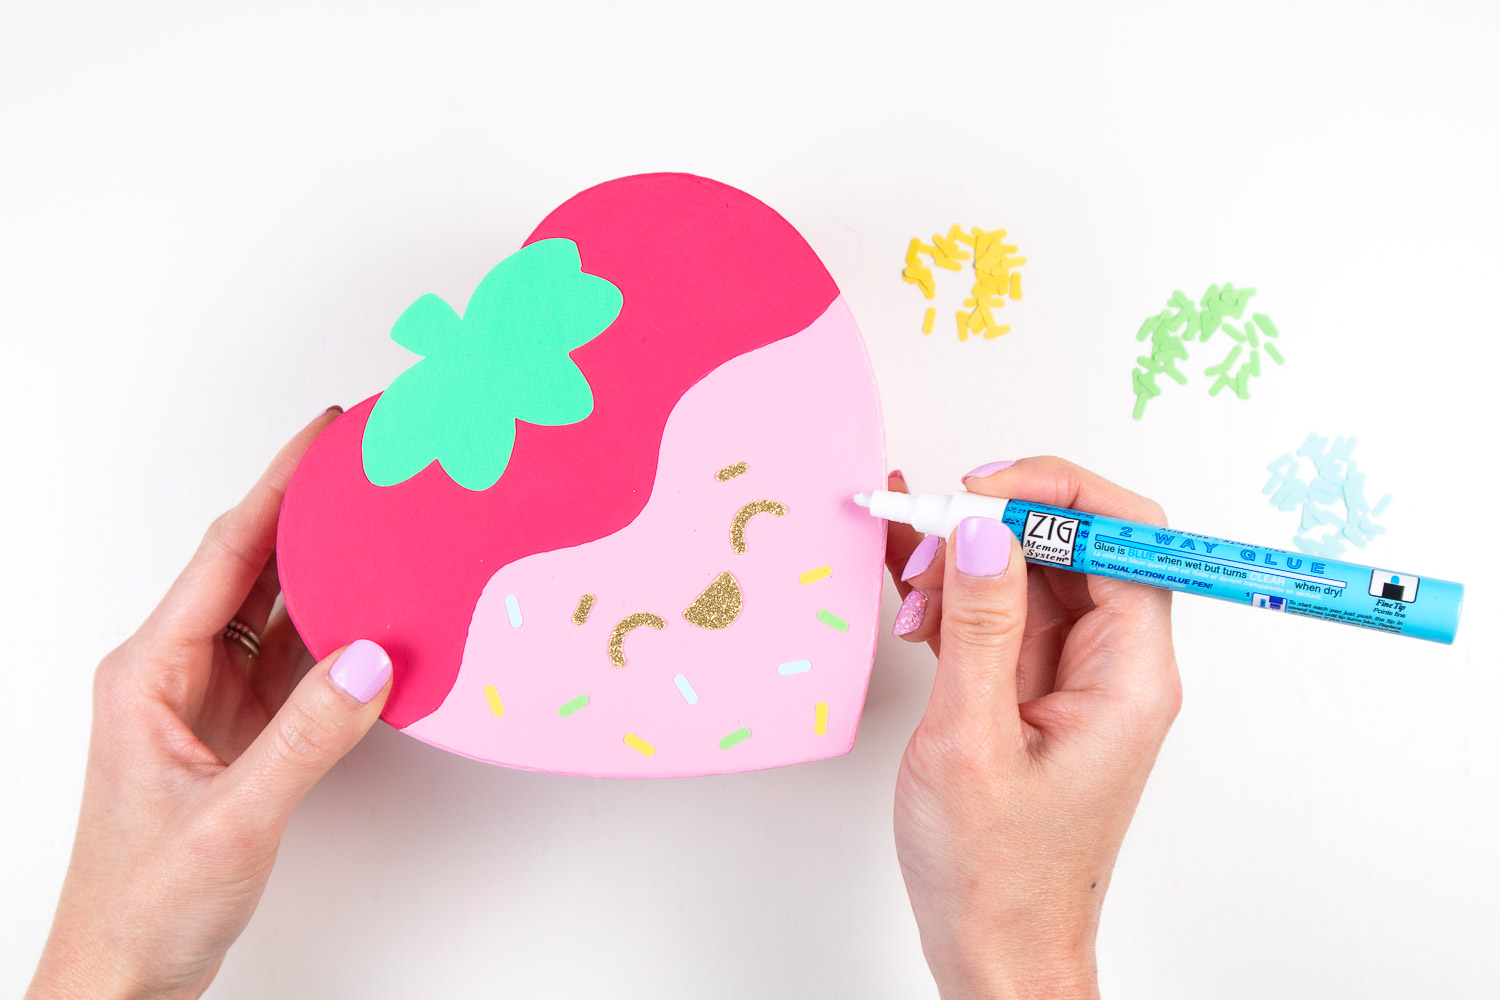
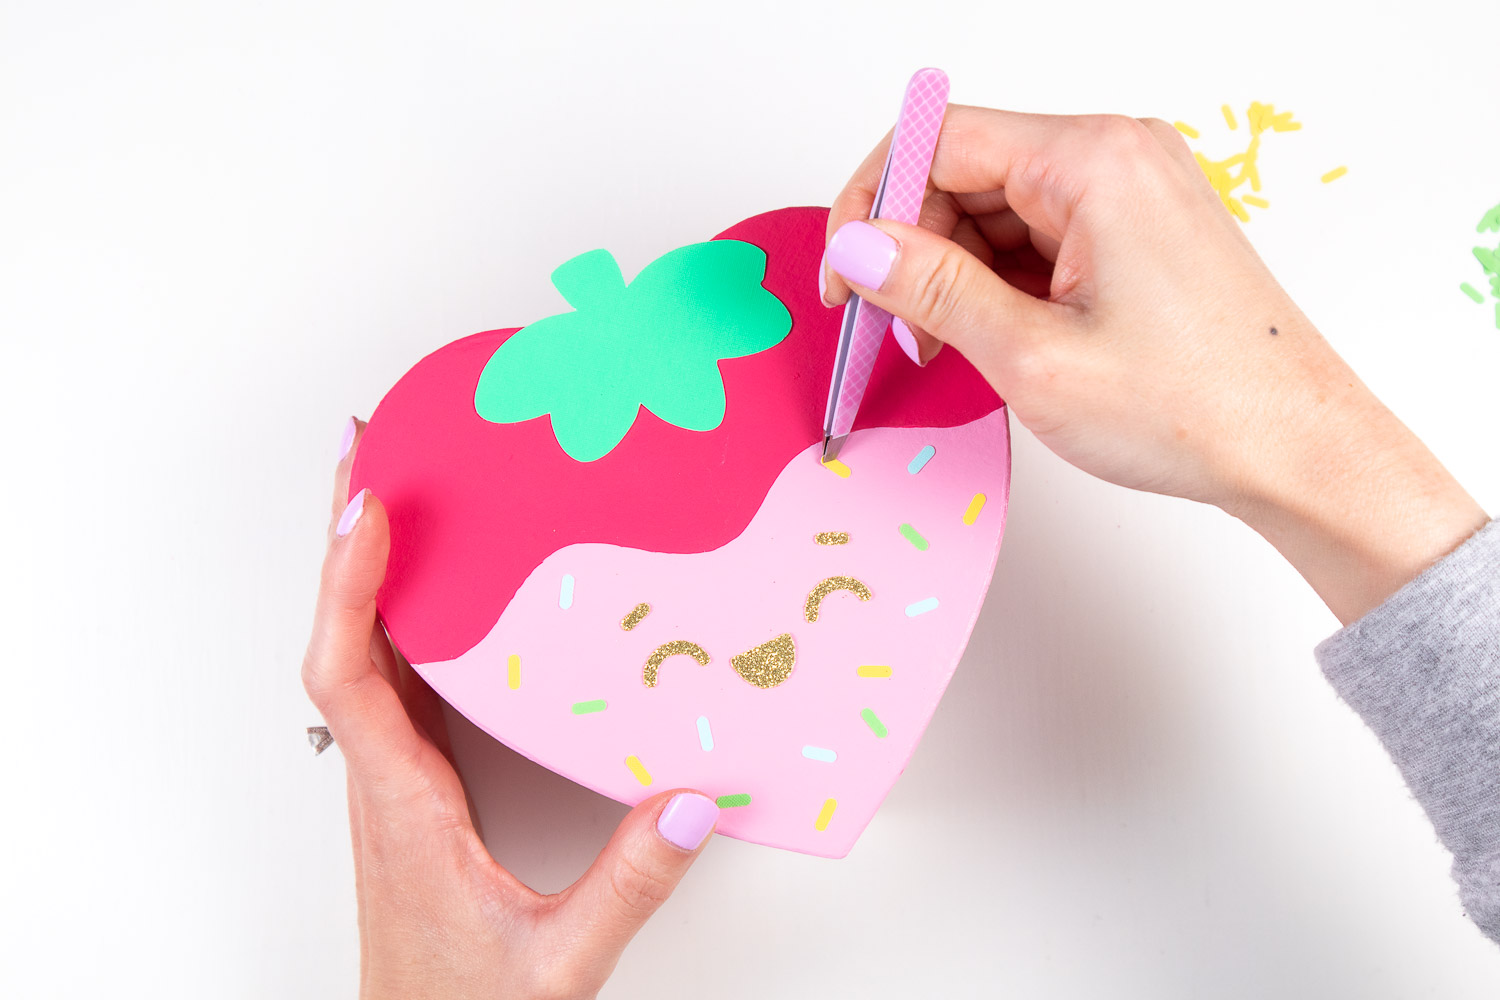
Once you have cut out sprinkles, attach them all over the chocolate dip part of your box. My favorite way to do this is using a glue pen! It seriously makes it so easy! The one I linked in the materials section is the new version of the one I have but should work similarly. Basically you draw on small dashes where you want your sprinkles to go, then place the sprinkle right on top. You can use a pair of tweezers to help you pick up and attach the sprinkles. This glue dries pretty quickly so you’ll want to only draw one or two glue lines at a time and attach the sprinkle(s) right away.
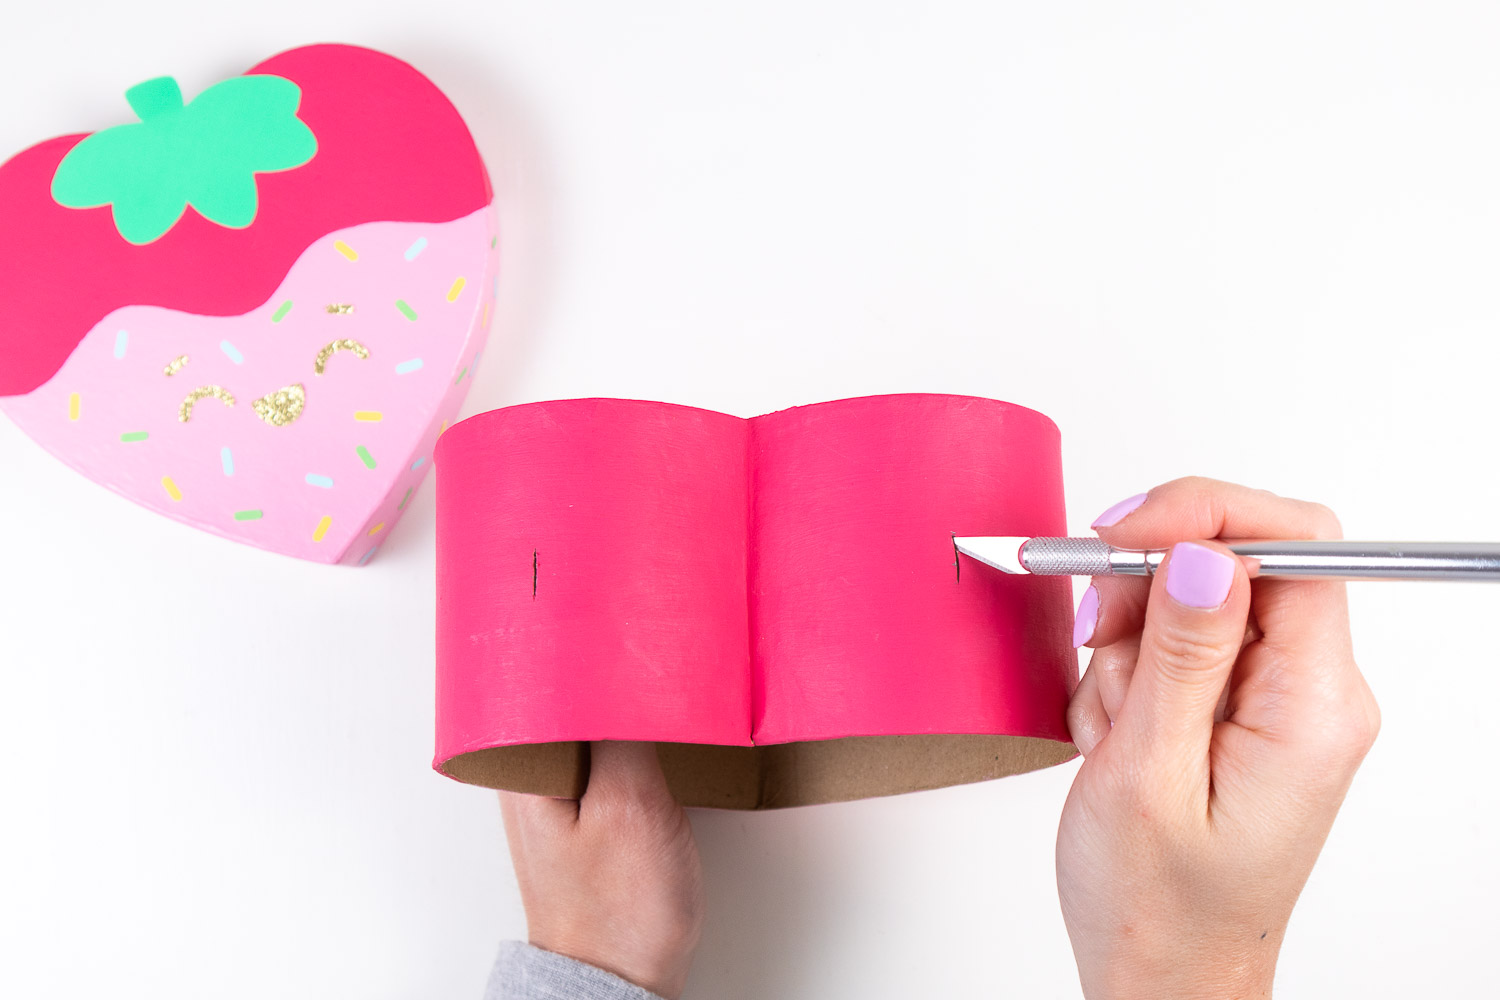
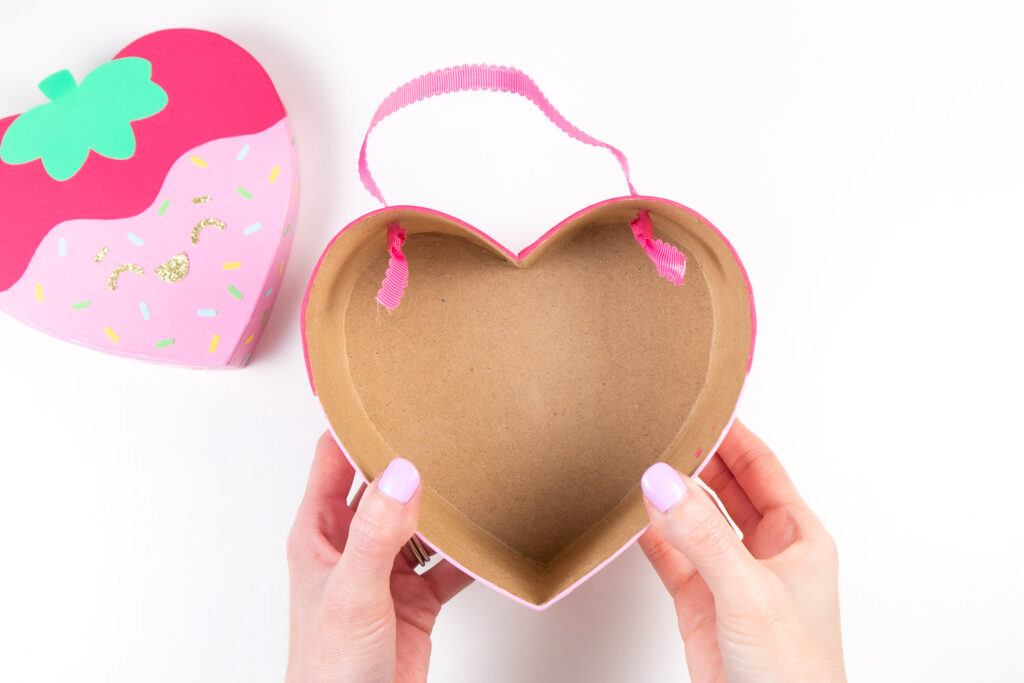
7. Cut slits and attach ribbon handle
Next we’ll be attaching a ribbon handle to the top of your strawberry box. Make sure your box is closed all the way then mark two spots where you want the ribbon handle to come out from. Use your craft knife to cut slits in those spots. Make sure your slits are long enough to fit the width of your ribbon. Wiggle the knife back and forth to widen the opening slightly. Determine the length of ribbon you’ll need for your handle and add a few inches. Remove the lid then take one end of the ribbon and thread it through one slit from the outside. Tie a knot from the inside to secure. Take the other end of the ribbon and repeat the same process.
8. Fill with treats and enjoy!
Fill with wrapped candies, small toys, beauty products, love notes, etc. I used some crinkled paper in mine for filler.
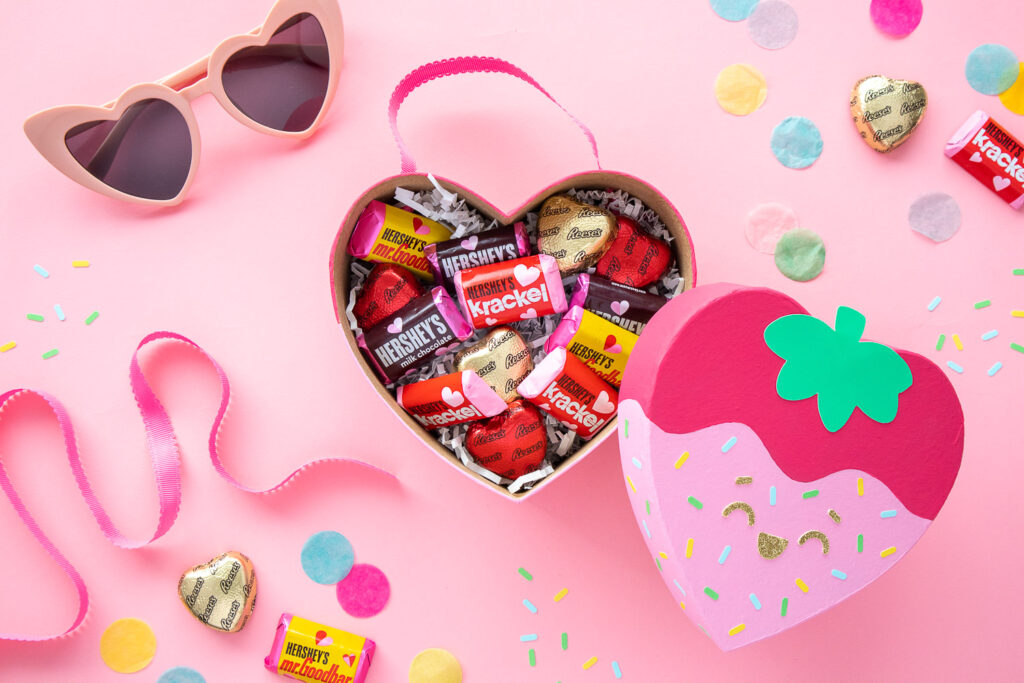
Super cute and super sweet!
Hope you loved this strawberry heart box tutorial as much as I did making it! If you make this project, tag me in your photos on Instagram. I would love to see and share your creations with my craft-loving community. Happy crafting friends!
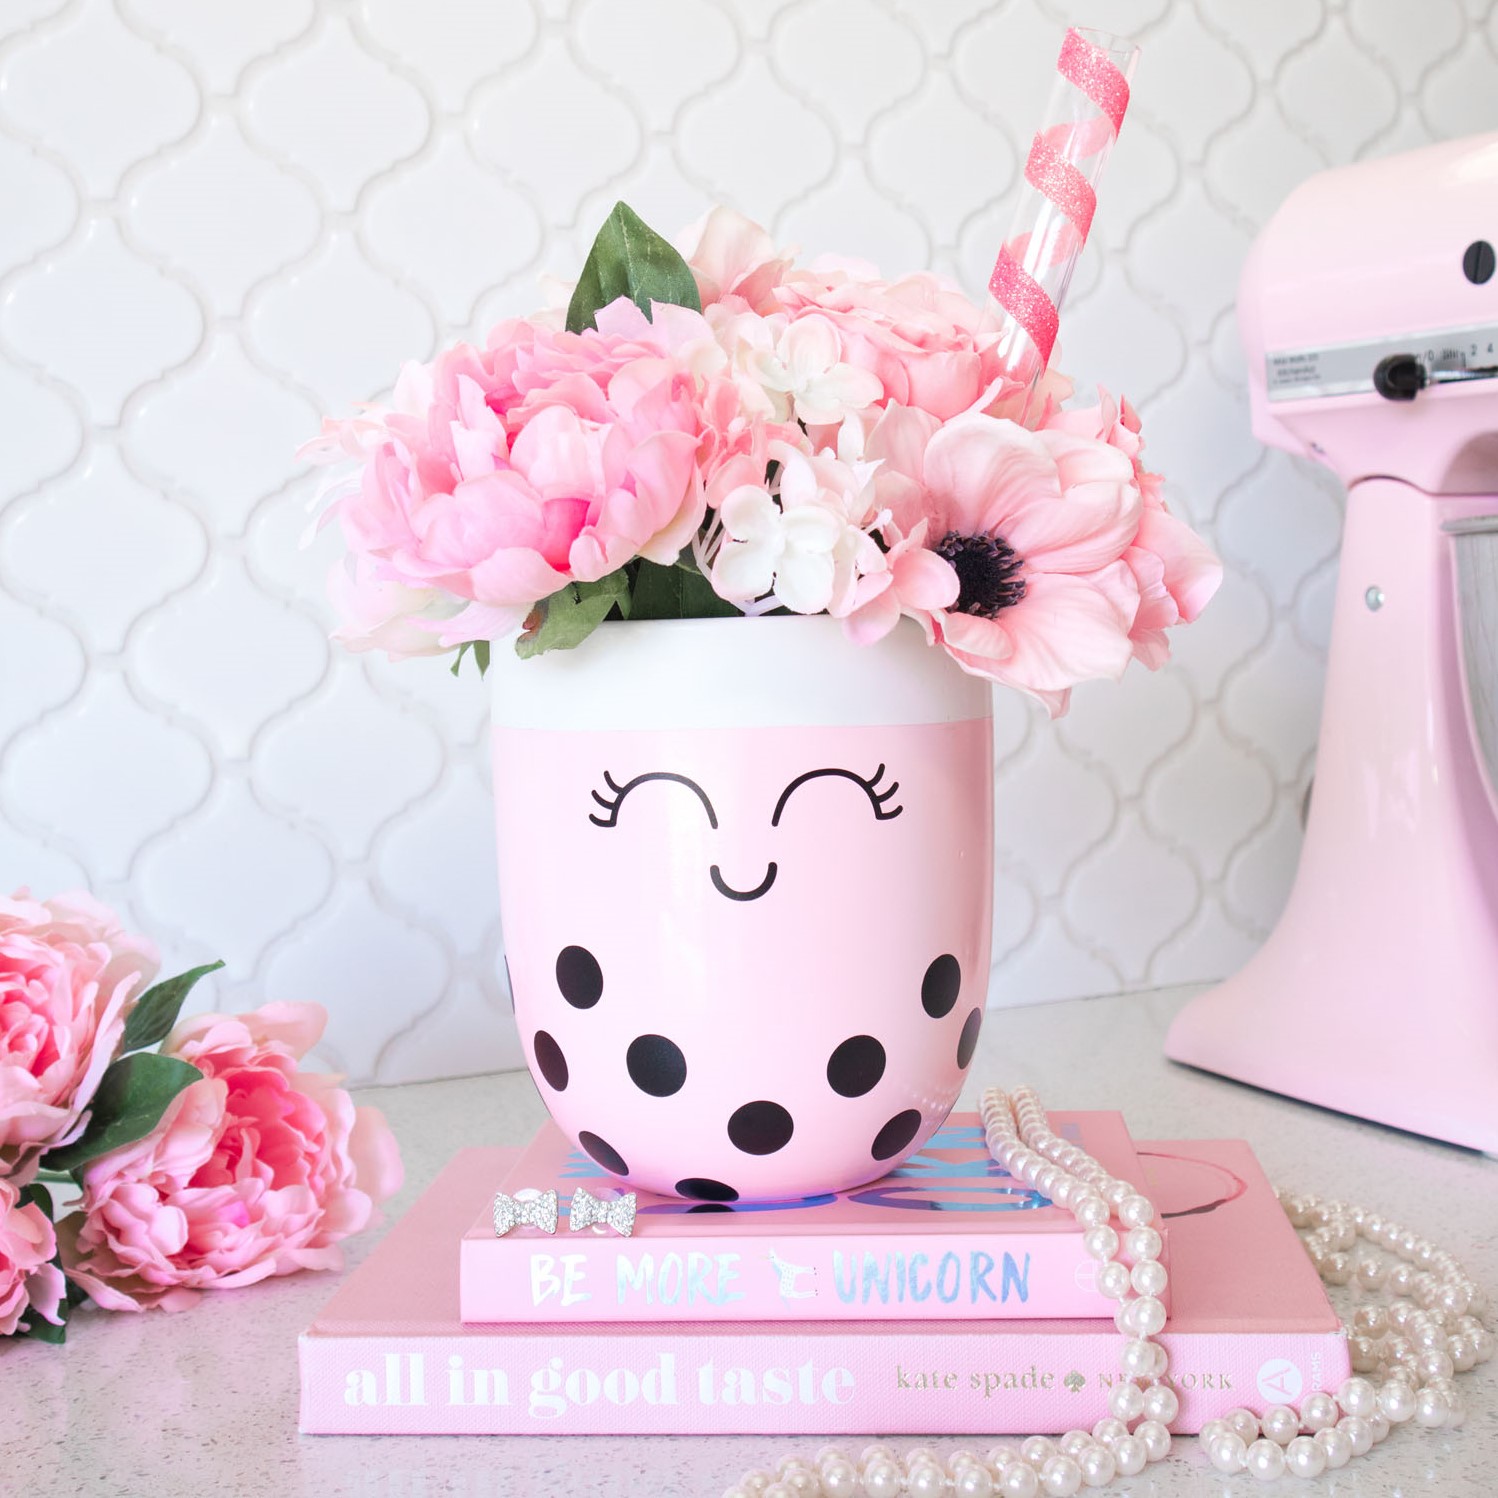
If you love hearts, you’ll love this DIY rhinestone sunglasses project! If you are looking for more Valentine’s Day inspiration, check out this Valentine’s Day photoshoot I worked on a few years ago!