How to Make a Boba Tea Plant Pot
This DIY boba tea plant pot is the perfect gift for the boba tea lover in your life!
If you haven’t heard of boba tea or bubble tea, it is a sweet tea-based drink originating from Taiwan. It’s commonly found with chewy tapioca balls called boba. The world’s love for boba has extended beyond just the boba tea shops with make-at-home kits, handmade crafts, songs, and even kawaii (Japanese for “cute”) boba characters. I personally love boba and think the new interpretations are so adorable!
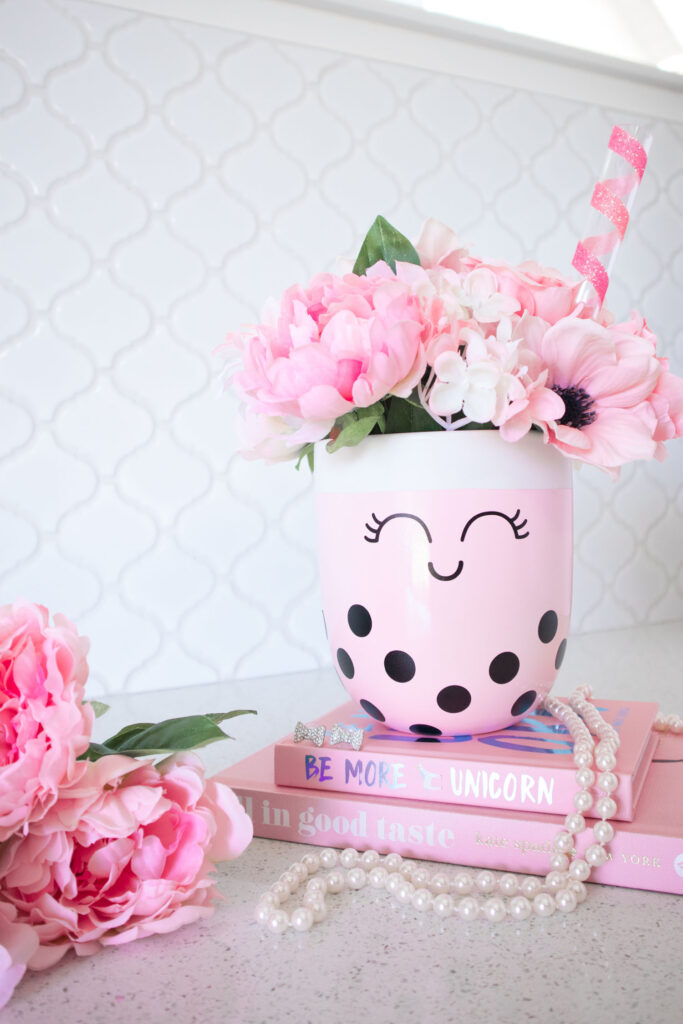
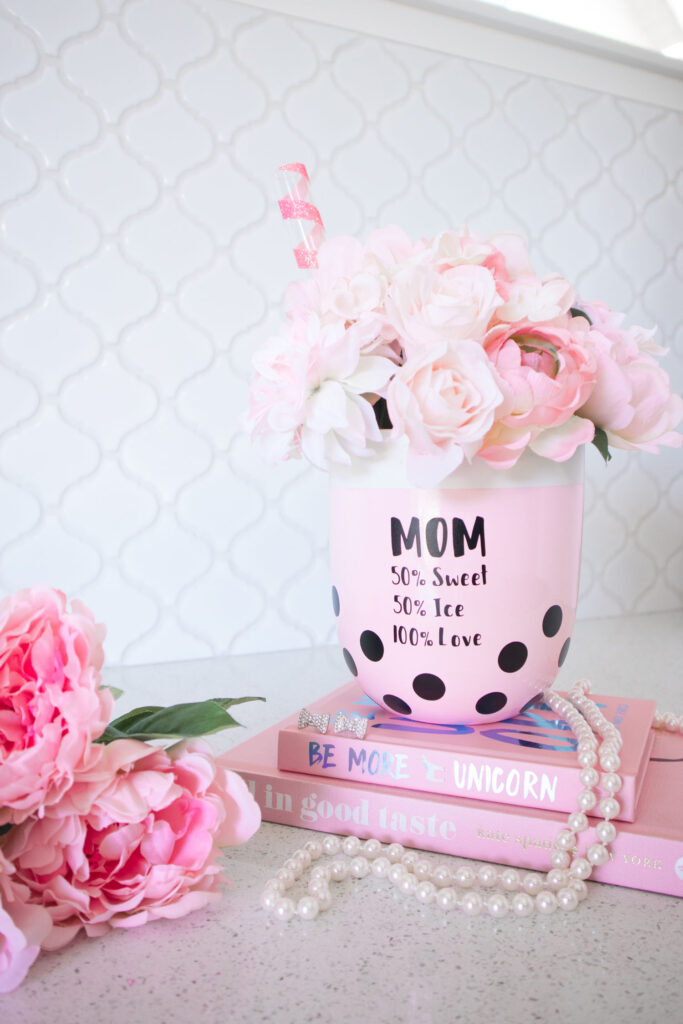
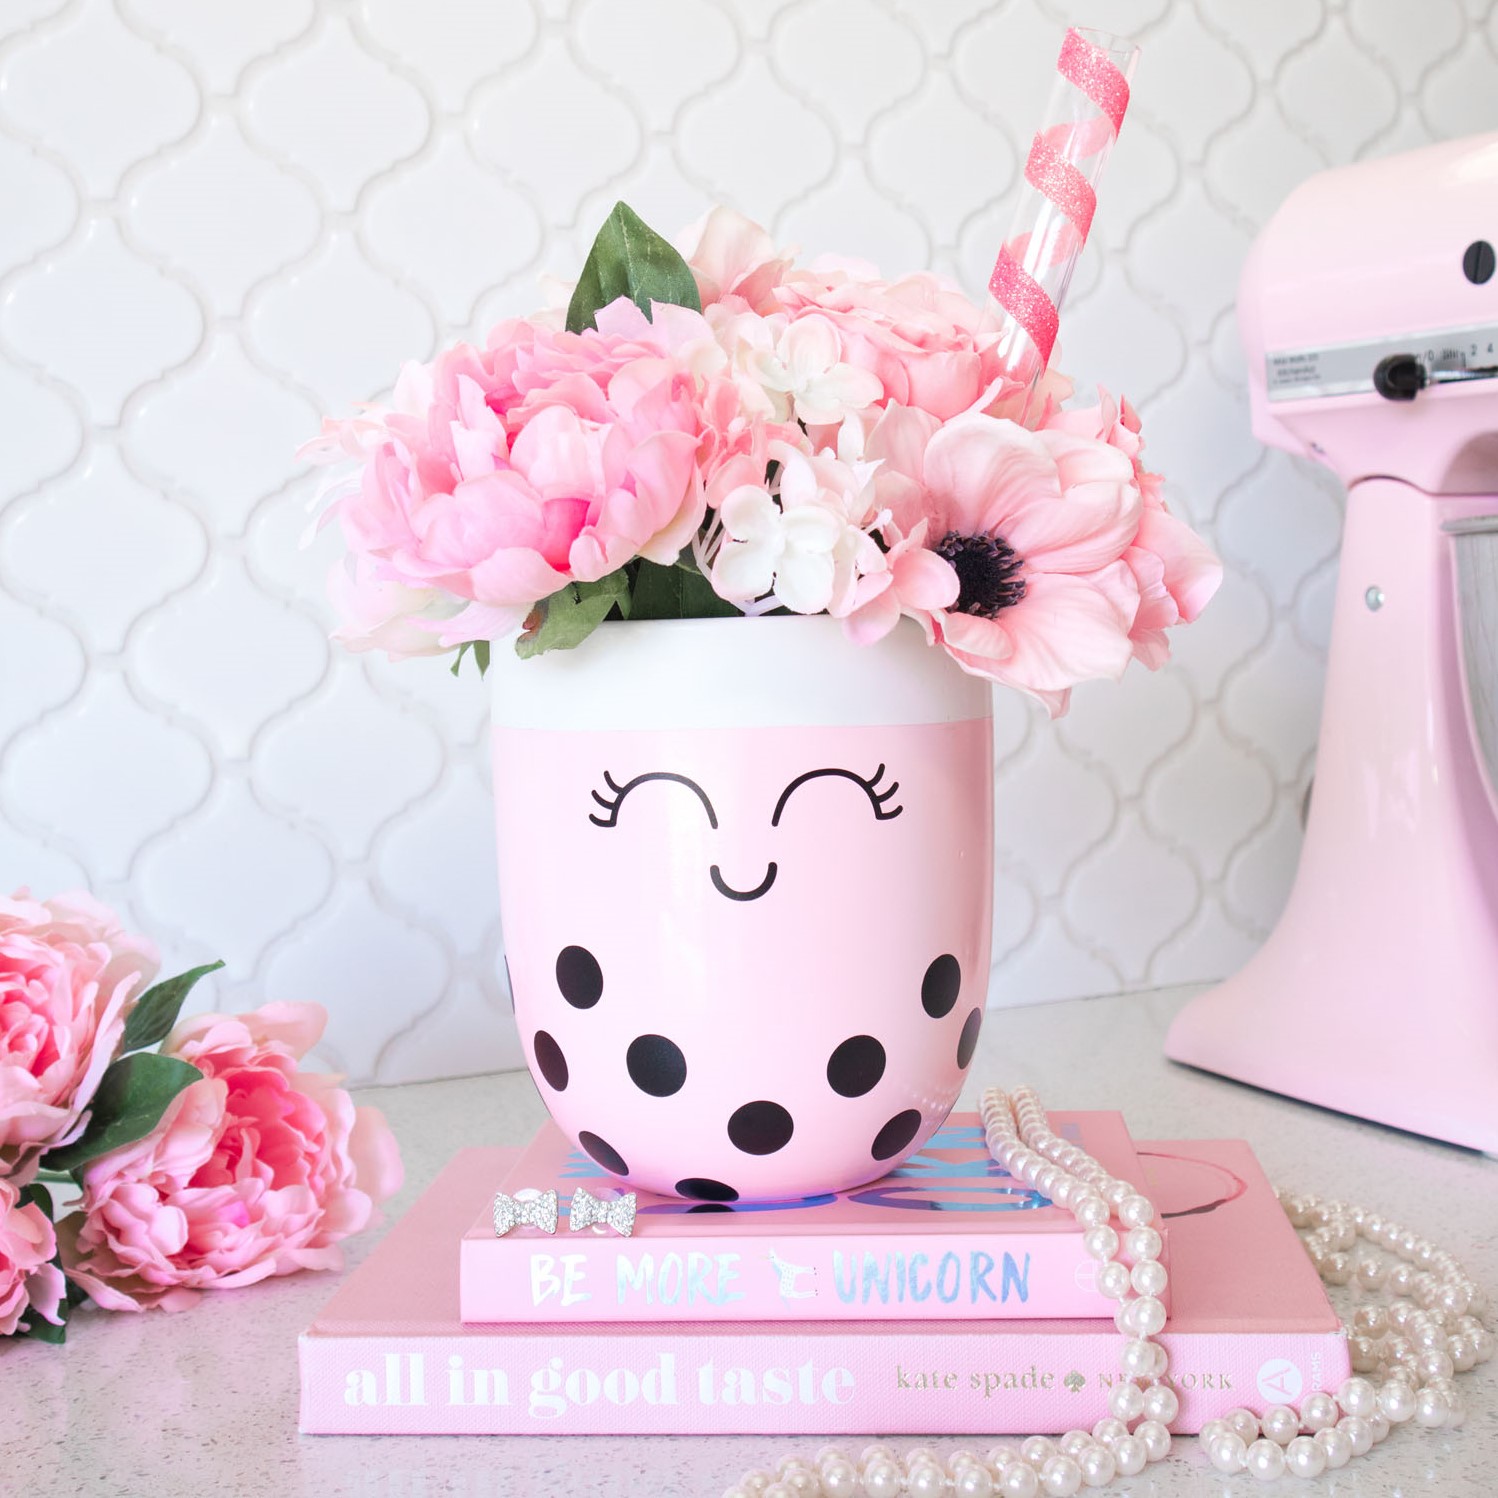
With Mother’s Day coming up, I wanted to make a boba tea inspired gift that could be gifted to a mom or motherly figure. Mother’s day is one of the most popular days of the year to give flowers, so I designed this project to be used with fresh or faux flowers. I found an inexpensive white ceramic plant pot and gave it a super cute makeover with pink spray paint and black vinyl to make it look like a boba cup. The flowers at the top look like an extra large (and extra pretty) helping of whipped cream!
To me, no boba cup is complete without a giant straw for sucking up all those boba pearls! I used an acrylic tube for the straw and added some sparkle for even more sweetness. Finally, to make this gift extra special, I added custom order instructions to the back…just like a real boba cup would have!

You can customize your boba tea plant pot in so many ways, changing up the color of the tea, the types and colors of flowers (fresh peonies would look AMAZING in this one), the custom order, and even the face! Are you ready to make the cutest boba tea plant pot ever? Keep reading to get the step by step instructions and watch my video!
This post contains affiliate links. I may earn a small commission when you click on the links, at no cost to you. As an Amazon Associate, I earn from qualifying purchases
Supplies
MATERIALS
Planter pot (I found mine in the Target Dollar Spot)
Spray paint color of choice
Acrylic tube (I used ¾” diameter)
Glitter washi tape (similar)
Faux flowers (These are the peonies I used)
Filler material ( I used pink crinkled shredded paper)
TOOLS
Ruler
Pencil
Painters tape
Paper
Sanding sponge or sand paper
Dry cloth
Drop cloth
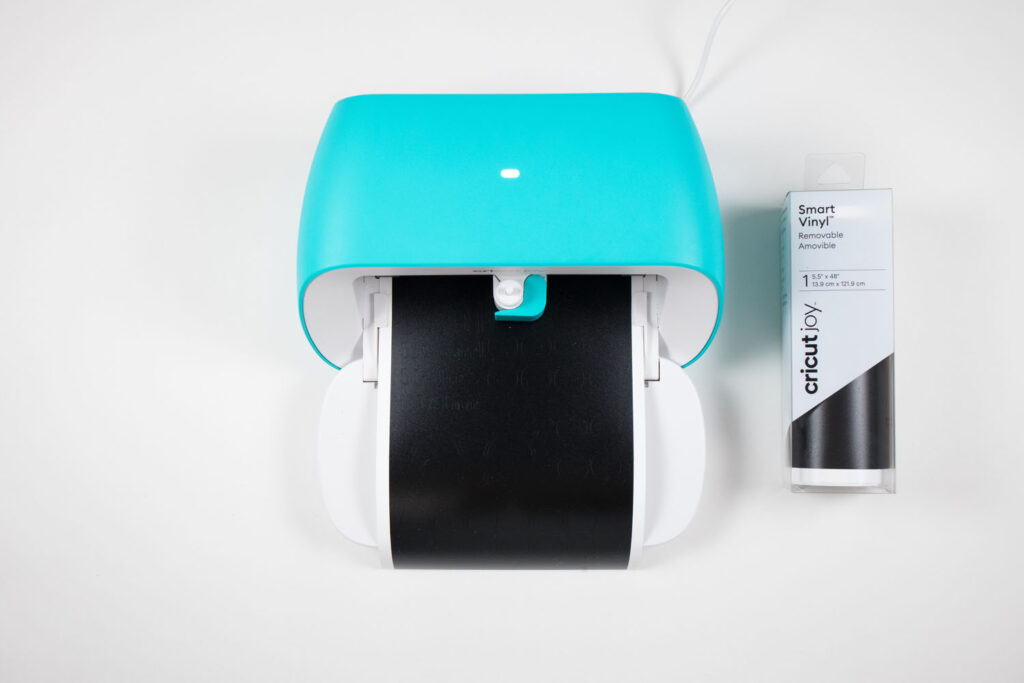
Cricut machine – Explore Air 2, Explore 3, Maker, Maker 3 or Joy (I used my Cricut Joy for this project)
Watch my Video Tutorial Below!
Instructions
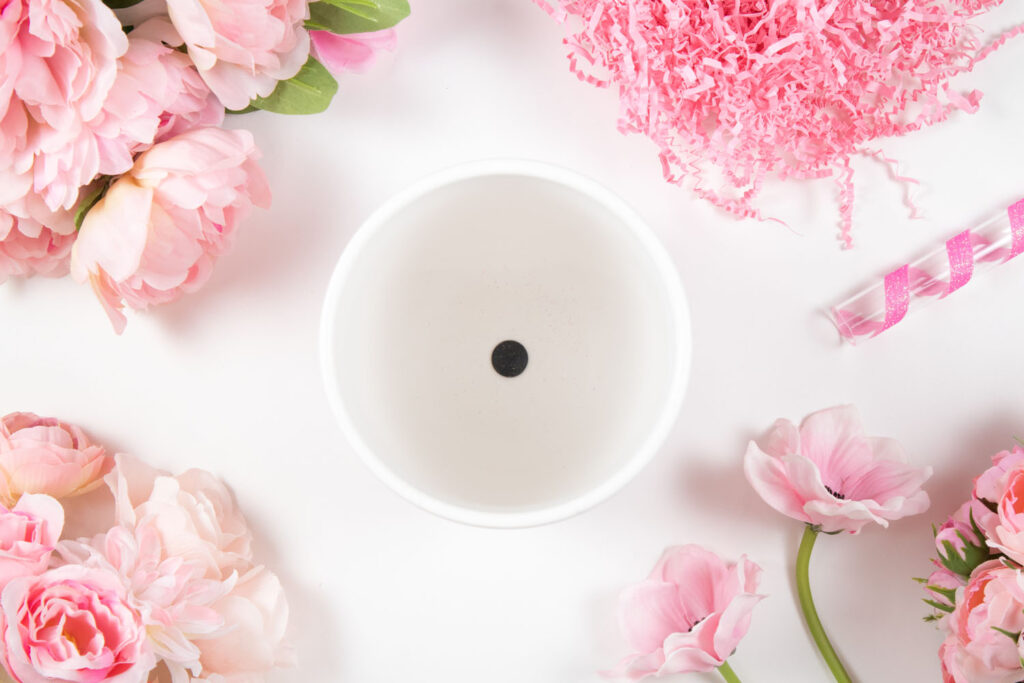
1. PREPARE POT
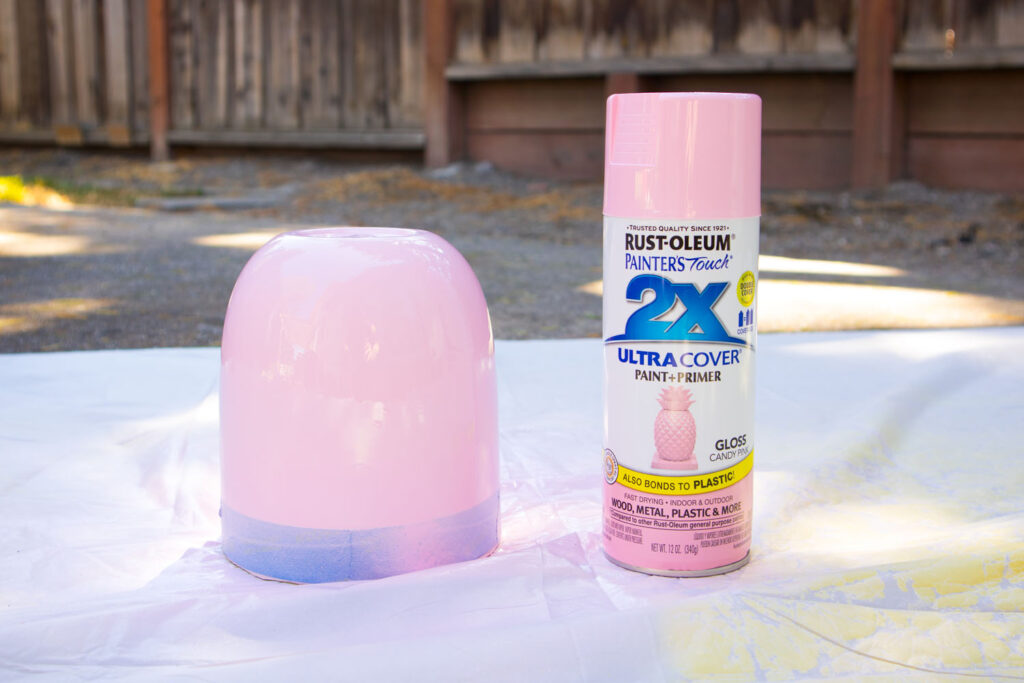
Use a ruler and pencil to make light markings at the top of the pot where you want to your “tea” line to be. Cover the top portion of your pot using painter’s tape and paper, using the markings you made as a guide. Press the tape to ensure a good seal for painting. If your painter’s tape is wider than mine, you might be able to just fold it over the rim (no paper necessary). Lightly sand the exposed surface, then remove any dust with a dry cloth.
2. SPRAY PAINT POT
Prepare a drop cloth in a well ventilated area. Flip the pot upside down. Apply a light layer of spray paint to the exposed portion of your pot in a sweeping motion. Allow to dry to touch and then apply a second coat. Allow to dry overnight.
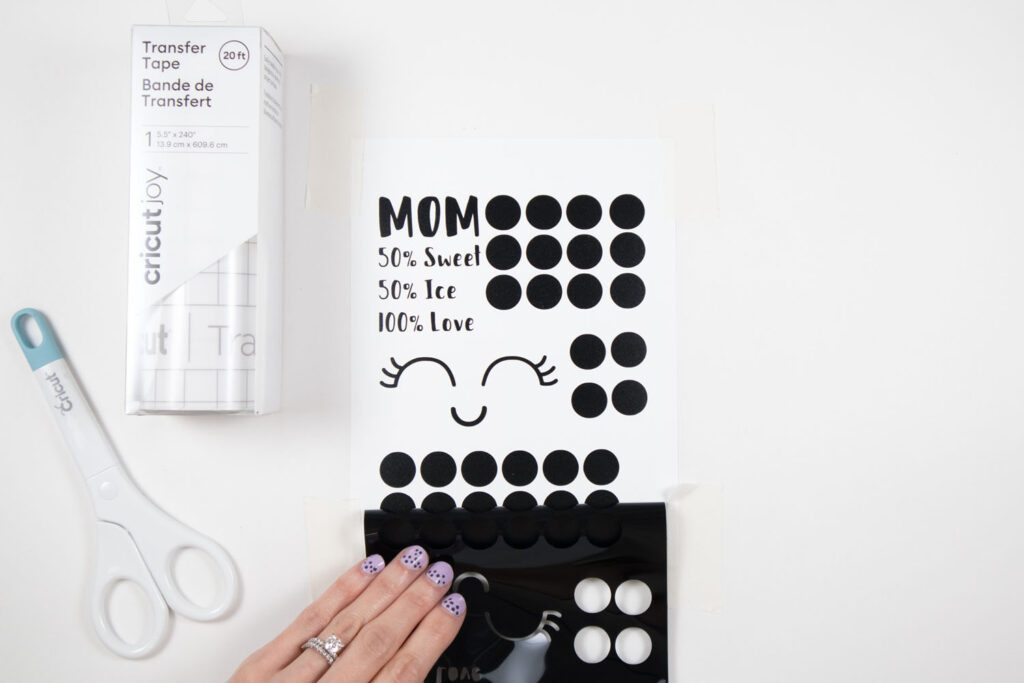
3. CUT AND WEED DESIGN FROM VINYL
Open my design file in Cricut Design Space. Feel free to customize the name and order instructions to suit your needs! You’ll want to hide the boba cup and straw templates before hitting “Make It”. Cut out boba pearls, face, and order instructions using Cricut machine of choice. Attach the vinyl sheet to a flat surface using masking tape on the edges. This prevents it from moving around and coiling up as you weed. Using a weeder tool, remove the extra material around your design starting with the tiny pieces. Once all the tiny pieces have been removed, peel off the remaining material leaving your design intact. Apply a sheet of transfer tape over the design and smooth with a scraper tool to help it adhere to the transfer tape. Remove masking tape from the edges then cut around the face, order instructions and each boba pearl.
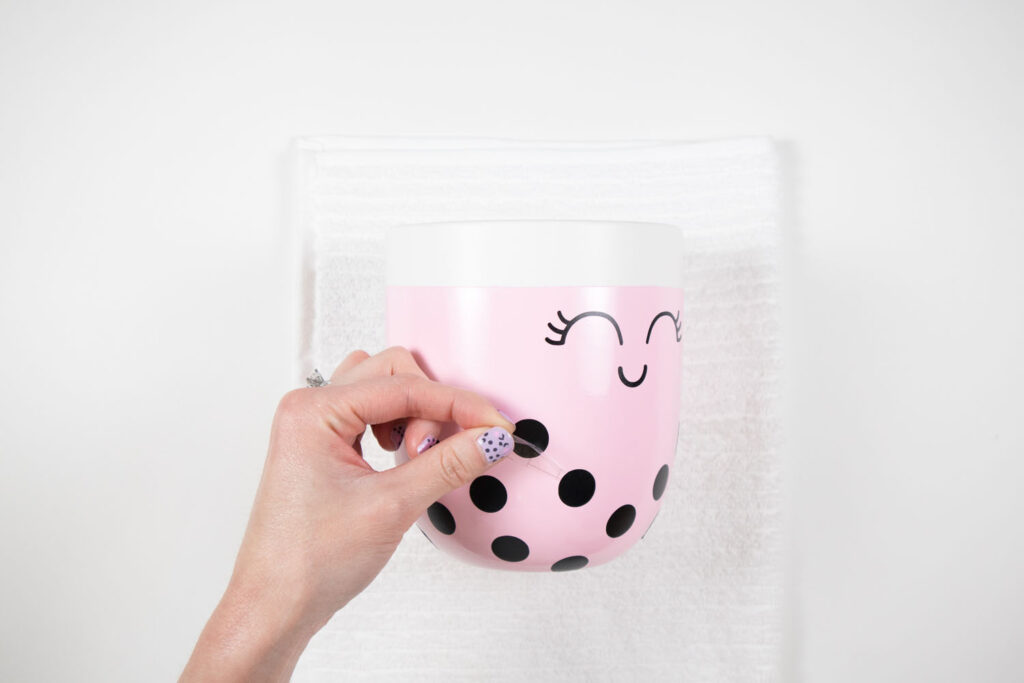
4. APPLY VINYL DESIGNS TO POT
Remove the backing from the face design and apply it near the top edge of your “tea”. Carefully peel back the transfer tape, leaving your design on the vase. Repeat this process with the order instructions. Position a boba pearl at the bottom of your vase then peel off transfer tape, leaving your boba behind. Repeat for the other boba pearls all around the bottom of the base until you’re satisfied with the look.
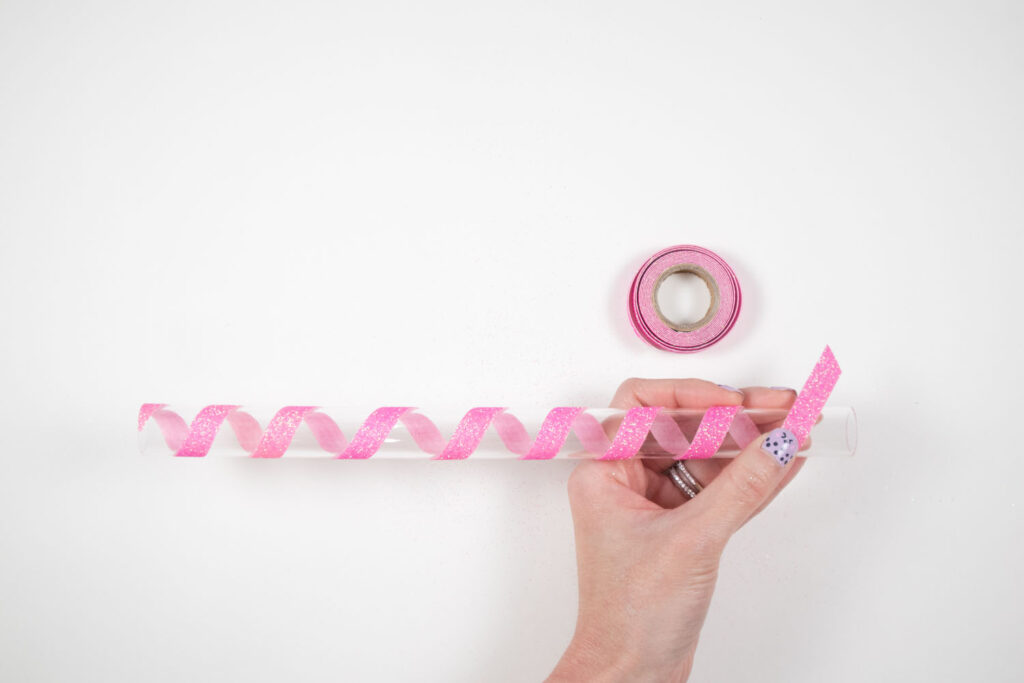
5. DECORATE BOBA STRAW
The acrylic tube will serve as your boba straw. You can opt to leave your boba straw plain but I decided to add a stripe for more fun. Simply position the washi tape at an angle on one end then wrap it diagonally down the straw until you reach the other end. Trim the ends of the washi tape so they’re flush with the edge of the straw.
6. ADD FLOWERS AND STRAW TO POT
Finally, fill the bottom of the pot with your filler material of choice (I used paper shreds since I’m using faux flowers). Trim and place flowers into the vase until you like the shape. Don’t forget to add the straw at the end!

Isn’t she a cute-tea?!

Did you love this project as much as I did? If you end up making this pot or something similar, tag me on Instagram. I would love to see and share your creations. Happy crafting!
Brenda
This is the cutest vase Blaire – my daughter loves boba tea so I think I need to try making this with her as she loves making faux floral arrangements.