IKEA HACK: Spring Watering Can
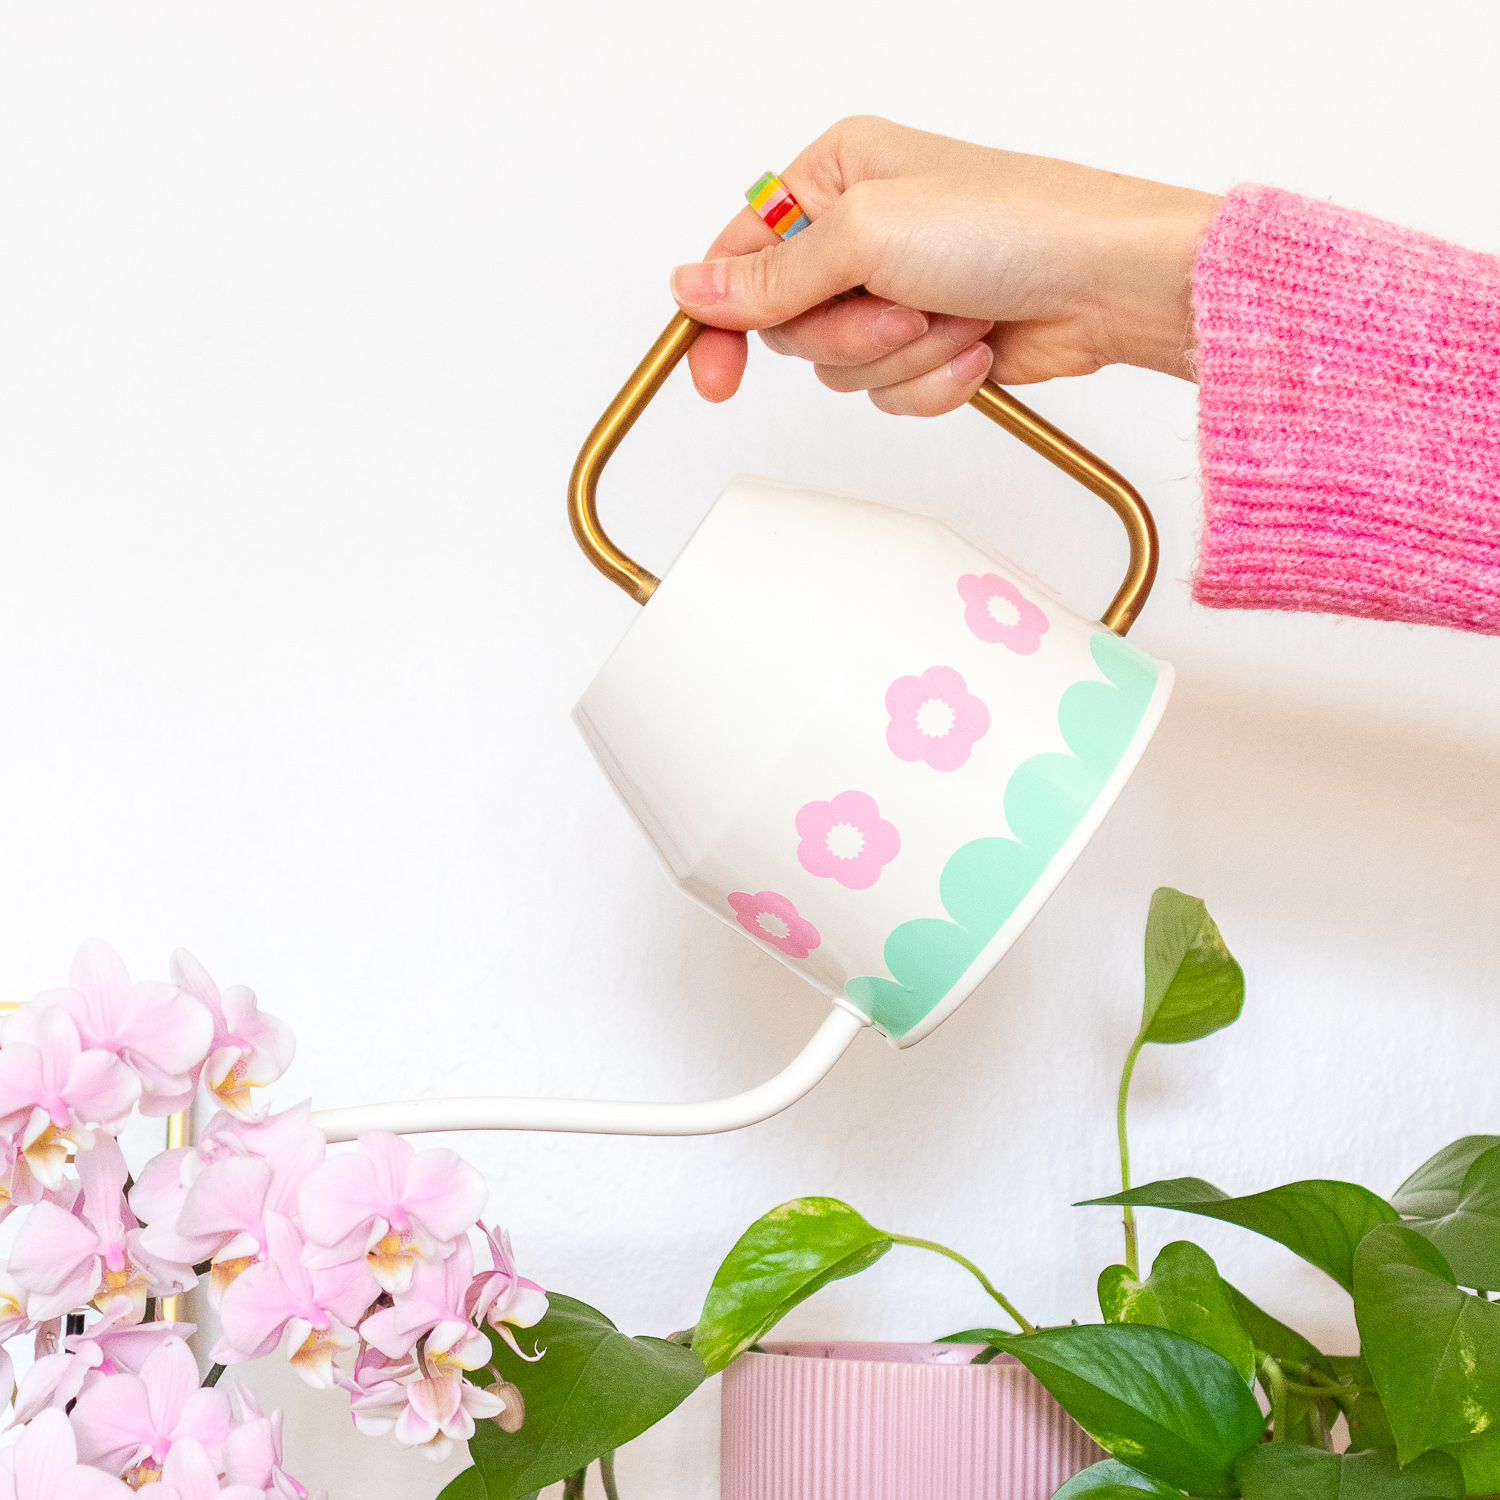
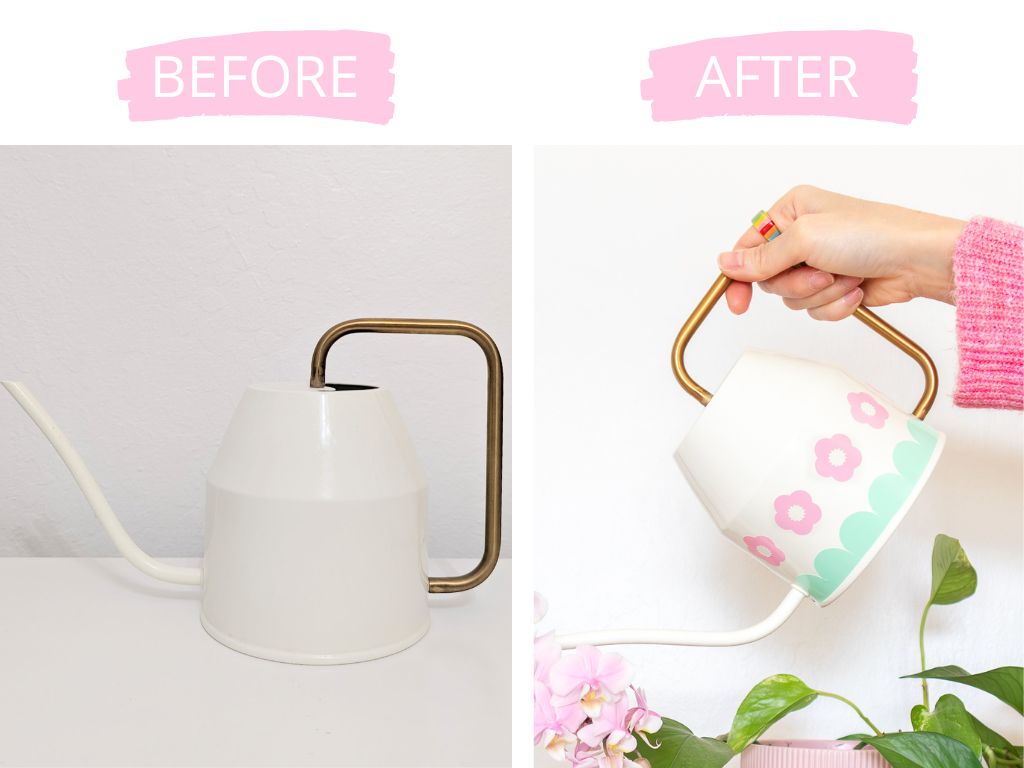
This spring watering can is hands down the cutest (and easiest!) Ikea hack out there! I’ve had this classic Vattenkrasse watering can for several years now and although it’s functional, I’ve never found it very exciting. Since I’ve been on a mission to add more color and fun to my home, I thought this was the perfect opportunity to get my hands wet (pun intended!). This watering can also happens to be a top seller at Ikea, so I figured a bunch of obsessed Ikea hackers (like you!) might want to get the deets on this project too.
With some colored vinyl and a sprinkle of imagination, we’ll give this watering can a refreshing new look that will delight any corner in your home. Keep reading for the supplies list and step-by-step tutorial!
WHERE CAN I FIND THE CUT FILE?
The SVG cut file for this project can be purchased in my shop! Included with your purchase is a PERSONAL USE LICENSE. See the product page for more details.
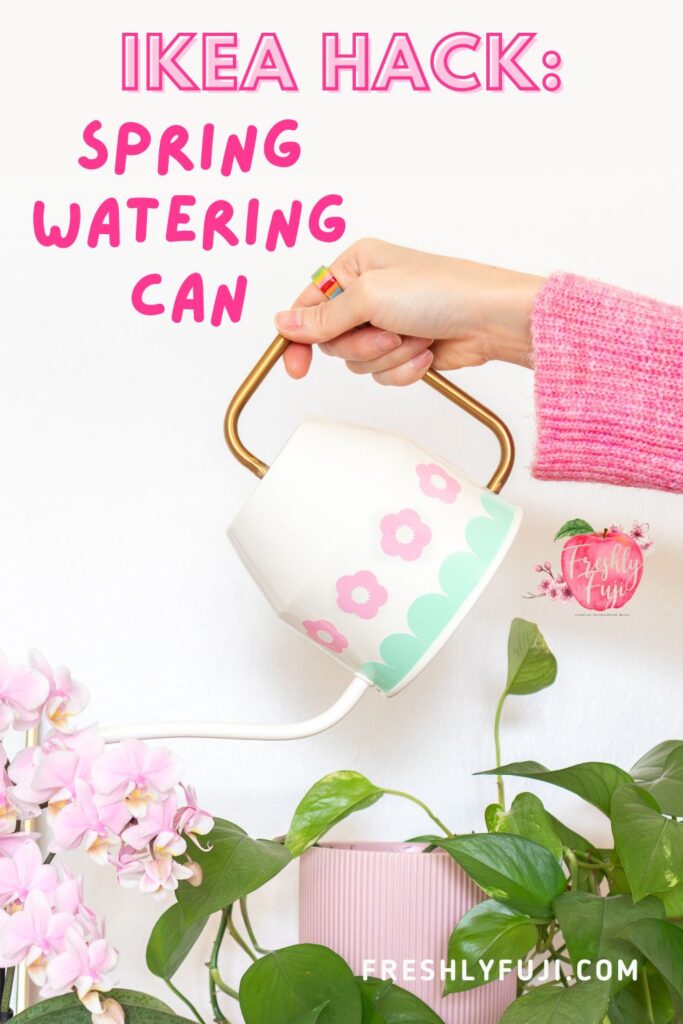
SAVE THIS PIN!
This post contains affiliate links. If clicked, I may make a small commission at no cost to you. As an Amazon affiliate, I earn from qualifying purchases.
Supplies
Ikea Vattenkrasse watering can (I used the ivory/gold one, but there’s also a dark green one if you want a more dramatic look! There used to be a light blue one too, but it doesn’t look like it’s sold anymore.)
Cricut machine – I’m using my Cricut Maker, but you can use any Cricut-brand cutting machines.
SVG cut file – The SVG cut file is designed to specifically fit the Vattenkrasse watering can.
Mint vinyl – exact, similar (I used permanent vinyl since the watering can will be contact with water)
Pencil
Ruler
Instructions
1. UPLOAD SVG CUT FILE TO CRICUT DESIGN SPACE
Unzip the downloaded file and save it somewhere on your computer. Open Cricut Design Space and start a new project. From the left panel, select the UPLOAD button. Locate the SVG file on your computer and follow the program prompts to add it to your canvas.
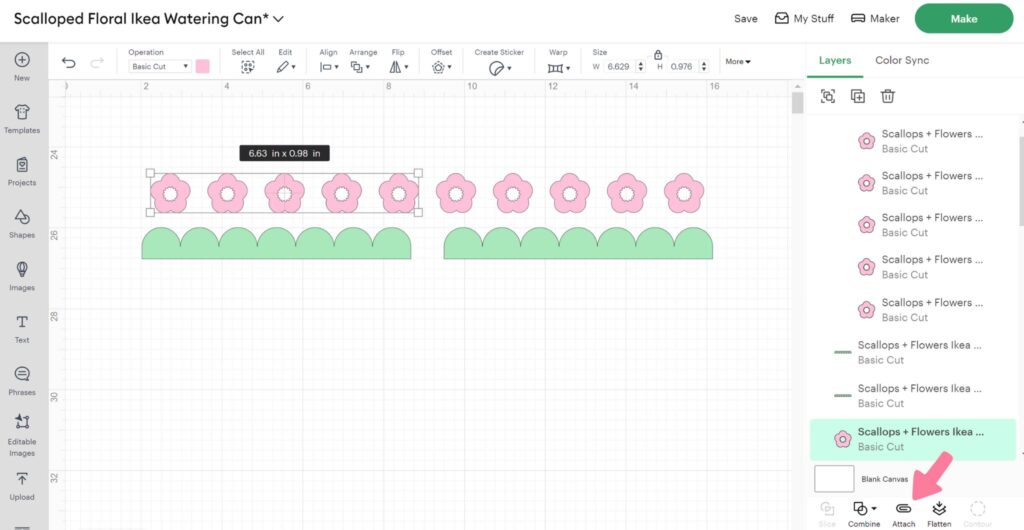
2. EDIT THE DESIGN TO PREPARE FOR CUTTING
Ungroup the entire design. All of the flowers and scallops will now be separated. Highlight the 5 flowers on the left and click attach. Repeat for the 5 flowers on the right. This will allow the flowers to be cut together with the appropriate spacing. Alternatively you CAN attach all the flowers together if you have sheet of vinyl that can accommodate it (~14 in).
3. CUT THE VINYL
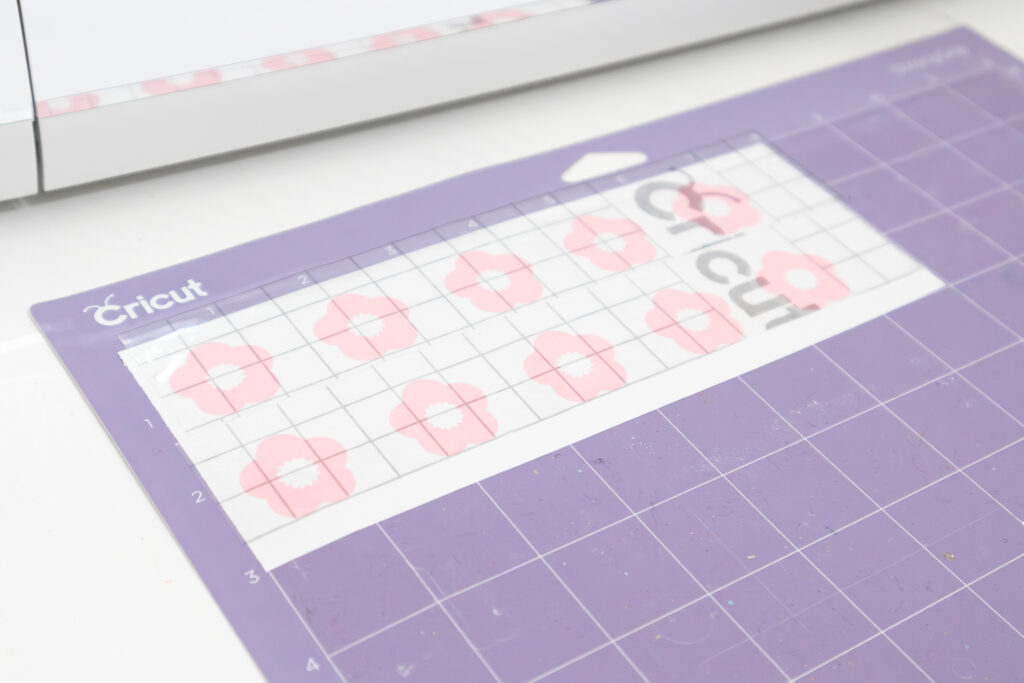
Select the machine you’ll be using, then click the green MAKE IT button. Select the mat with the mint scallops. Place a piece of mint vinyl onto your StandardGrip mat (I’m using an old StrongGrip mat that has lost some stickiness). Roll the brayer over the vinyl to smooth out any bubbles and make sure it’s properly adhered.
Set your base material to Vinyl, then load the fine point blade into clamp B. Load the mat into your machine, then press the Go button on your Cricut to start cutting. Press the Unload button once the cut is complete.
Next, select the mat with the pink flowers and place a piece of pink vinyl onto another mat. Repeat the cutting process described above.
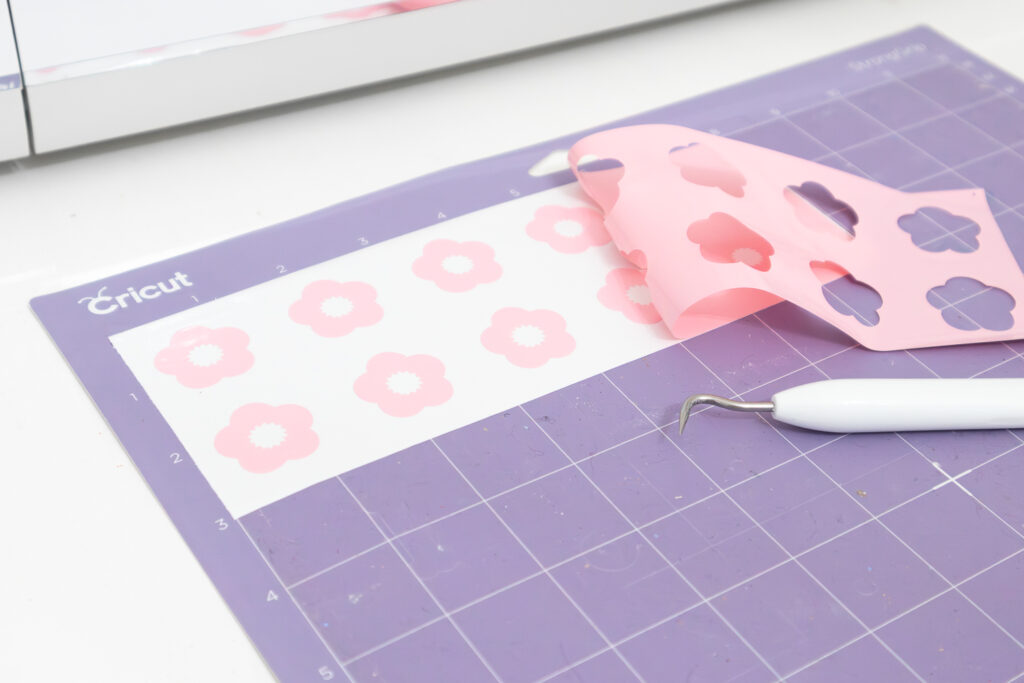
4. WEED THE EXCESS VINYL AND APPLY TRANSFER TAPE
Leave the cut vinyl on your mat and weed the excess vinyl around your design using your weeder tool.
Mint scallops: Apply a piece of transfer tape over each scalloped strip, lining up the bottom straight edge with the grid lines.
Pink flowers: Cut two strips of transfer tape. Apply each strip of transfer tape over the flowers, lining up the bottom edge of the flowers with the grid lines.
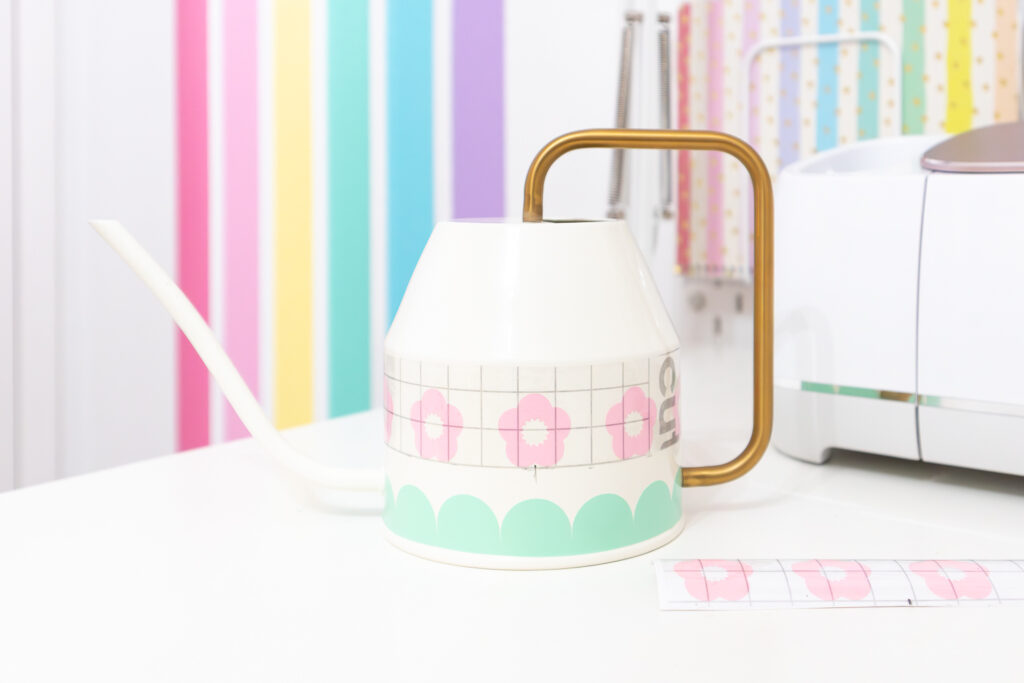
5. APPLY THE VINYL TO WATERING CAN
Mint scallops: Carefully peel the transfer tape and scalloped vinyl from the mat, leaving the paper liner behind. Place one end adjacent to the watering can handle, right above the ridge at the base. Press the vinyl onto the watering can, making sure to keep the bottom edge straight. Use the scraper tool to smooth it out. Finally peel off the transfer tape.
Repeat with the second scalloped strip on the other side of the watering can. The scallops should fit perfectly between the handle and spout! Note: There will be an intentional gap in the vinyl.
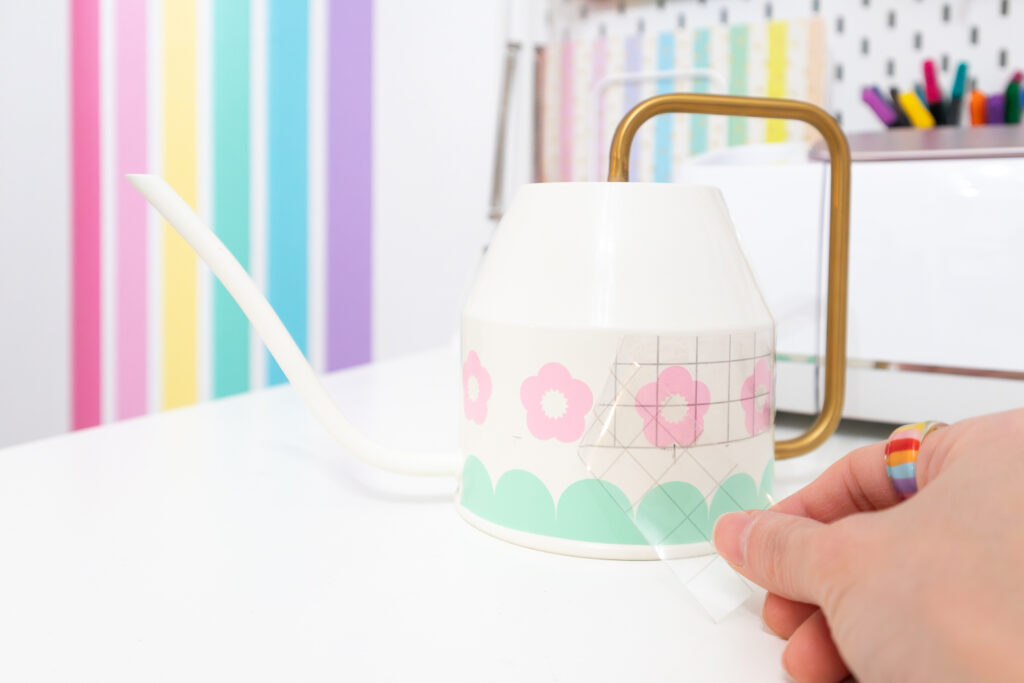
Pink flowers: Draw some pencil dashes around the watering can, around 3/8″ above the scallops. This will help you align the flowers. Carefully peel the transfer tape and vinyl flowers from the mat, leaving the paper liner behind. Press the flowers onto the watering can, using the dashes (on the watering can) and grid lines (on the transfer tape) as guides. Use the scraper tool to smooth it out. Finally peel off the transfer tape.
Repeat with the second strip of flowers on the other side of the watering can. Pay attention to the spacing between the first and second set of flowers if you want a uniform look. Note: If you cut all the flowers in one long strip, you will only have to do this once!
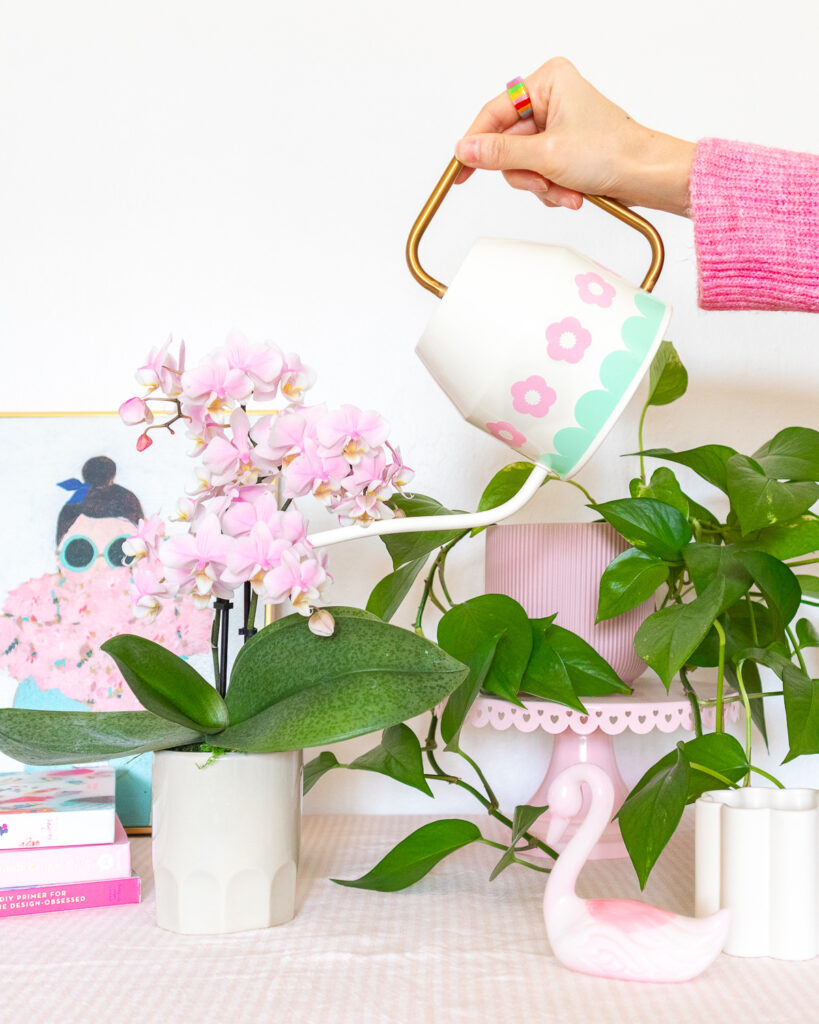
Wet your plants!
Water your plants and shower YOURSELF with love. You just made the cutest watering can ever!
Other Variations and Ideas
SWITCH UP THE COLORS – Select vinyl colors that match your home and personality. Alternating flower colors would be so fun too!
ADD FLOWERS – While this can be used as a watering can, it’s equally functional as a vase too. Add your favorite flowers (real or faux) for a pop of color!
MAKE A CENTERPIECE – This would make a beautiful centerpiece for Easter, a bridal/baby shower, or other special occasions. Add some flowers, greenery, and a table number for a fresh look! Check out this gorgeous watering can filled with peonies for inspiration.
GIFT BASKET ALTERNATIVE – Make this spring watering can in lieu of a gift basket for your friend with a green thumb. Pair it with gardening tools, seeds, and of course, their favorite plant.
PARTY FAVOR – Hosting a garden party or bridal shower? Treat your guests to an unconventional gift that will surely perk up their watering routine.
How are we feeling about this Ikea hack? I might be biased, but I absolutely adore it! In fact, I don’t think I’ve ever said that about a WATERING CAN ha! If you end up making this spring watering can or one of the variations, tag me on Instagram so I can see it and cheer for you! Happy crafting!!