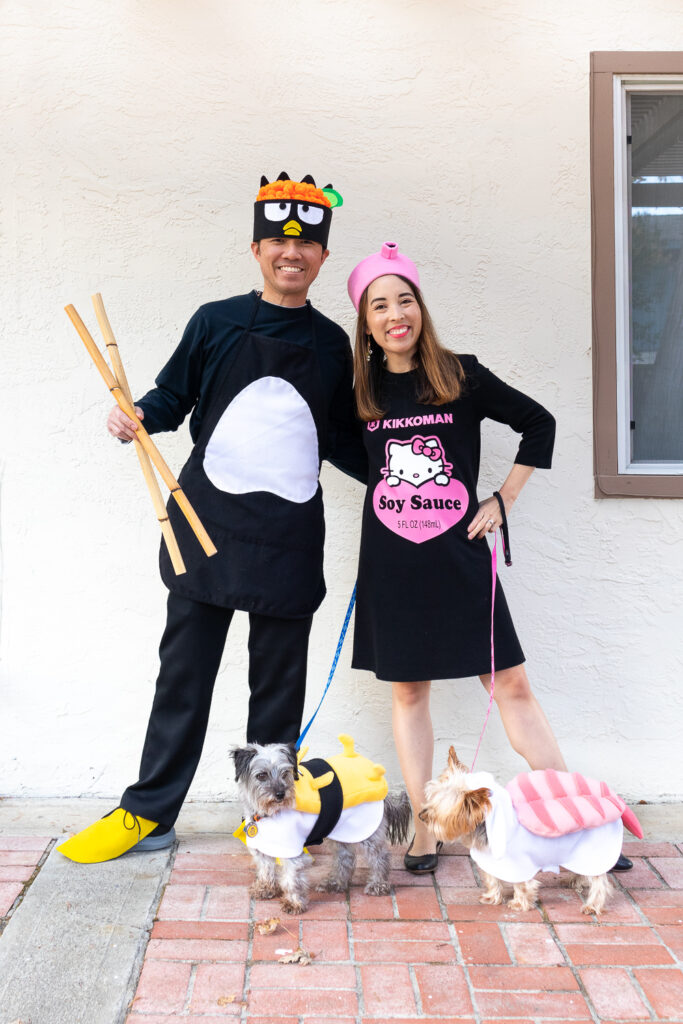
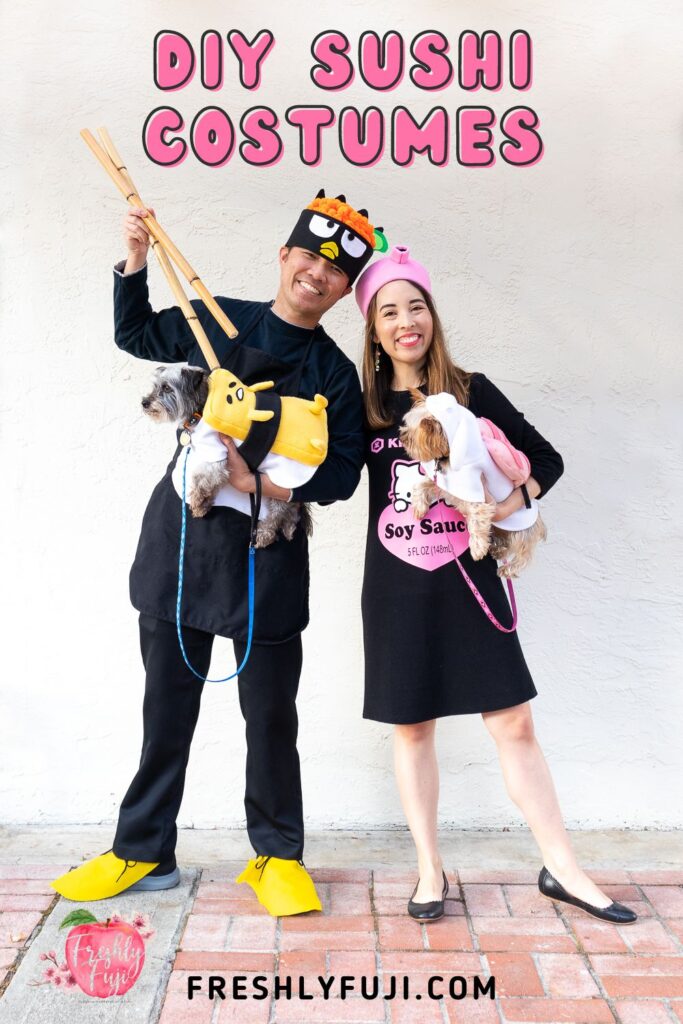
DIY Sanrio Sushi Family Costumes – Hello Kitty, Badtz Maru, Gudetama, Cinnamoroll
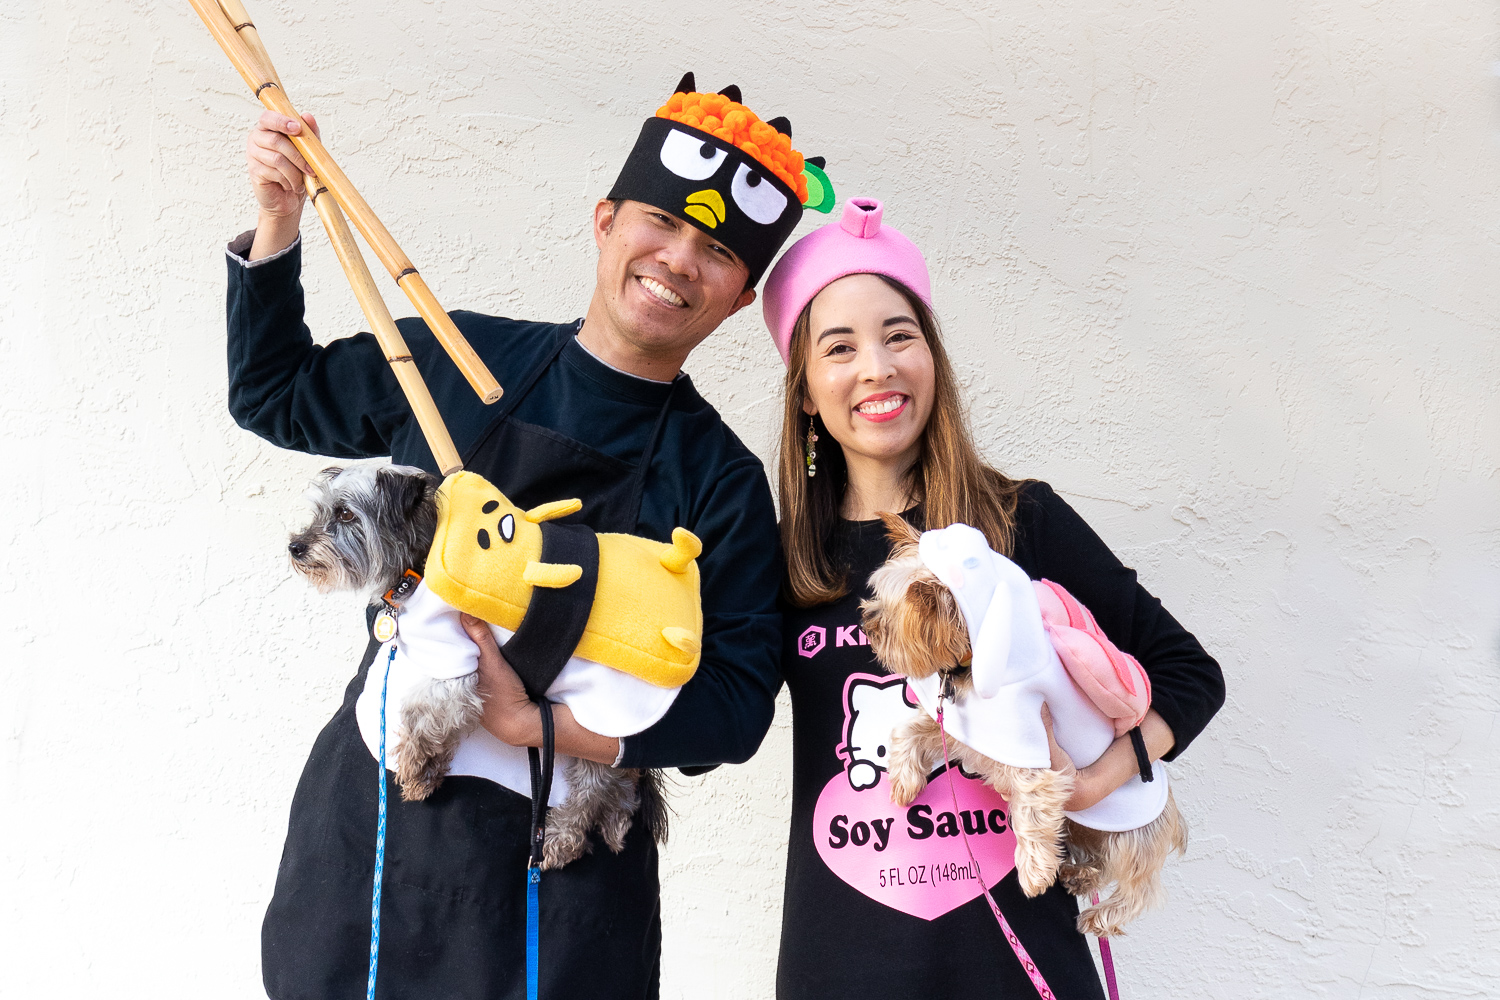
I combined my love for Sanrio and sushi with this super cute Sanrio Sushi family costume!
In July 2021, the Hello Kitty and Friends x Kura Sushi collaboration went live. They had a number of themed prizes you could win in the restaurant and even a limited release lunch bag. While I wasn’t able to visit Kura Sushi during this promotion (I was recovering from a car accident and surgery), I did enjoy seeing all their cute products on Instagram!
DIY sushi costumes are not new, but I have never seen SANRIO sushi costumes! I thought it would be fun to create a family costume around this theme, so I studied the lunch bag for inspiration. I knew nigiri sushi would work well with our dogs’ body shapes. The hard part was picking which Sanrio character I would use! I ended up with Gudetama and Cinnamoroll as I thought tamago (egg) and ebi (shrimp) would be easily recognized by most people.
With it’s round shape, I thought the Badtz Maru ikura (fish eggs) sushi would make a fun hat for my husband. It soon evolved into a Badtz Maru sushi chef costume! My costume took some time to figure out. One day I opened my fridge and had an aha moment when I spotted the Hello Kitty x Kikkoman soy sauce bottle!
About
The Hello Kitty Soy Sauce and Badtz Maru Sushi Chef costumes are no-sew costumes.
The dog sushi costumes requires sewing.
Keep reading for the costume tutorials!
This post contains affiliate links. If clicked, I may make a small commission at no cost to you. As an Amazon affiliate, I earn from qualifying purchases.
Table of Contents
Click the links below to go to the section of your choice.
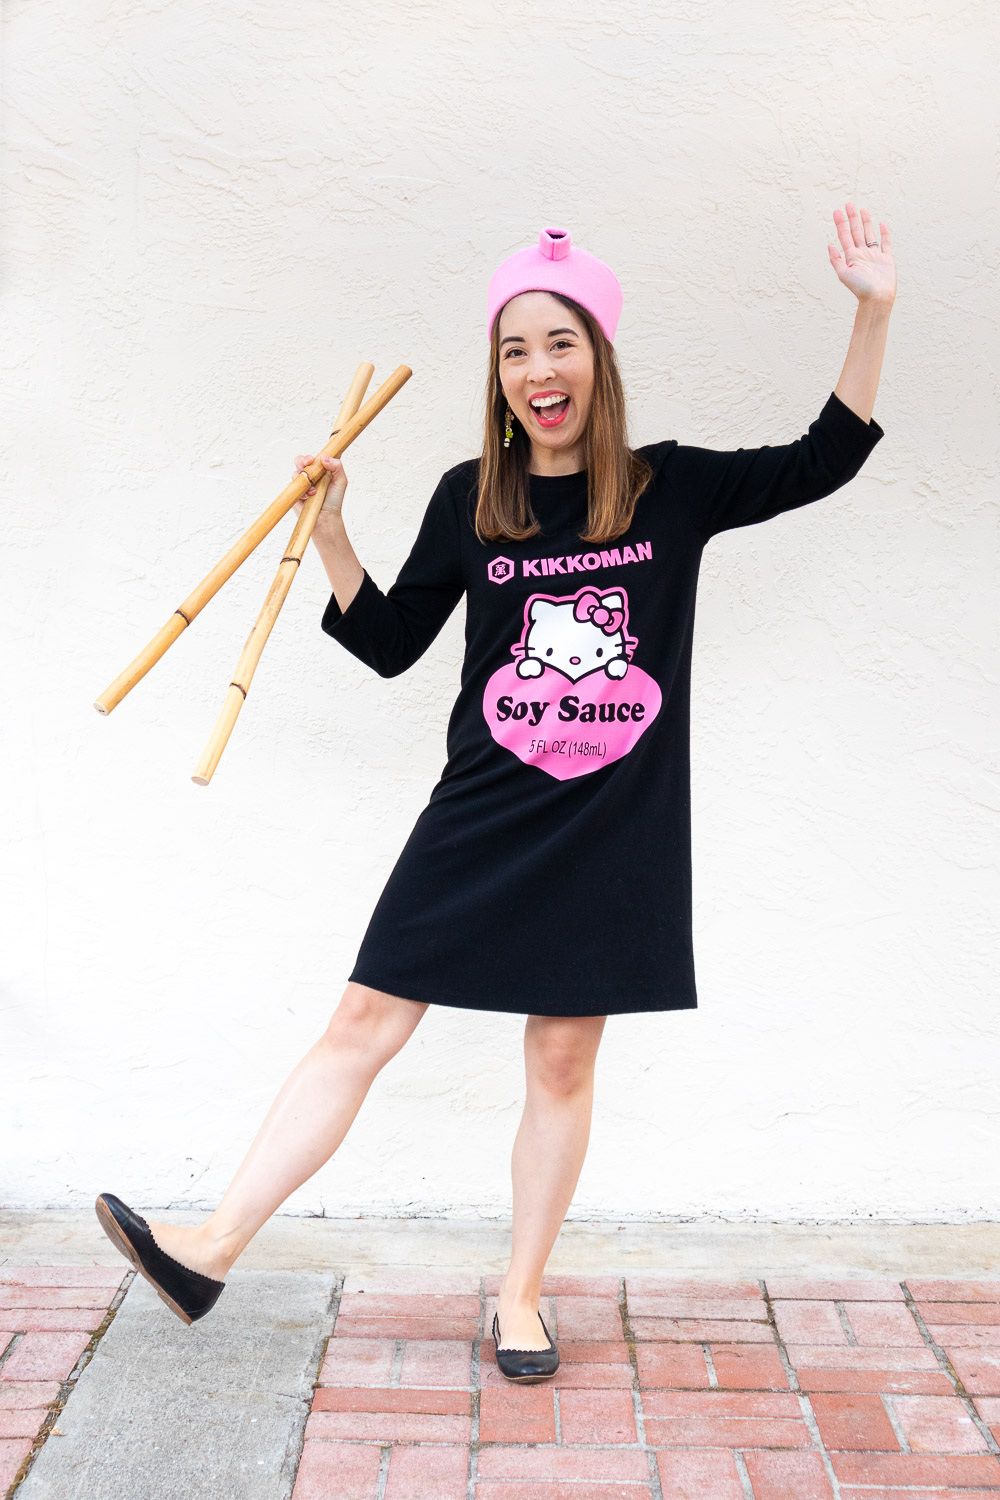
Hello Kitty Kikkoman Soy Sauce Costume
Badtz Maru Sushi Chef Costume
Gudetama Tamago Nigiri Dog Costume
Cinnamoroll Ebi Nigiri Dog Costume
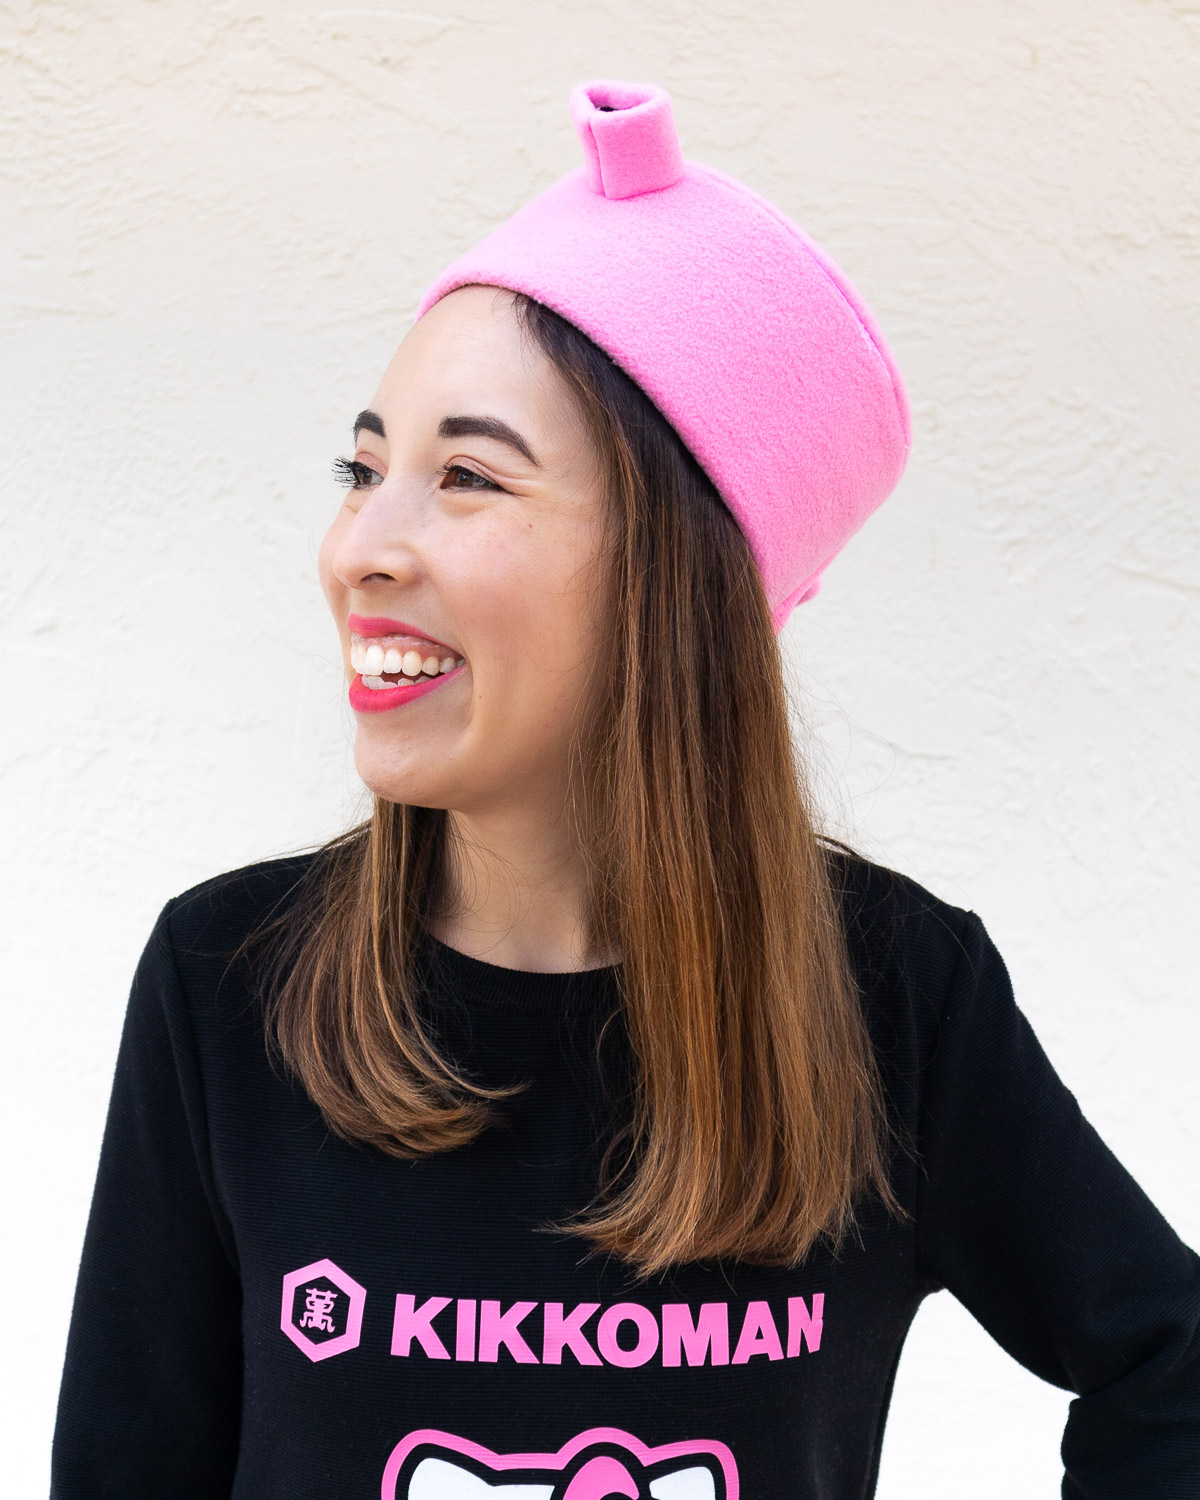
Hello Kitty Kikkoman Soy Sauce Costume
Over the years I’ve seen a bunch of DIY soy sauce costumes on the internet, but have never seen a Hello Kitty version. This Hello Kitty x Kikkoman Soy Sauce costume is inspired by the real thing I actually have in my fridge at home. Kikkoman has since revised the packaging – the new version is all pink and equally adorable.
How to Make Soy Sauce Hat
Materials
Pink fleece
Stiff felt sheet
Hot glue gun + glue sticks
Instructions
1. MAKE TOP OF SOY SAUCE HAT
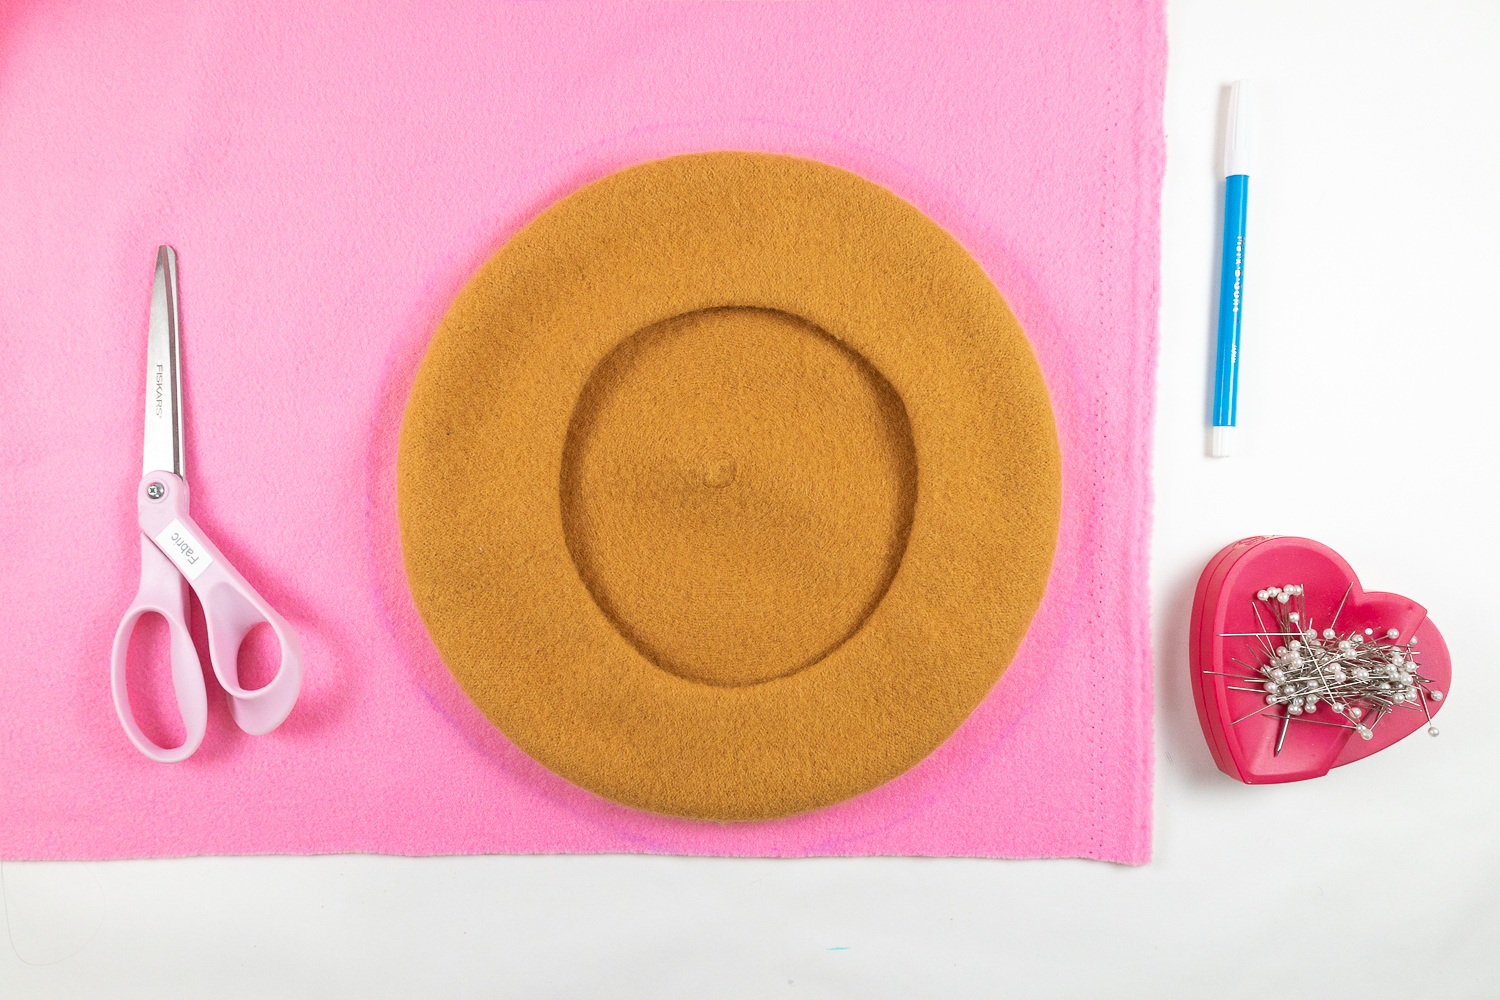
The Kikkoman soy sauce bottle cap is wider at the top then at the bottom. Cut out a circle of pink fleece ~1 inch wider than the size you would like the top of the hat to be. I traced around a beret I had. Then cut out a smaller circle of stiff felt 1 inch smaller than your circle. My small circle measured 7.5 inches across.

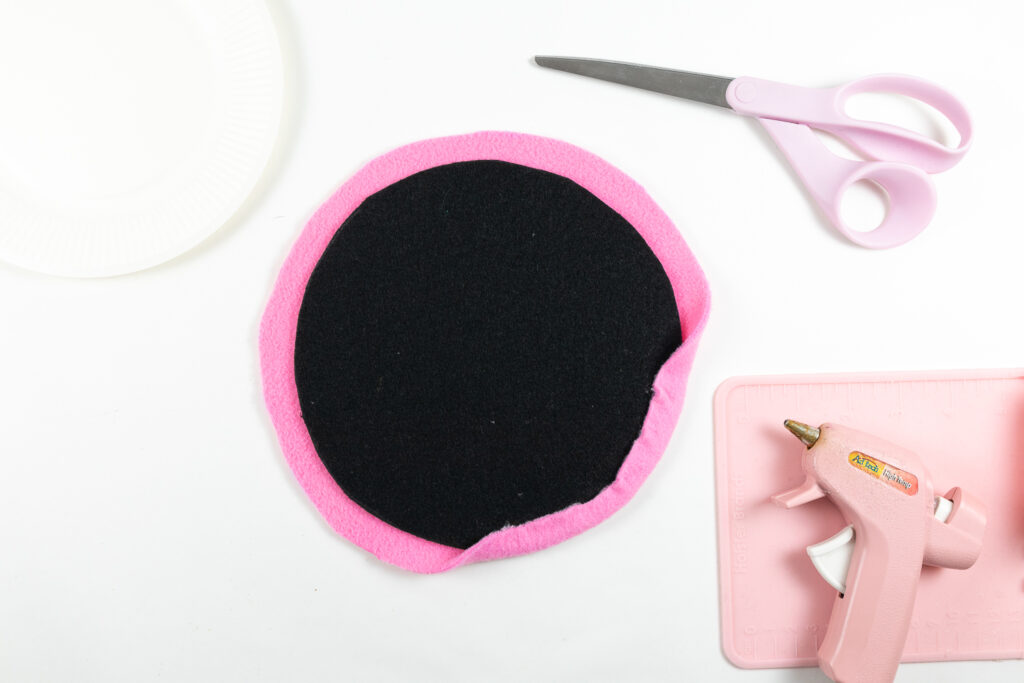
Place the stiff felt circle in the center of the fleece circle. Fold the edges of the fleece onto the felt circle and attach with hot glue. Work your way around the whole circle.
2. Make sides of soy sauce hat
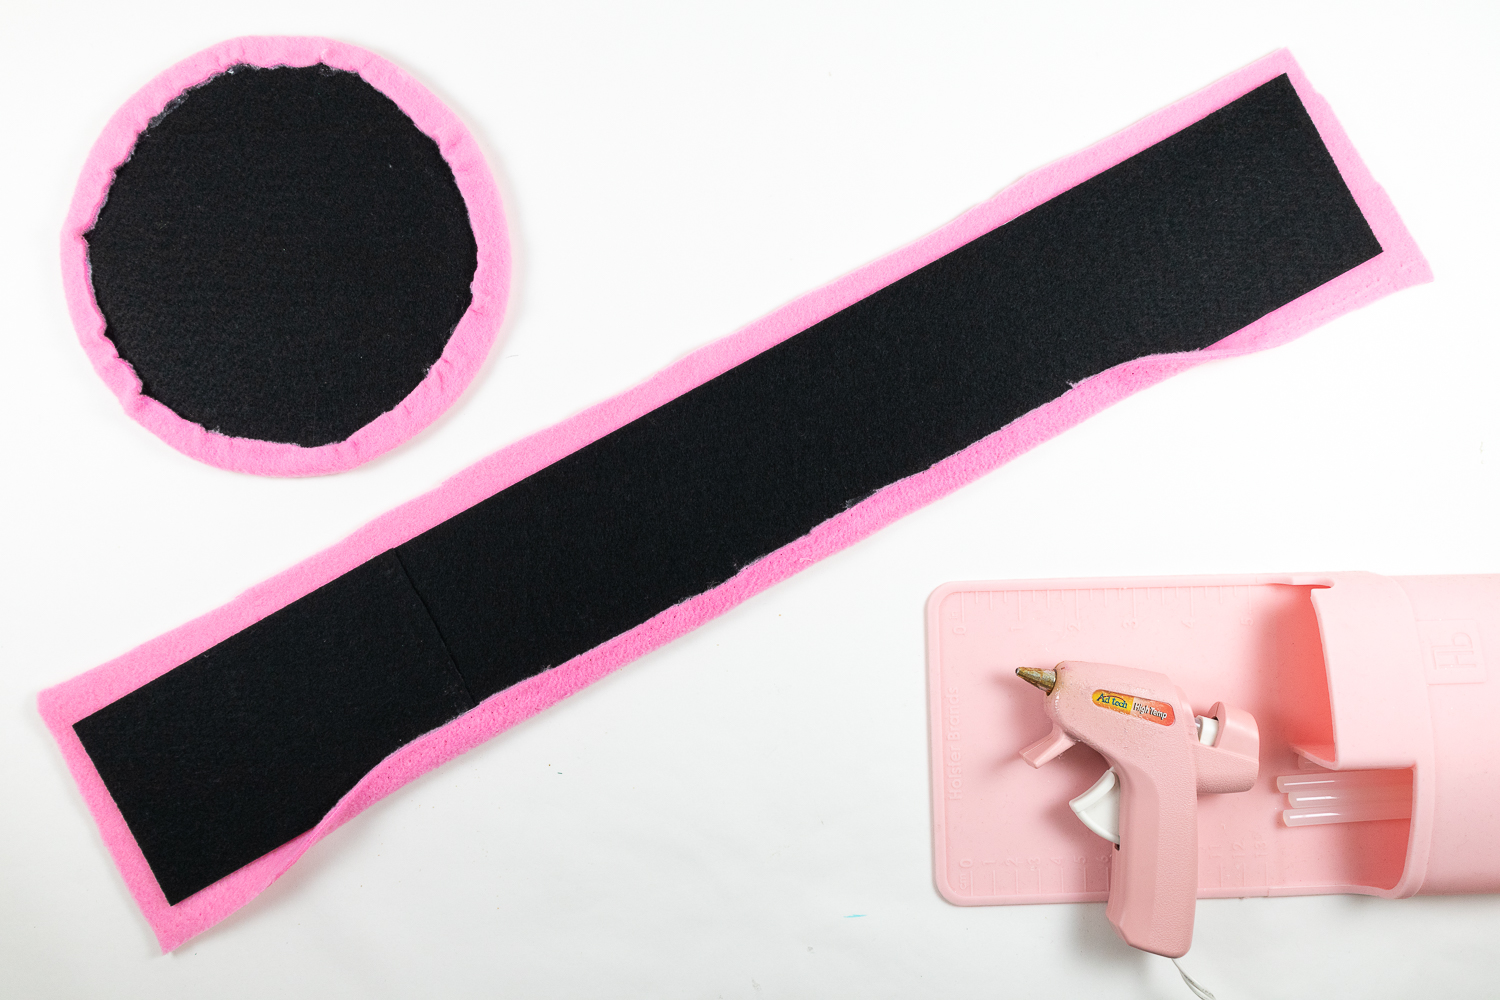
Use a tape measure to determine the circumference of the circle above. Then, decide how high you would like your hat to be. I used 3.5 inches for mine. Cut a rectangular strip of stiff felt using these measurements. (You may glue two strips of felt together if needed. They will be covered.)
Cut out a rectangular strip of pink fleece 1 inch longer and wider. (eg. If your stiff felt rectangle measures 21” x 3.5”, your fleece rectangle should be 22” x 4.5”)
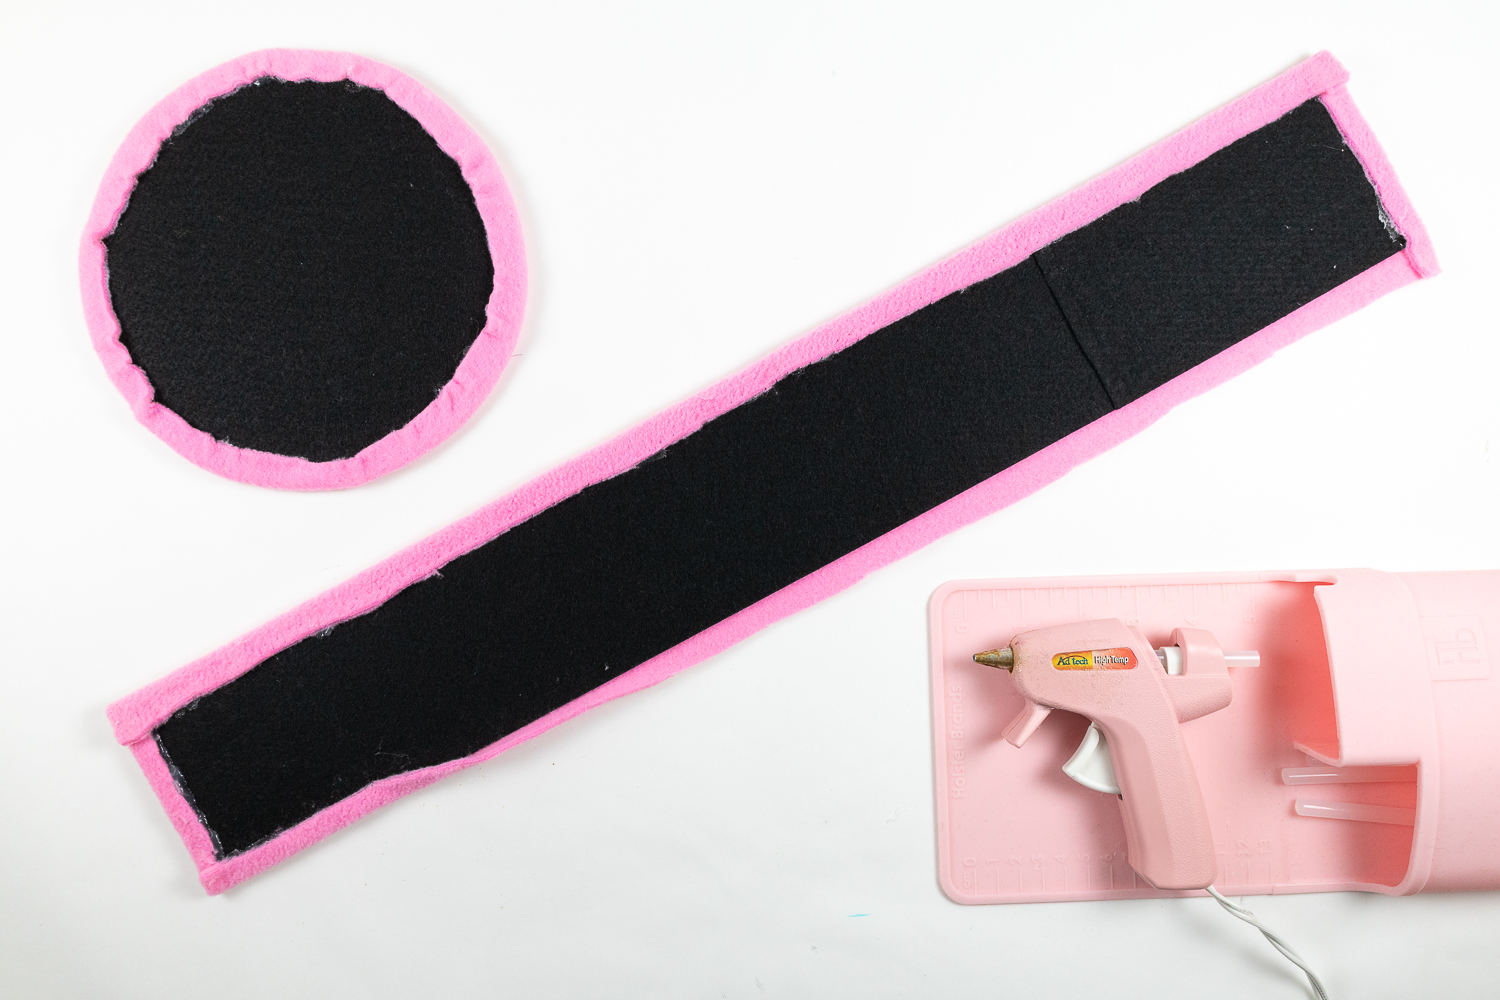
Similar to the top of the hat, you will be wrapping the stiff felt with fleece. Fold over one edge and attach with hot glue. Repeat with the other three sides.
3. Attach sides to top of hat
Working in small sections, glue the long edge of the rectangle around the edge of the circle. Make sure the pink fleece side is facing out. Do not glue the short sides together just yet.
Place a clip at the bottom where the two ends meet. Then place it on your head to test the fit and adjust the overlap as necessary. Once you’re satisfied with the fit, glue the overlapping ends in place.


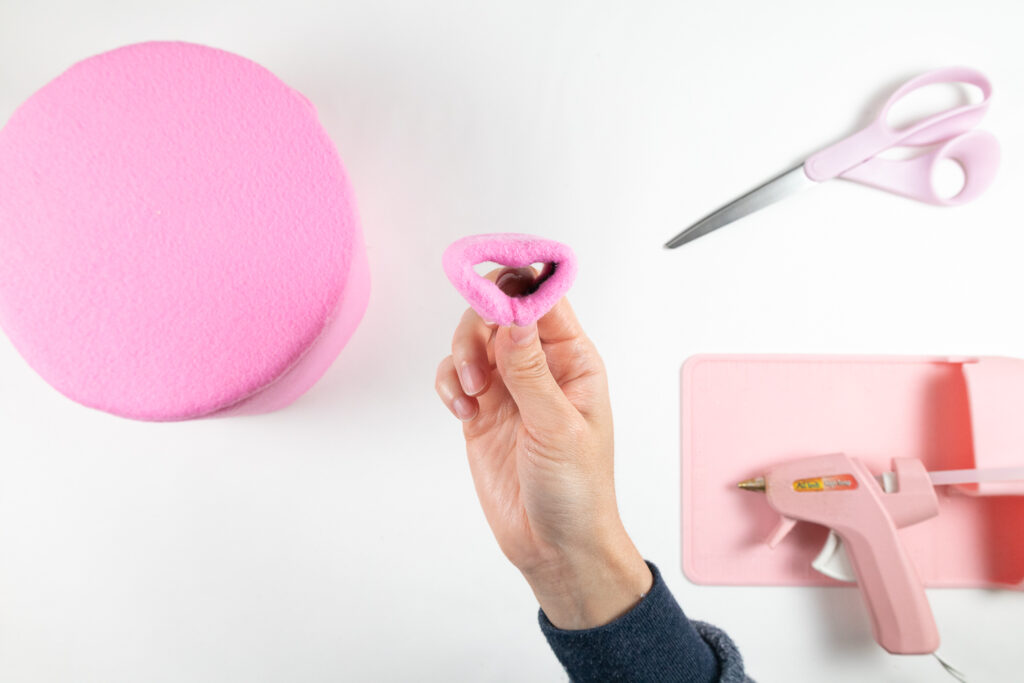
4. Make and attach soy sauce spout
Cut out a small rectangle strip of stiff felt for the spout. Just like you did for the side of the hat, wrap it in pink fleece. Then fold the rectangle to form a triangle shape. Glue the short ends together. Finally glue this triangle piece to the top edge of the front of your hat. (The seam should be in the back). Optional: Repeat this process and glue the second spout to the back of your hat.
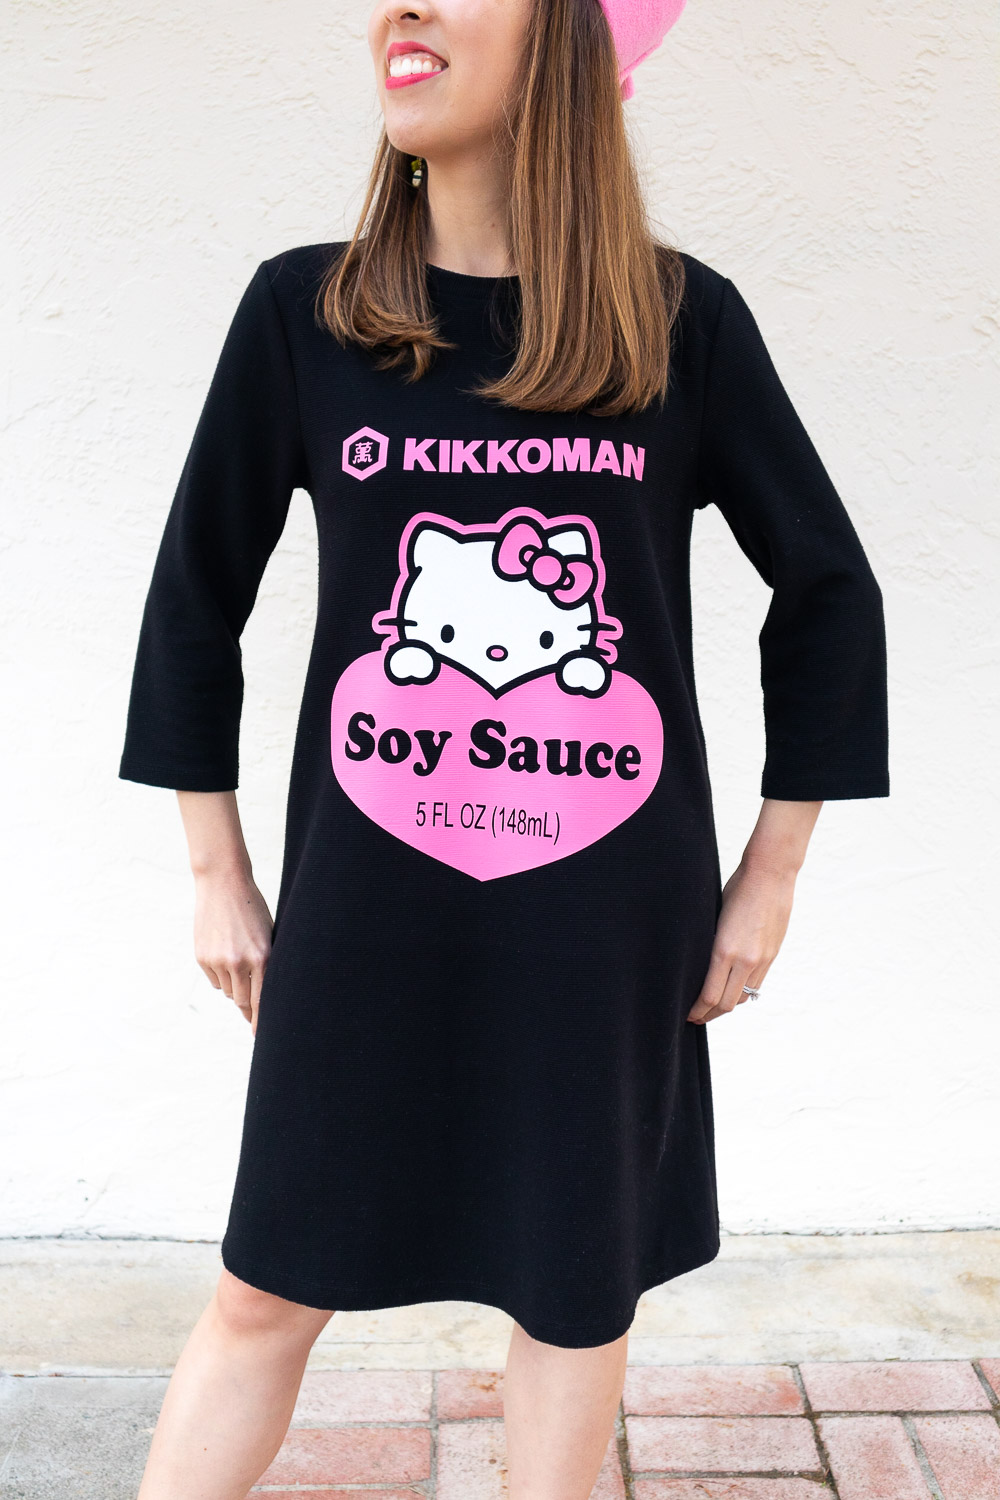
How to Make Soy Sauce Dress
Materials
Black dress (I found mine at the thrift store)
SportFlex Iron-On – Light Pink
Sewing pins
Lint roller
Instructions
Unfortunately I won’t be sharing this design file (trying to avoid copyright issues!), but I did want to show you the process in case you DO have design skills and want to create something similar.
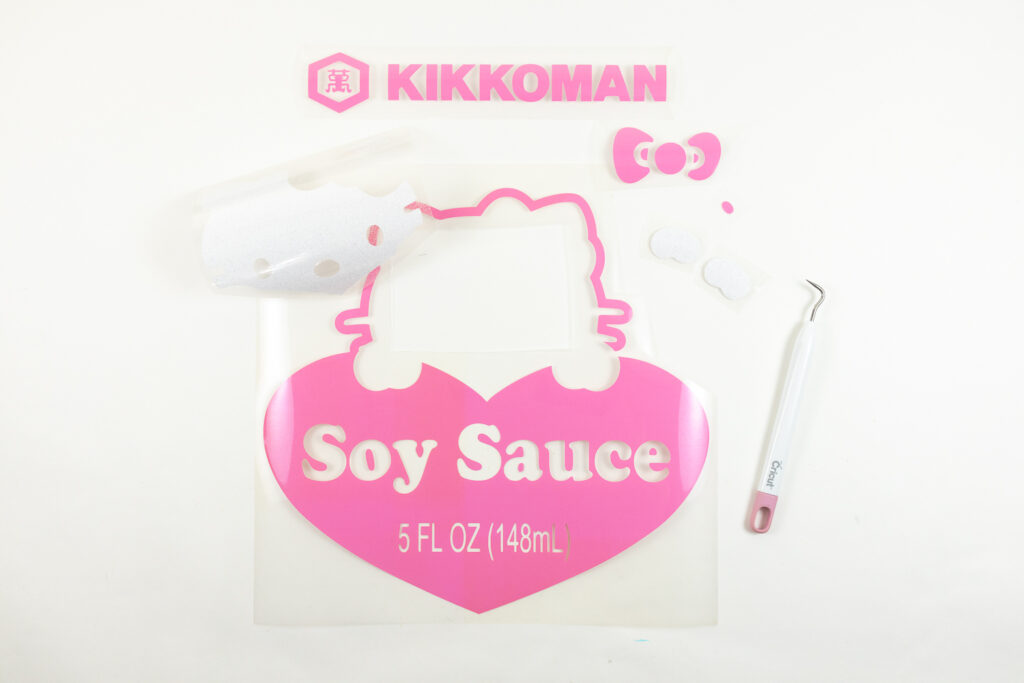
1. Cut out designs
Cut out designs from iron-on material using a cutting machine. Weed around the design. I used Pink Sportflex Iron-On for the Kikkoman logo and heart shape, and white glitter Iron-On for Hello Kitty’s face.
2. Prepare dress
Prepare dress for design Use your EasyPress or a household iron to press out any wrinkles. Then use a lint roller to remove any dust from the area you’ll be applying the design.
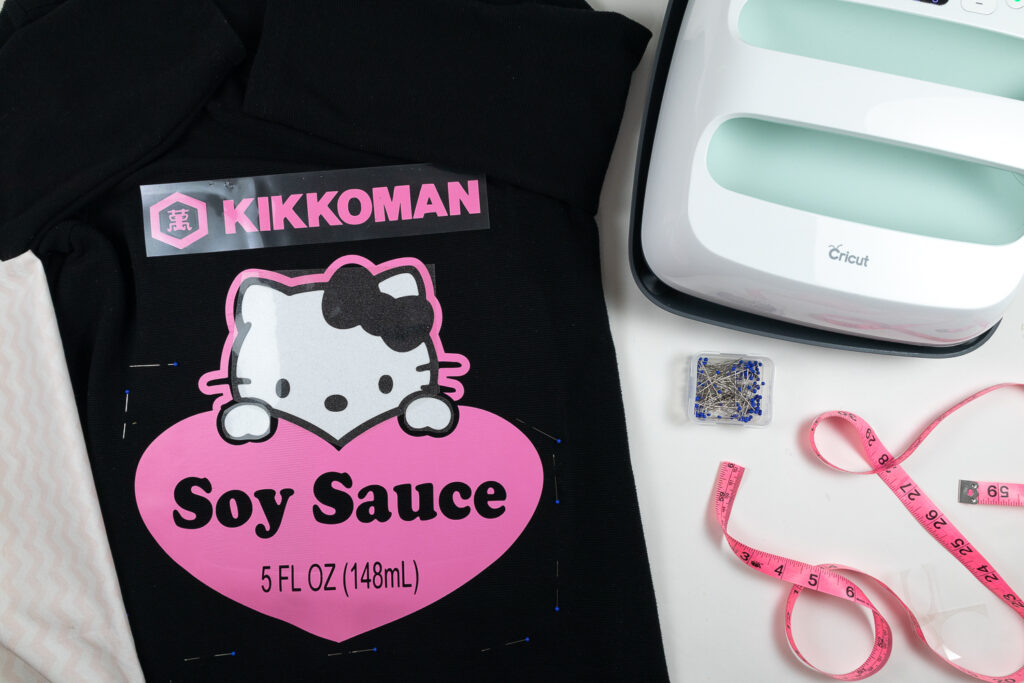
3. Determine placement of your design
I tried on my dress multiple times and used pins to mark the placement of the Iron-On, but you can also just eyeball it if you’re feeling confident. A measuring tape can help you center your design.

4. Apply design
Place the dress over an EasyPress mat then preheat your EasyPress to the appropriate temperature. Refer to Cricut’s Heat Guide to determine your EasyPress settings for your iron-on material and fabric. The Heat Guide will also tell you how long to press.
Since I’m using two types of materials I applied the larger pink Iron-On pieces first. Once it cooled completely, I peeled off the protective film before adding the white glitter Iron-on pieces. (The bow and nose had to go on last since their placement was determined by the white glitter Iron-on). ALWAYS make sure you have an Iron-On protective sheet or some kind of cloth covering your whole design before pressing. Direct contact with the EasyPress plate can damage your design. Remember to heat the reverse side. Allow it to cool completely before wearing.
Badtz Maru Sushi Chef Costume
This costume was inspired by the Badtz Maru ikura (fish eggs) sushi. It consists of a sushi hat, a belly apron, and penguin feet. The bamboo chopsticks are actually fighting sticks my husband owns.

How to Make Sushi Hat
Materials
Black stiff felt sheet
Black fleece
Felt – white, yellow, black, green, light green
Fine point scissors – great for cutting small details
Sewing clips or safety pins
Hot glue gun + glue stick
Black thread
Sewing needle
Instructions
Refer to images of Badtz Maru for best results.
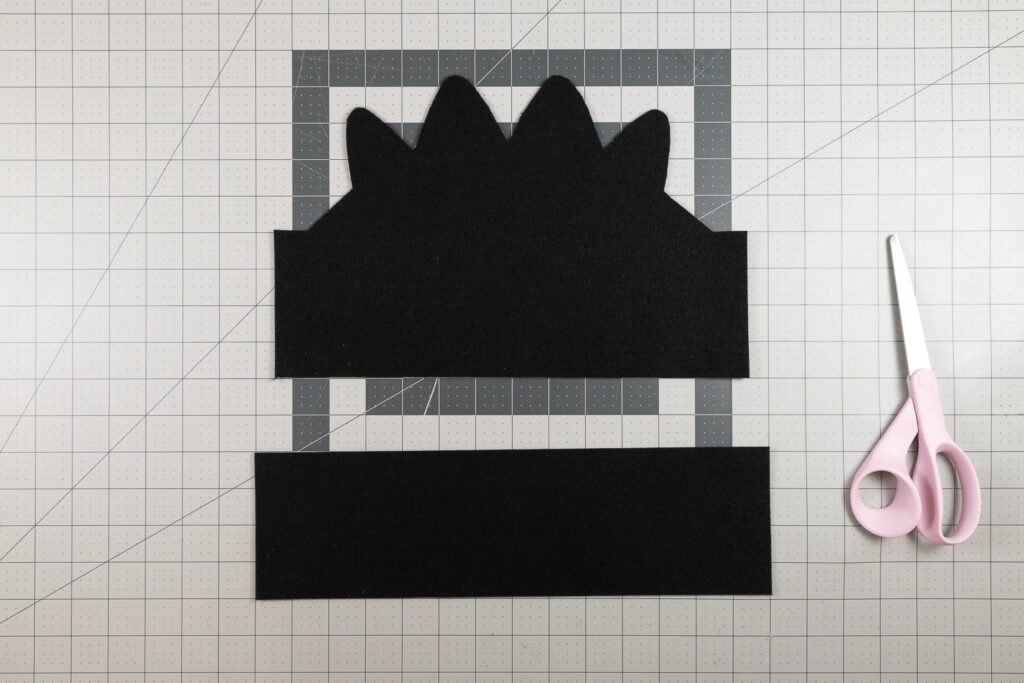
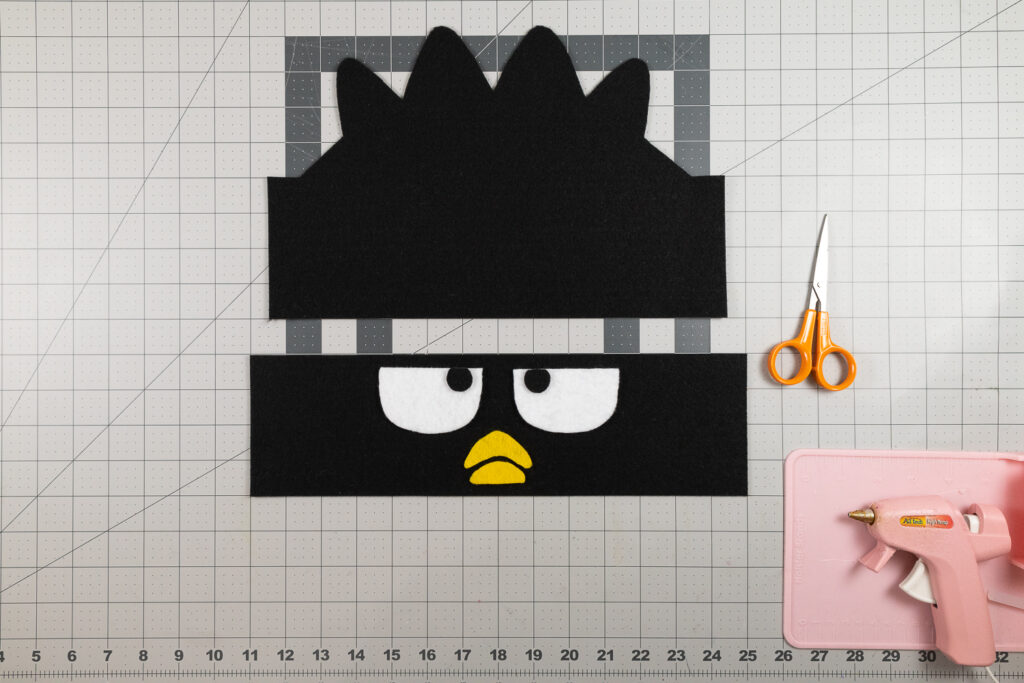
1. Cut hat pieces
Cut one large rectangle out of black stiff felt for the front of the hat. My rectangle measured14″ x 4″. Cut out another piece that looks like a rectangle with feathers for the back of the hat. I used ~8” high for the feathers.
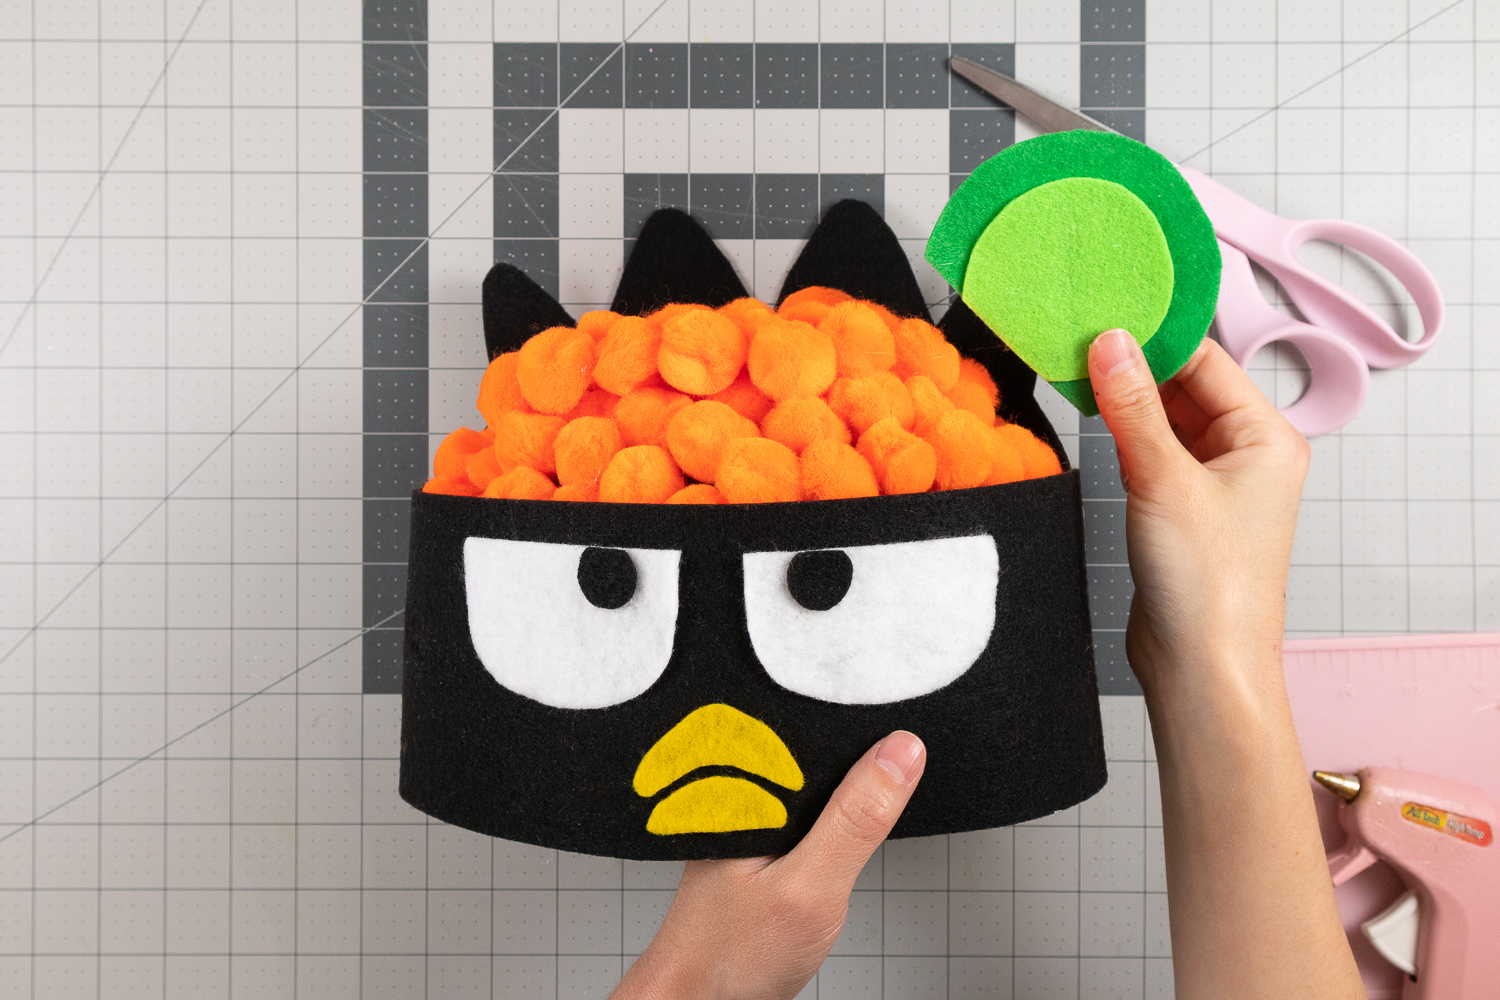
2. Attach face
Cut out the eyes from white and black felt. Cut out the beak from yellow felt. Hot glue to the front rectangle.
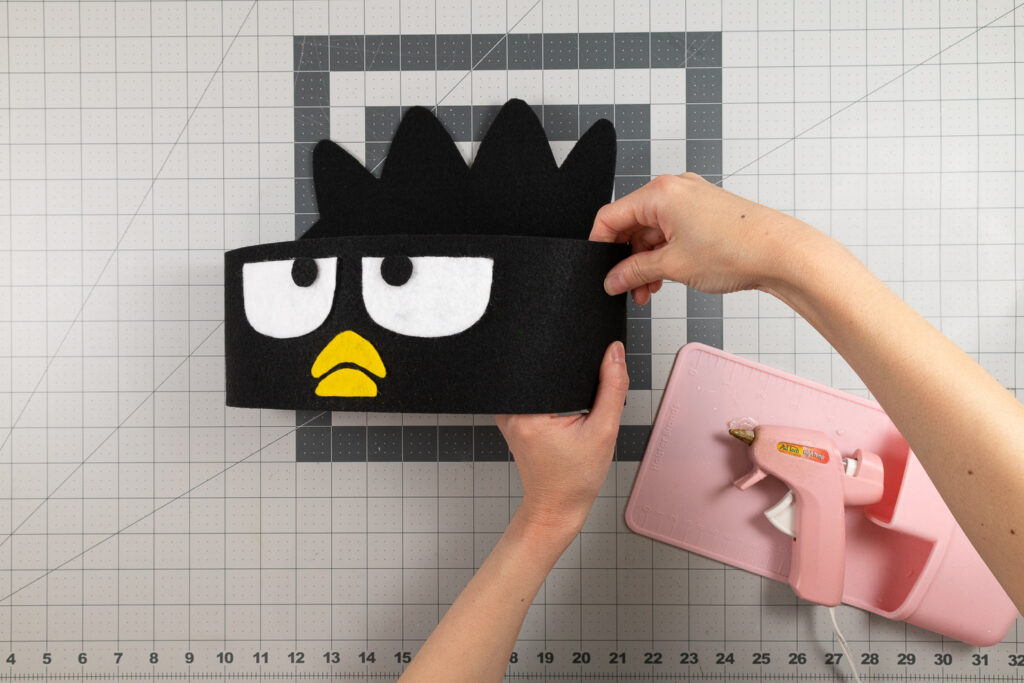
3. Form hat ring
Overlap the front and back pieces so it forms a ring. Hold them together with sewing clips or safety pins. Place on your head and adjust the size so it fits snugly without slipping. Once it fits, hot glue the overlapping sides together.
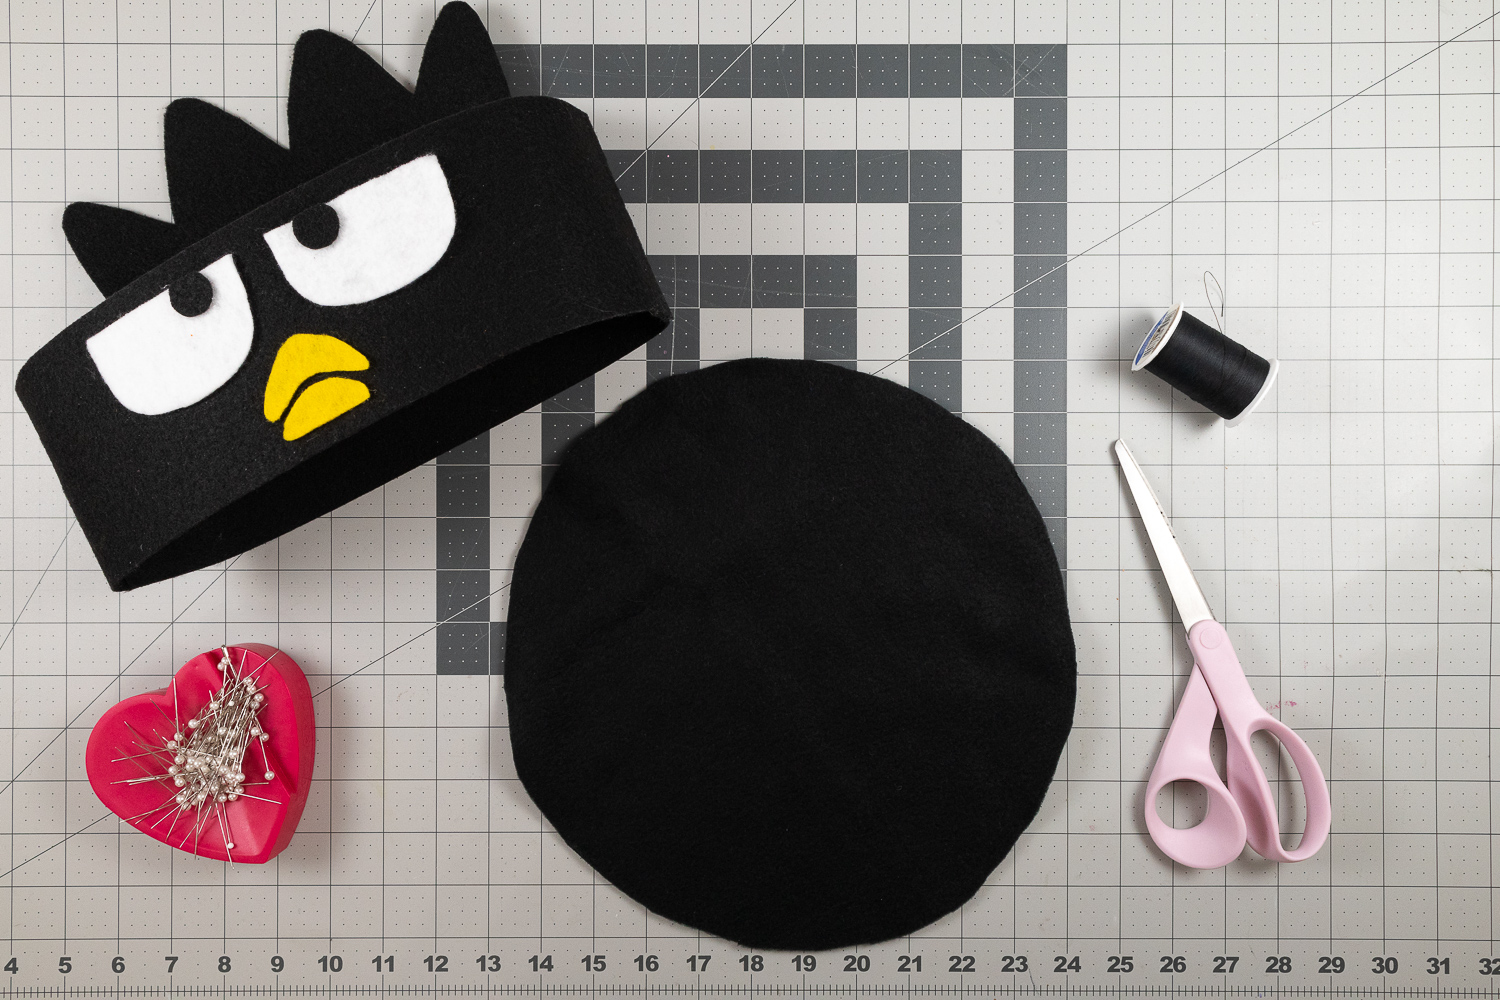
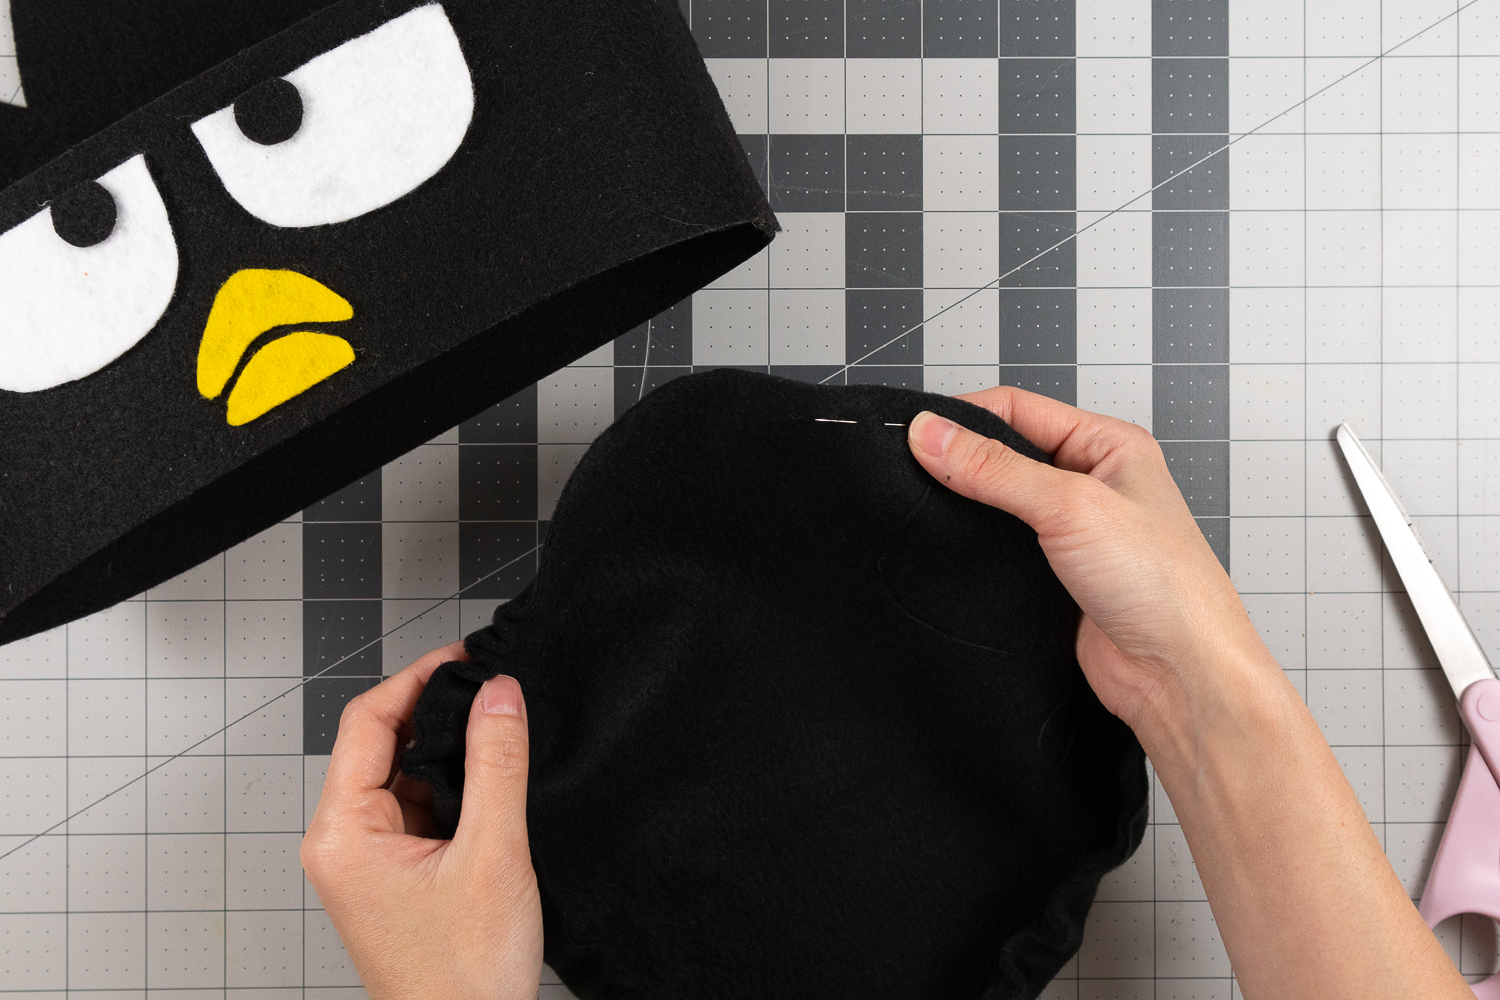
4. Make a dome
Cut out a round piece of black fleece or felt ~2 inches larger than the diameter of the ring you just made. Using a sewing needle and black thread, sew around the perimeter of the hat with large stitches. Pull the two ends of the thread to gather the edges and create a dome shape. Pin this dome piece midway inside of your hat ring, adjusting the size so the gathers are evenly distributed. Knot the two thread ends together, then hot glue the dome to the ring.
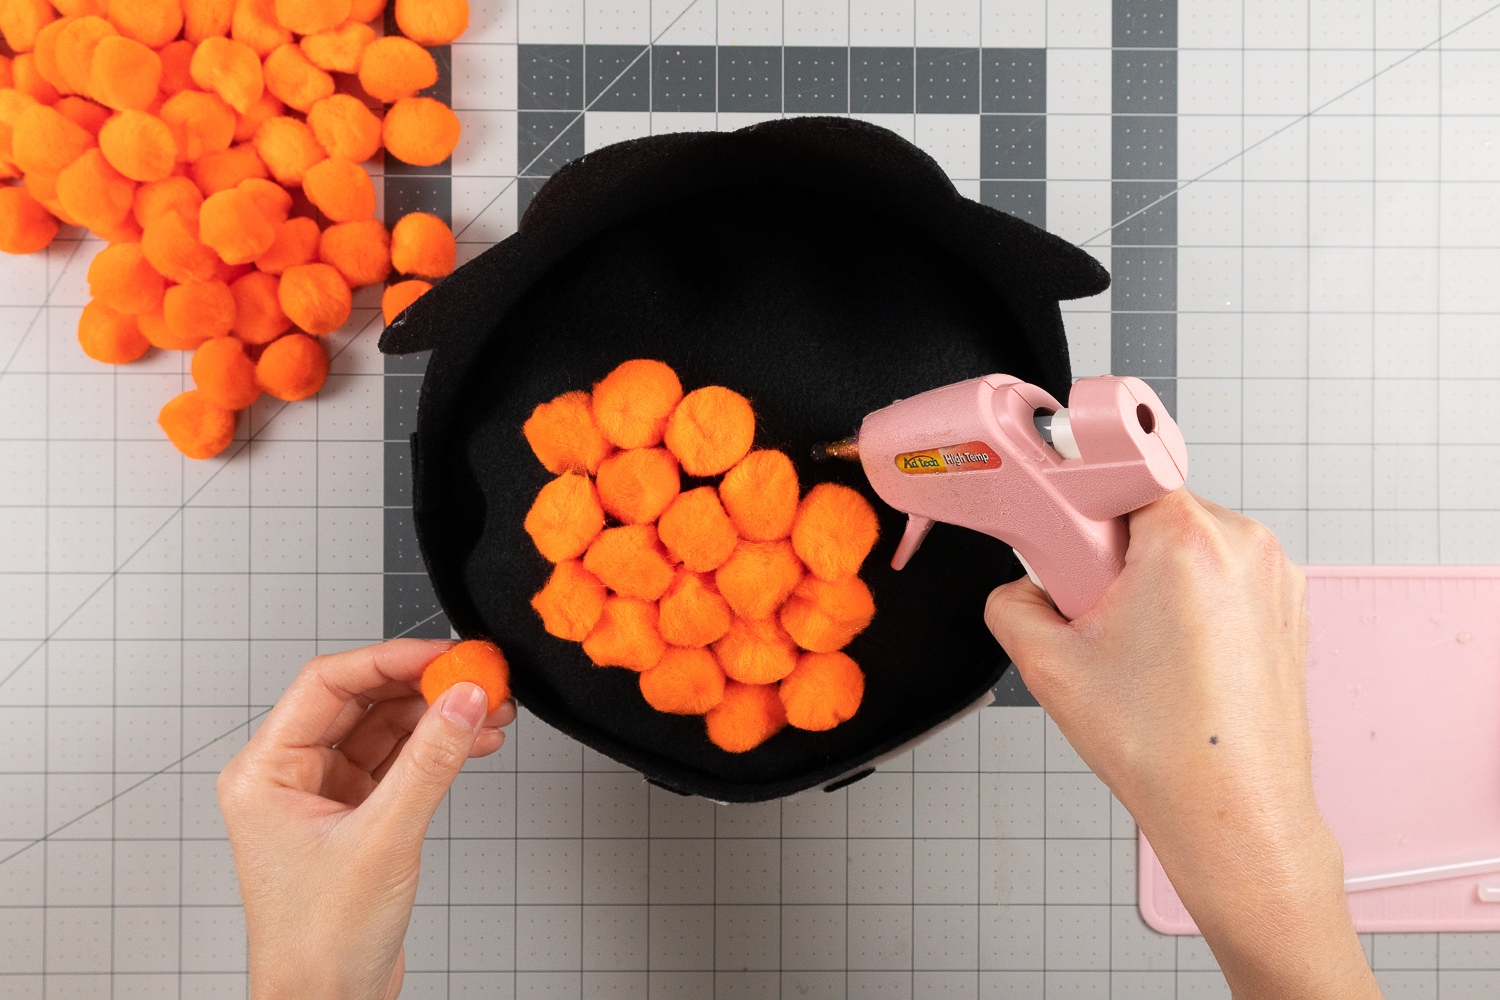
5. Add ikura (fish eggs) and cucumber
Place the hat on a flat surface then hot glue orange pom poms all over the rounded dome part of the hat. Keep layering pom poms until it looks full.
Cut out a circle from green felt (mine was 3.5″ across) and a smaller circle from light green felt. Glue the smaller circle to the larger circle then slice off a small section. Glue the flat edge to the top of the hat, tucking it between the fish eggs.
How to Make Belly Apron
Materials
Black apron (similar)
White fleece
White thread
Sewing needle
Instructions
Refer to images of Badtz Maru for best results.
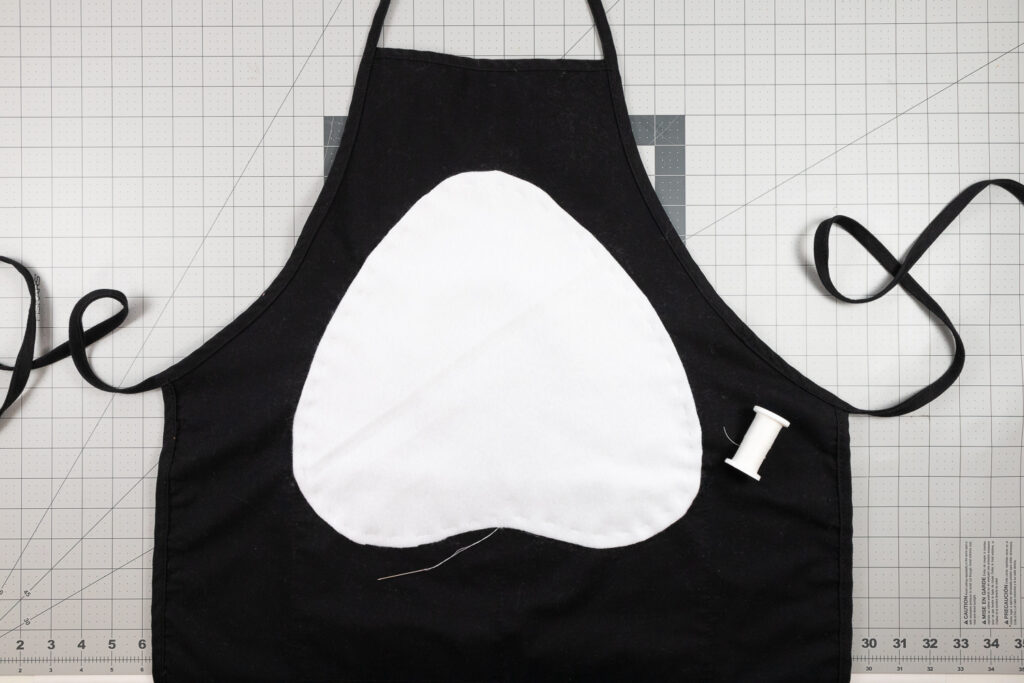
1. Cut out belly
Draw belly shape on white fleece (hint: it’s kind of like a rounded upside-down heart). Cut out belly.
2. Sew belly to apron
Pin the belly shape to the top portion of the black apron. Hand stitch the edges of the belly to the apron using white thread. You can opt to use hot glue, but I preferred sewing so I could still use this apron after Halloween.
How to Make Penguin Feet
Materials
Yellow felt sheets
Instructions
1. Cut yellow felt
Place yellow felt over the top of the shoe you’ll be wearing. Sketch out a rounded shape covering the toe and sides of your shoe. Sketch out a smaller curve for where your ankles will go. Cut out this shape. Use this shape as a template for the second shoe. If you’ll be wearing sneakers, cut out two small holes where your shoelaces will go.
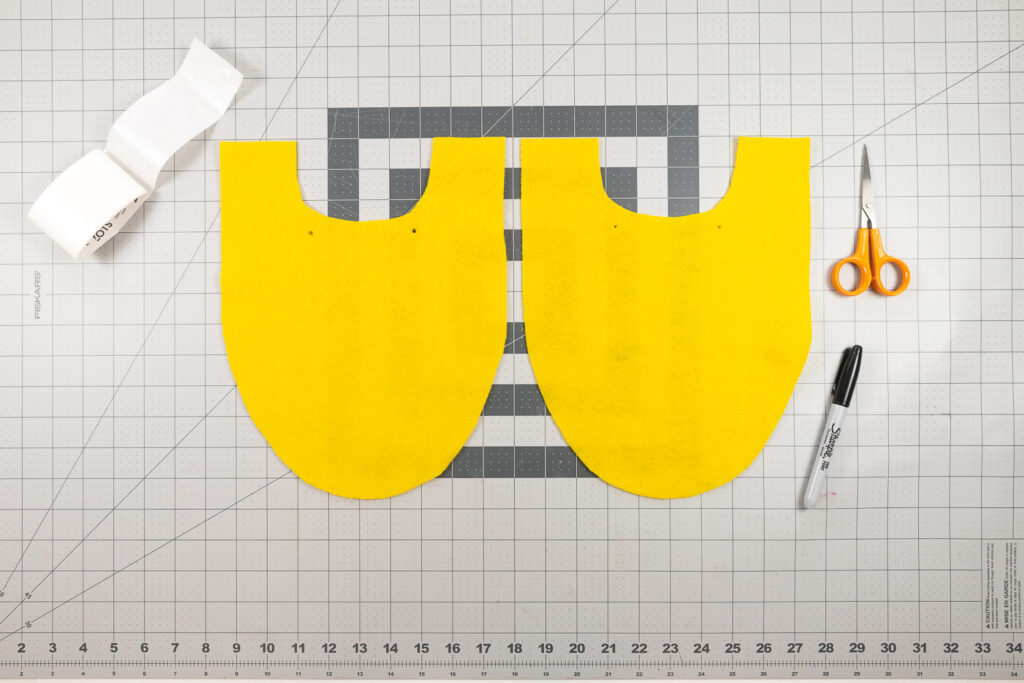
2. Attach felt cutouts to shoes
Thread your shoelaces through the holes of your shoe covers. Use glue dots to secure other parts to your shoes.
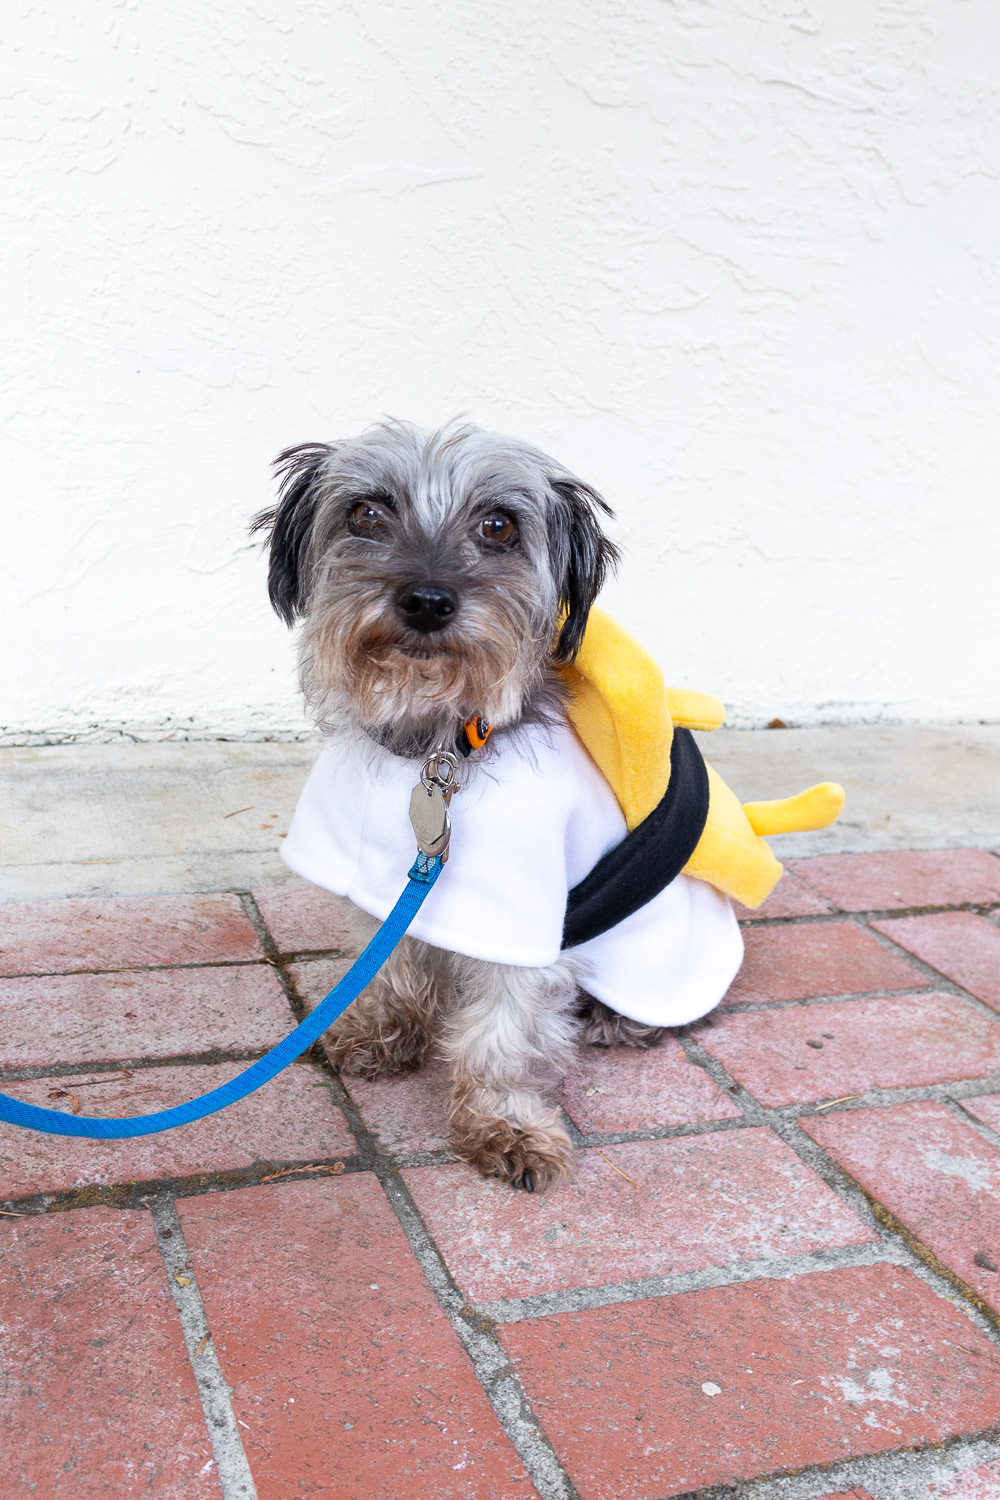
Gudetama Tamago Nigiri Dog Costume
This tamago nigiri dog costume looks just like the real thing! The Gudetama face, arms and legs will give your pup even more personality. Fun fact: The Gudetama Instagram page often features a HUGE life-size mascot doing silly things.
Tamago means “egg” in Japanese. Tamago sushi is a type of nigiri sushi with tamagoyaki (rolled omelet) on top. The tamagoyaki is sliced into rectangles before being placed on a ball of sushi rice.
How to Make Sushi Rice Body
Both the Gudetama Tamago costume and Cinnamoroll Ebi costume requires a sushi rice base, so construction is pretty similar. Here are the main differences:
- The Cinnamoroll Ebi costume has a hood and white strap under the belly. It has a plush shrimp pillow attached to the back.
- The Gudetama Tamago costume does not have a hood and uses a black (nori or seaweed) strap that goes under the belly. It has a rectangular Tamago (egg) pillow attached under the seaweed.
Materials
White fleece
Sewing pins
Sewing machine
White theaad
White VELCRO Sew On Tape (Only for Ebi costume)
Instructions
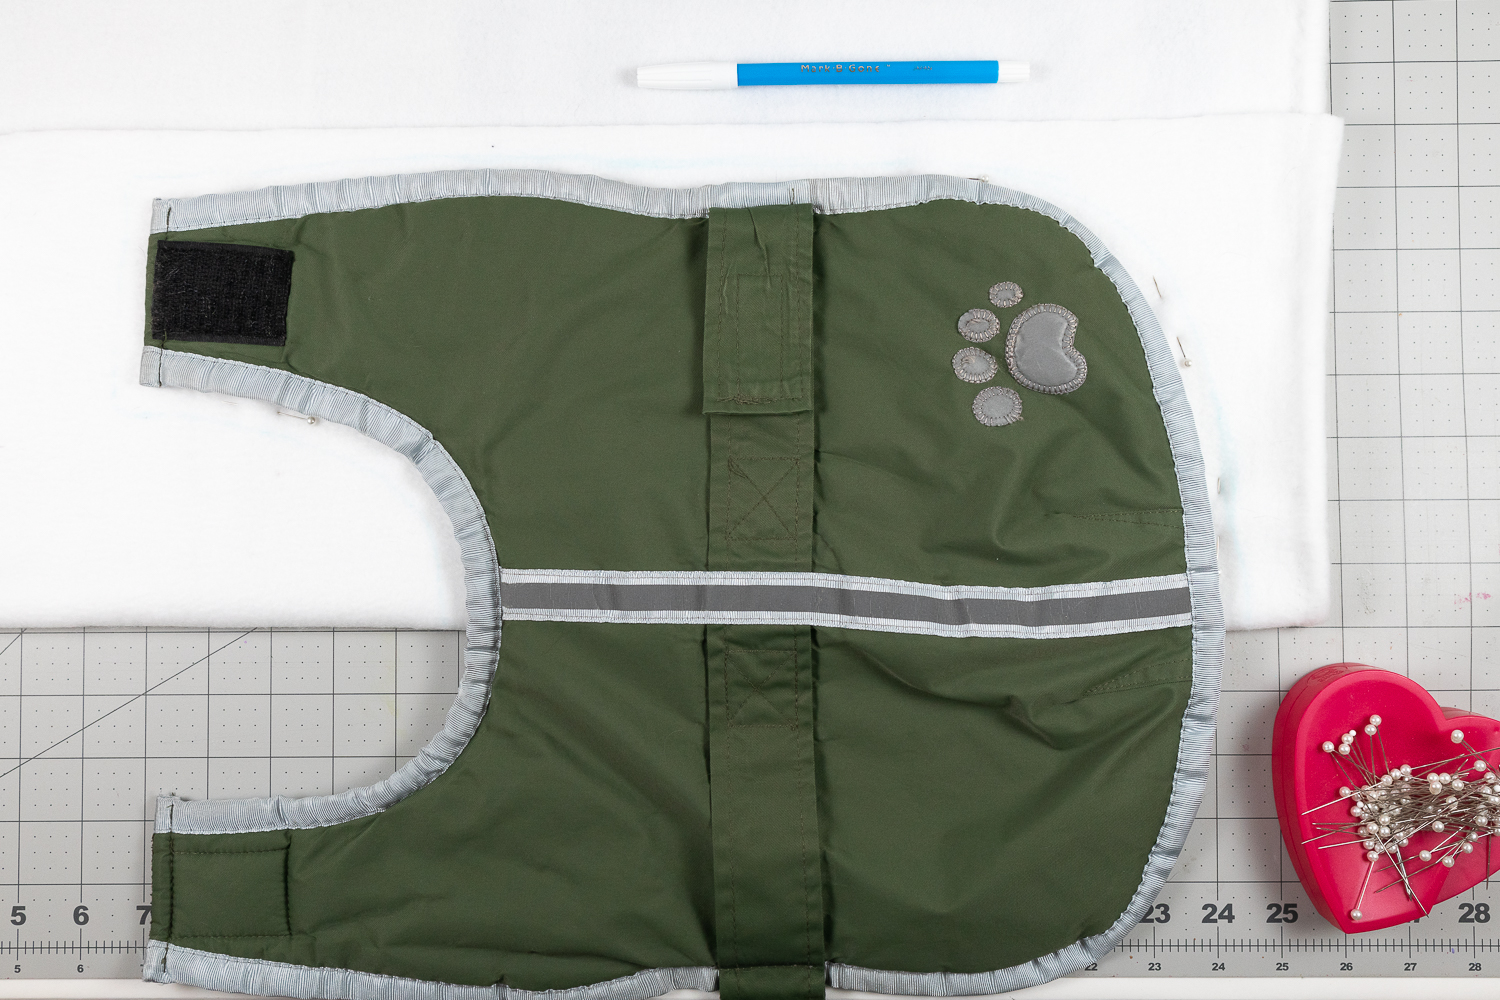
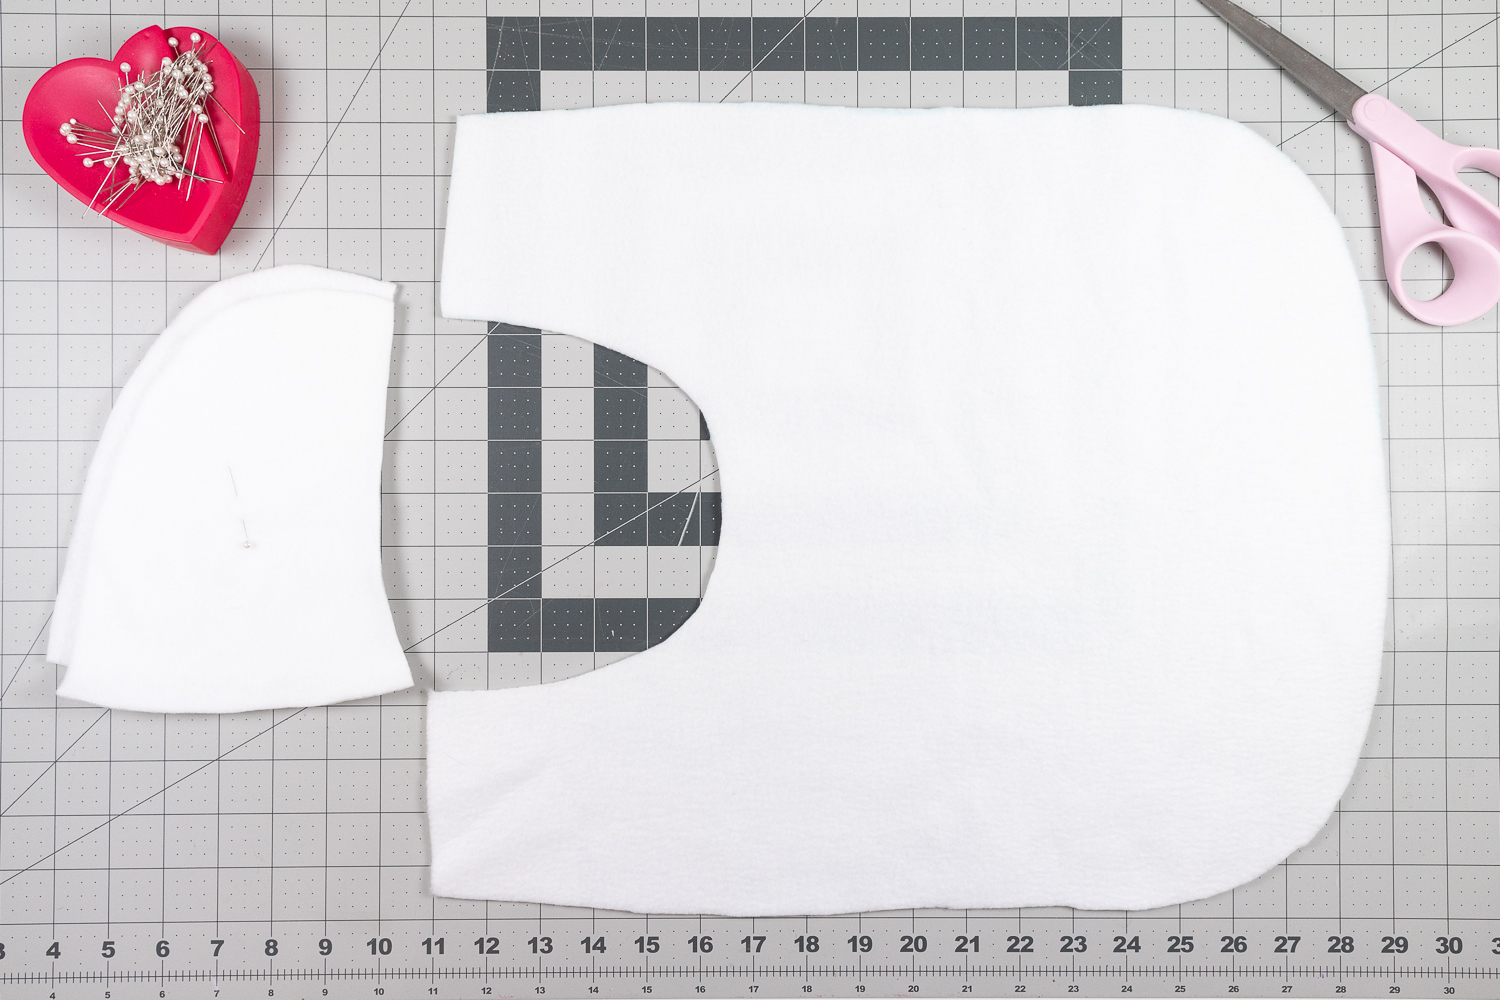
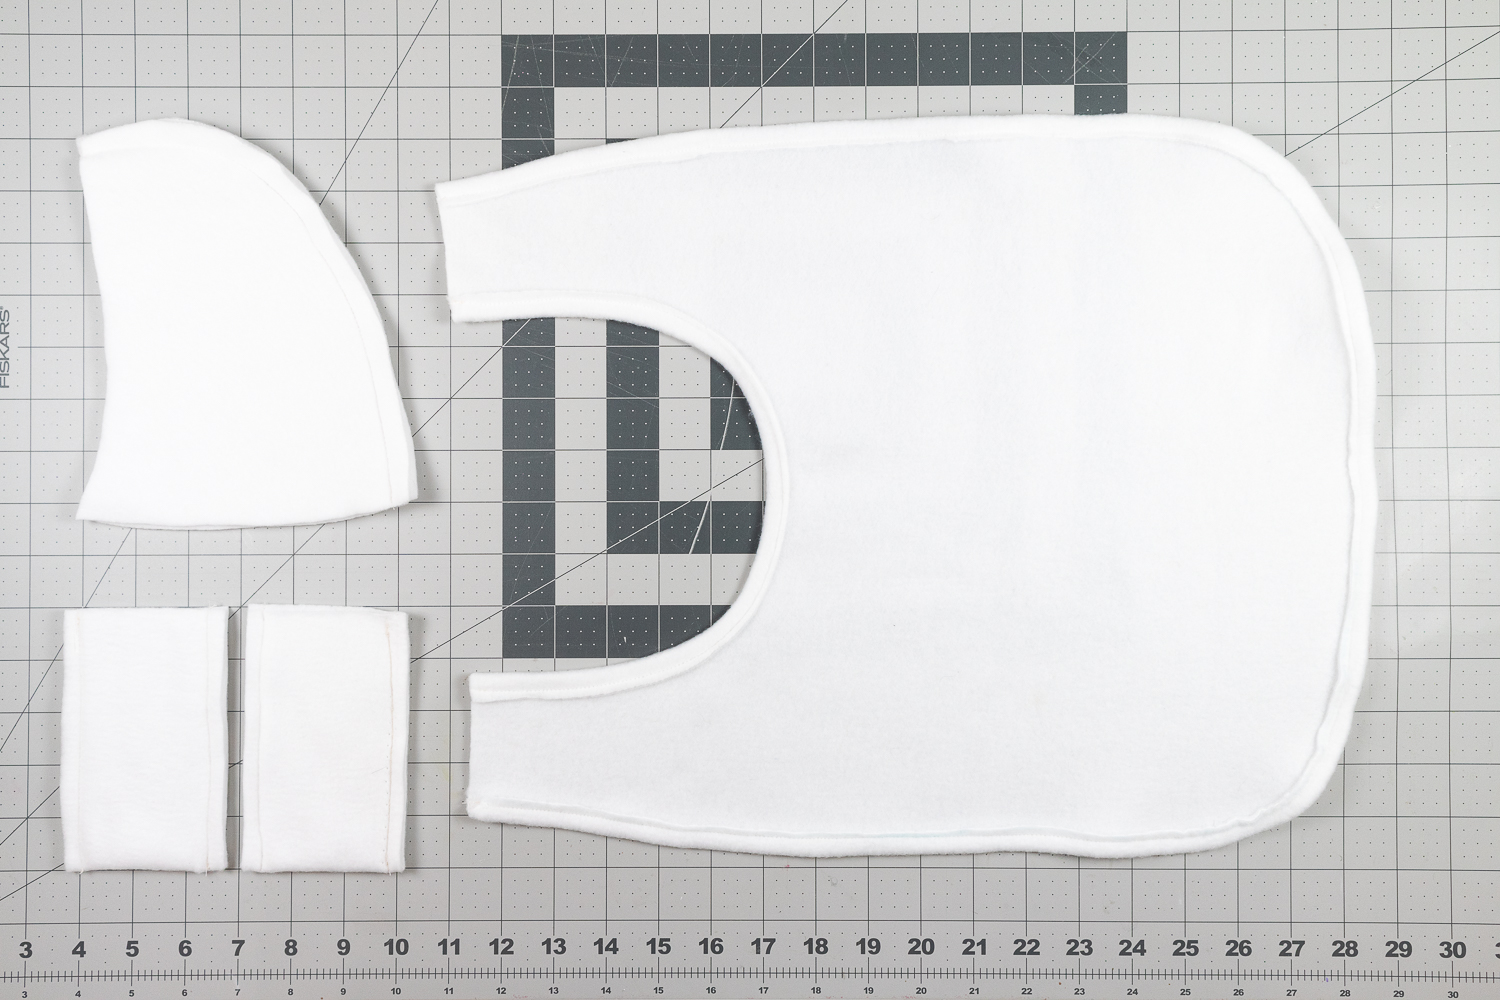
1. Cut sushi rice jacket pieces
I used my dog’s jacket as a template for this project. If you have a similar jacket for your dog, use that. Place the jacket on a folded piece of white fleece and trace around it using a fabric marker, leaving a ½ inch gap. Cut out this “jacket” shape using fabric scissors.
If you do not have a similar jacket, I recommend creating a pattern with paper and testing this on your dog before cutting the fleece.
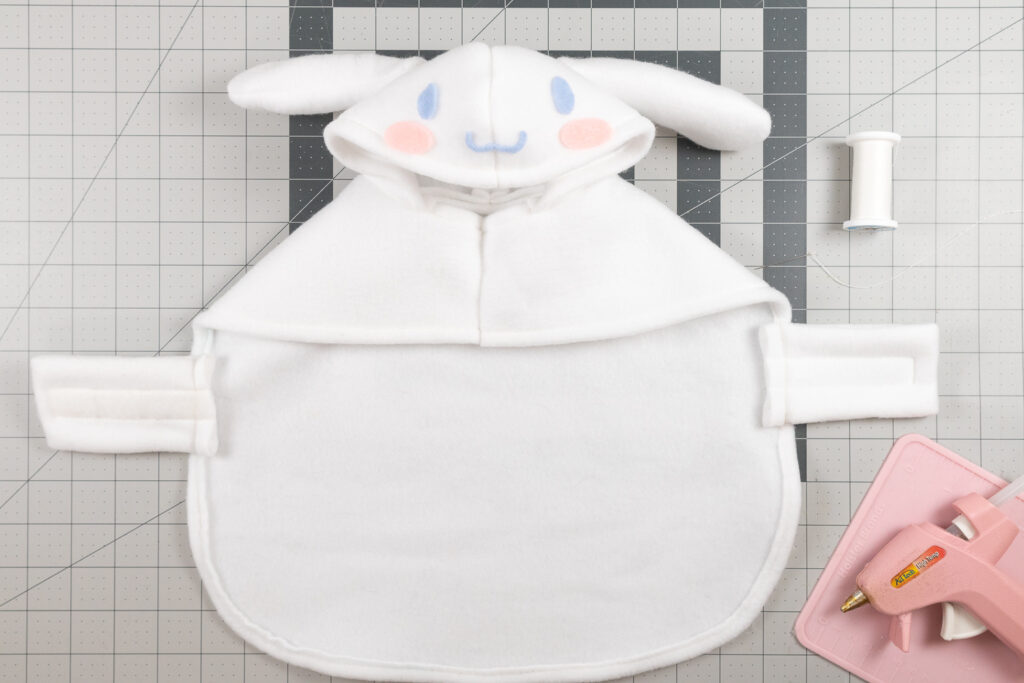
Only for Cinnamoroll Ebi costume: Cut out two shapes for the hood and two rectangular strips for the bottom straps that go under the belly.
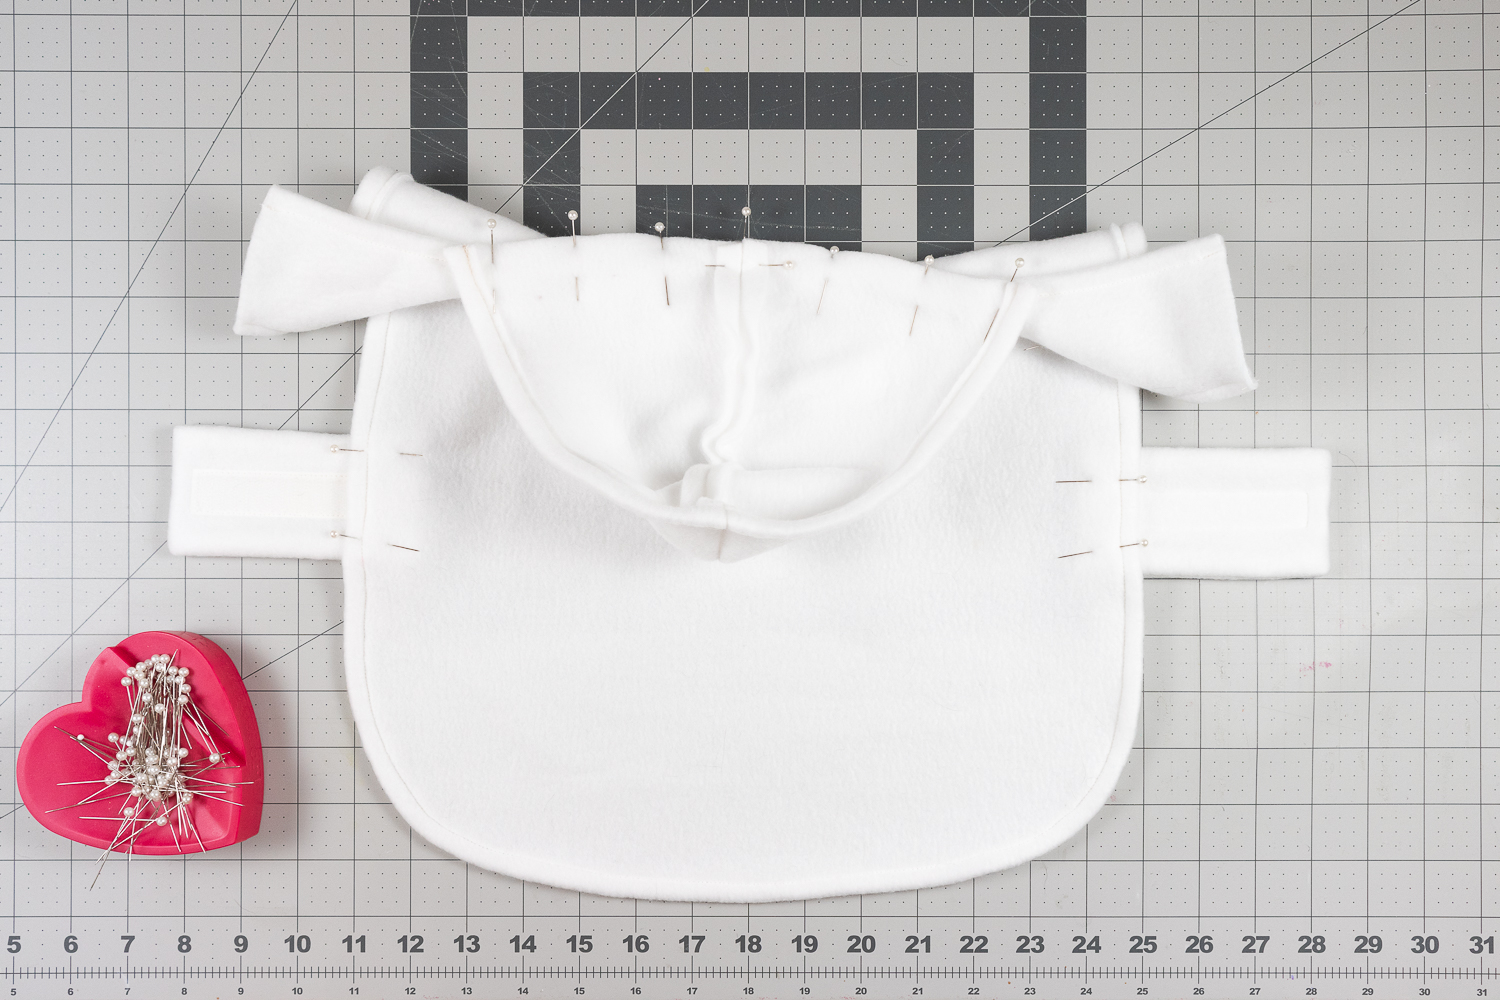
2. Construct the jacket
Fold down the outer rounded edges and the neck of the jacket using a 3/8″ fold and pin in place. Sew down the folded edges.
Only for Cinnamoroll Ebi costume: Pin the two hood pieces right sides together along the rounded edge and sew. Fold the rectangle strips in half and pin the long edges, leaving the short ends open. Sew the long edges of the rectangle. Flip the rectangle right side out and sew on strips of VELCRO tape.
Pin the bottom of the hood to the center of the neck and sew in place. Pin the rectangle straps under the edge of the jacket (near the middle) and sew in place. Remember to check the VELCRO tape orientation! To keep your pet comfortable, always have the rougher side of the tape facing out.
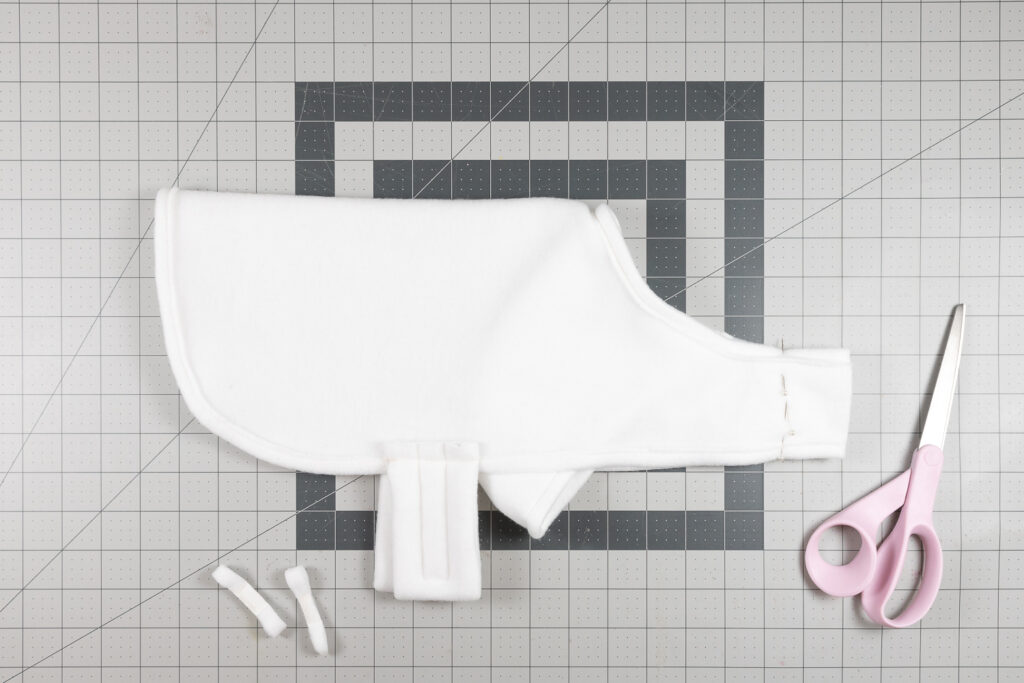
3. Finish jacket
Pin the flat neck part of the jacket together with safety pins. Try it on your pup, adjusting the neck if needed. Finally pin the ends right sides together and sew in place. Trim off excess fleece material.
How to Make Tamago (egg) Topping
Materials
Yellow fleece
Black fleece
Felt – black, white, yellow
Yellow thread
Black thread
Sewing machine
Fabric scissors and/or rotary cutter
Sewing pins
Hand sewing needle
Hot glue gun + glue sticks
Instructions
Refer to images of Gudetama sushi for best results.
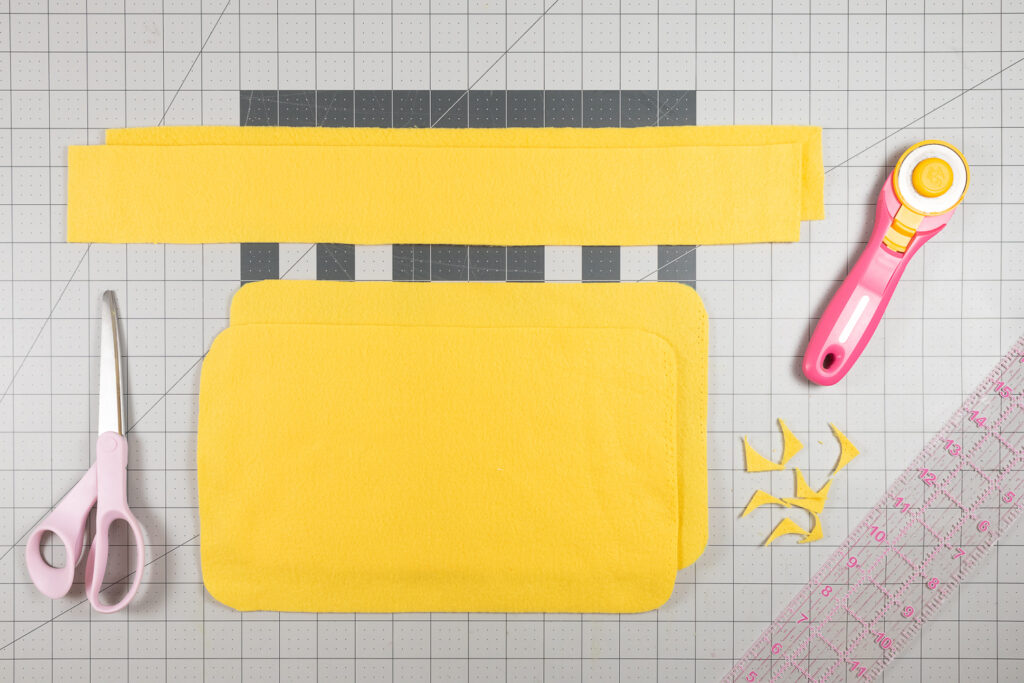
1. Cut out egg pieces from yellow fleece
Start by determining the size of the tamago pillow you want to make for your dog. I measured from the back of Frankie’s neck to the base of his tail to determine the length. For the width, I took the width of his body and added a few inches. To these two measurements, add 1 inch for the seam allowance. I used 12.5” x 7.5” inches for Frankie. Cut out two large rectangles and trim the corners so they’re rounded.
Side panels: To create the thickness of the tamago, you’ll need to cut two rectangular strips. Each strip should be long enough to wrap a little more than halfway around the larger rectangle. I made two 19” x 2.5” strips.
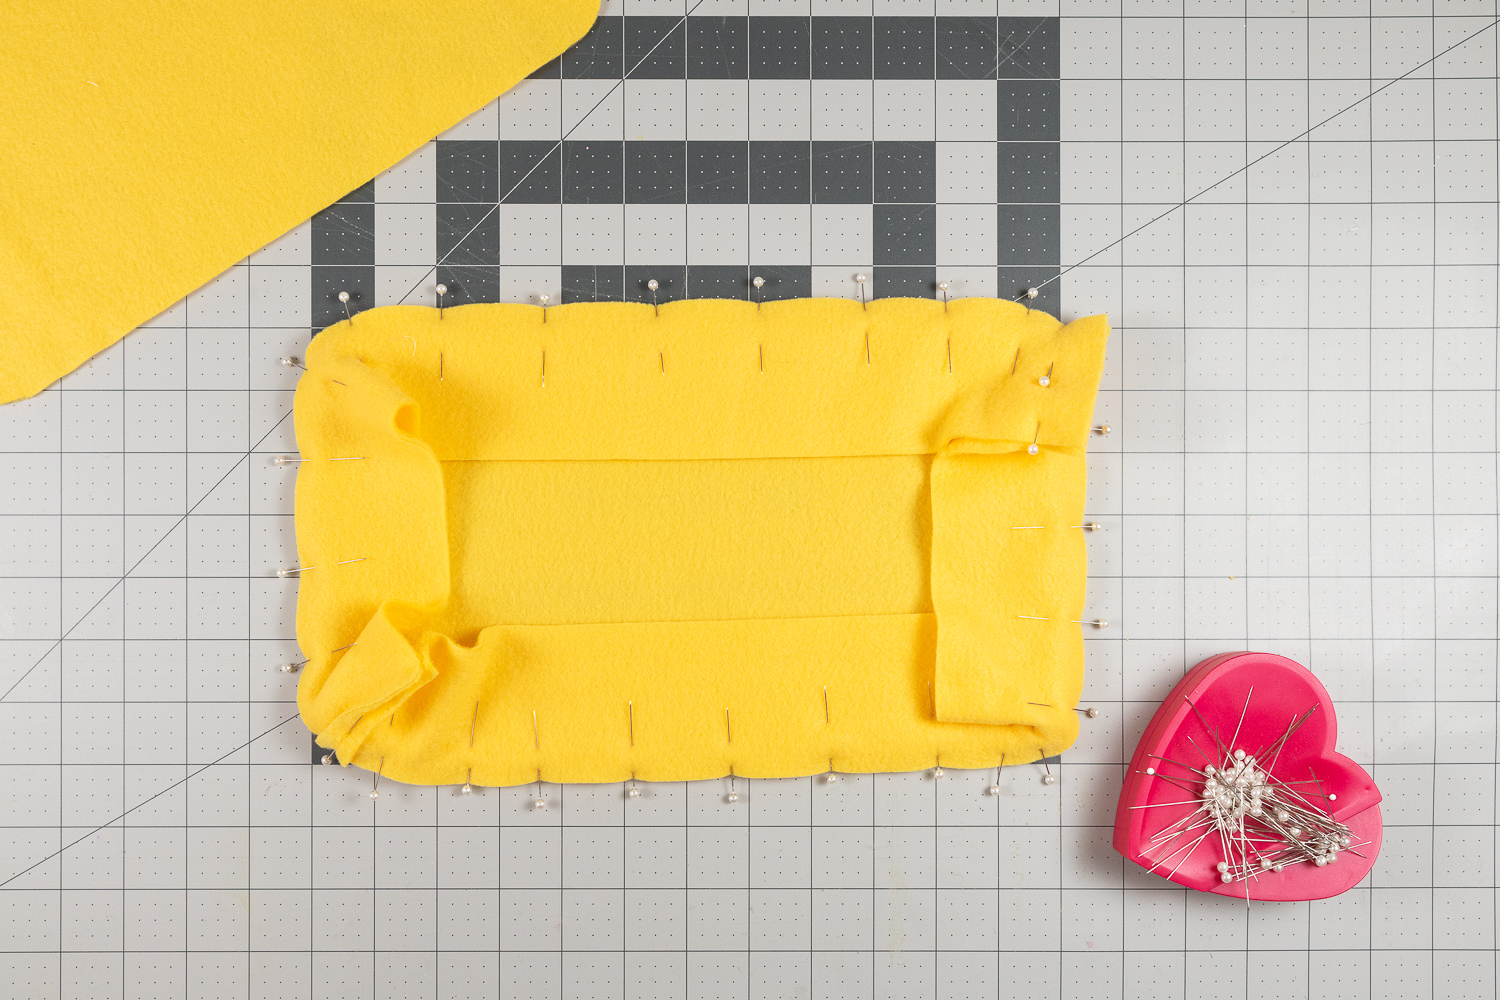
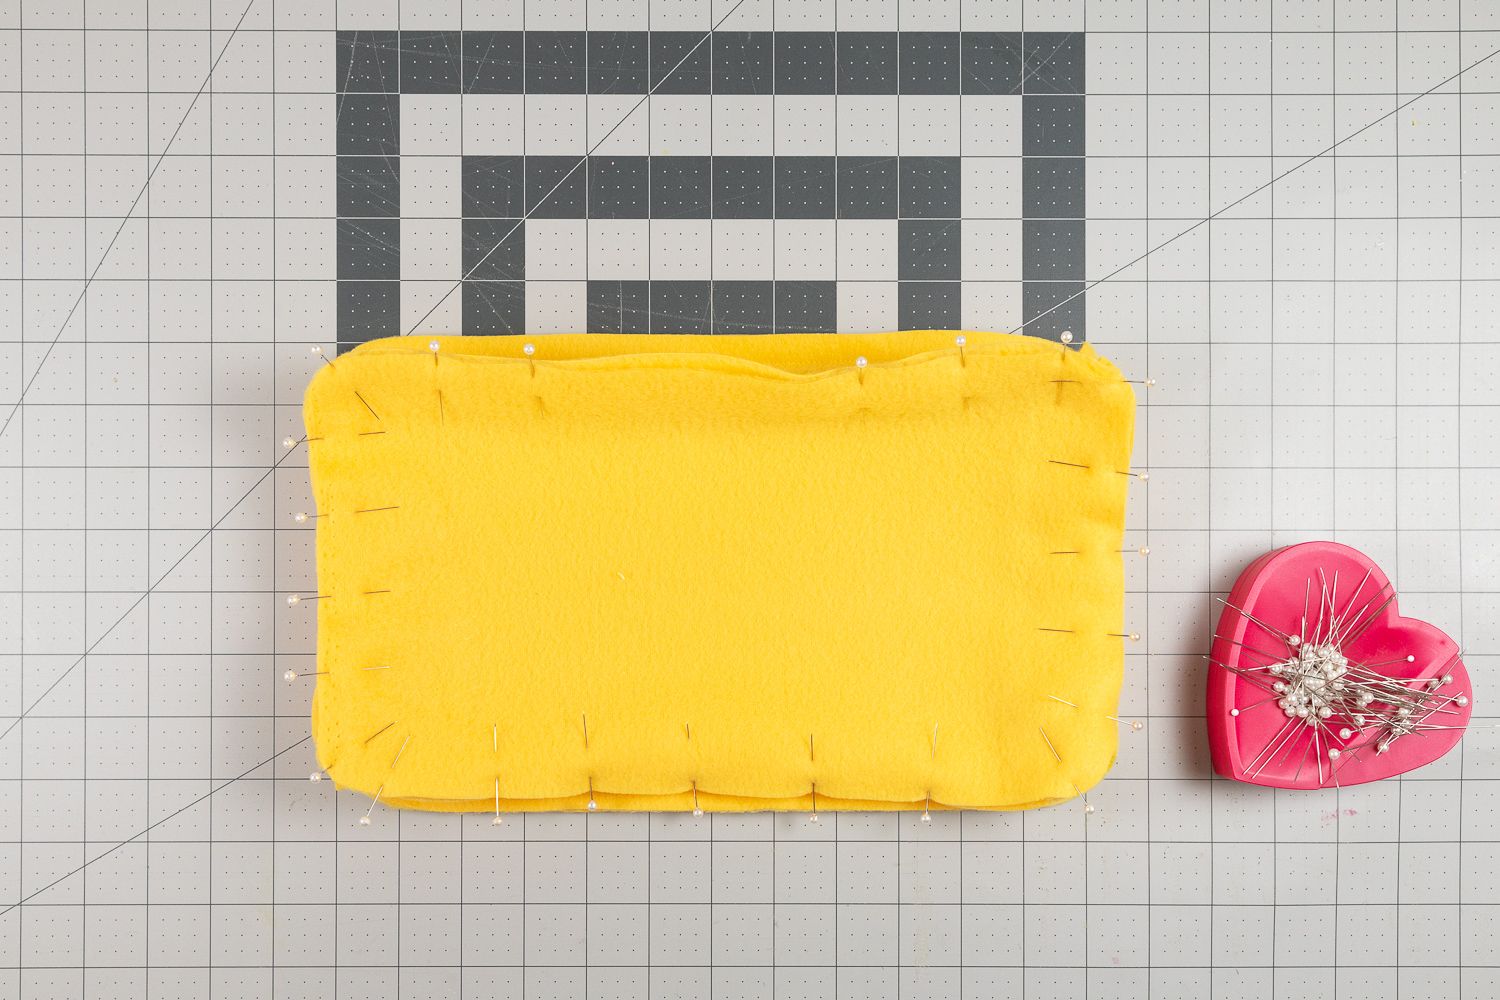
2. Sew egg pillow
Pin the rectangular strips around one large rectangle, right sides together. Try to have the strips meet at the rounded corners (this will make for a cleaner look). Pin the ends of the strips together and sew. Then sew all around the large rectangle to attach the strips.
Pin the other large rectangle to the sides panels of your sewn piece, right sides together. Sew together, leaving a large gap on a long edge (for flipping).
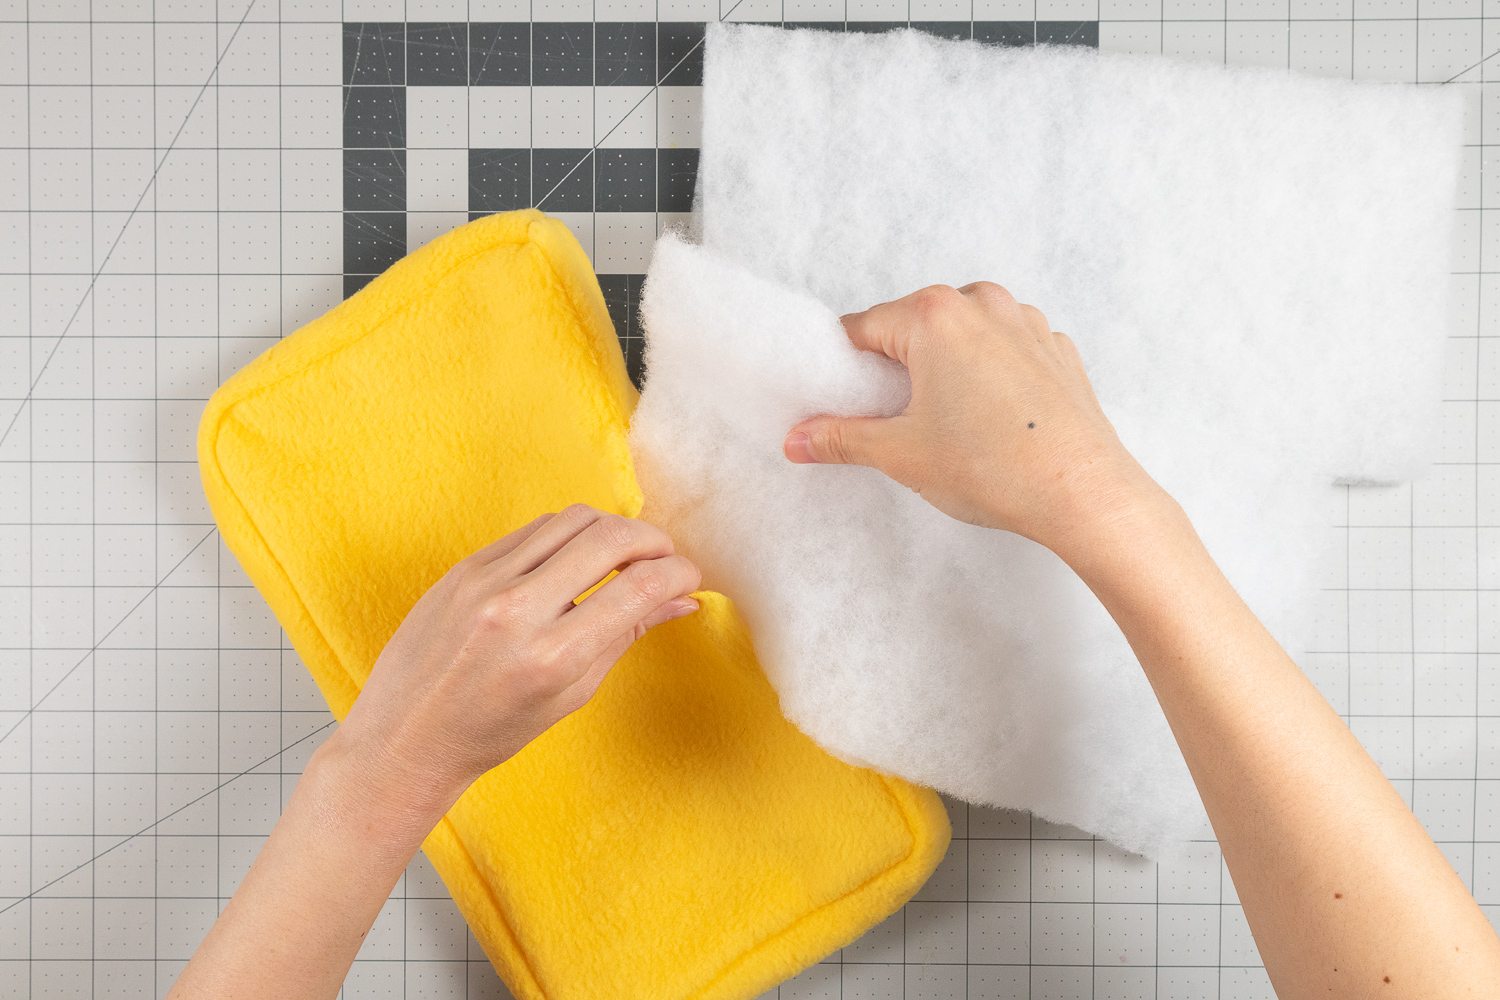
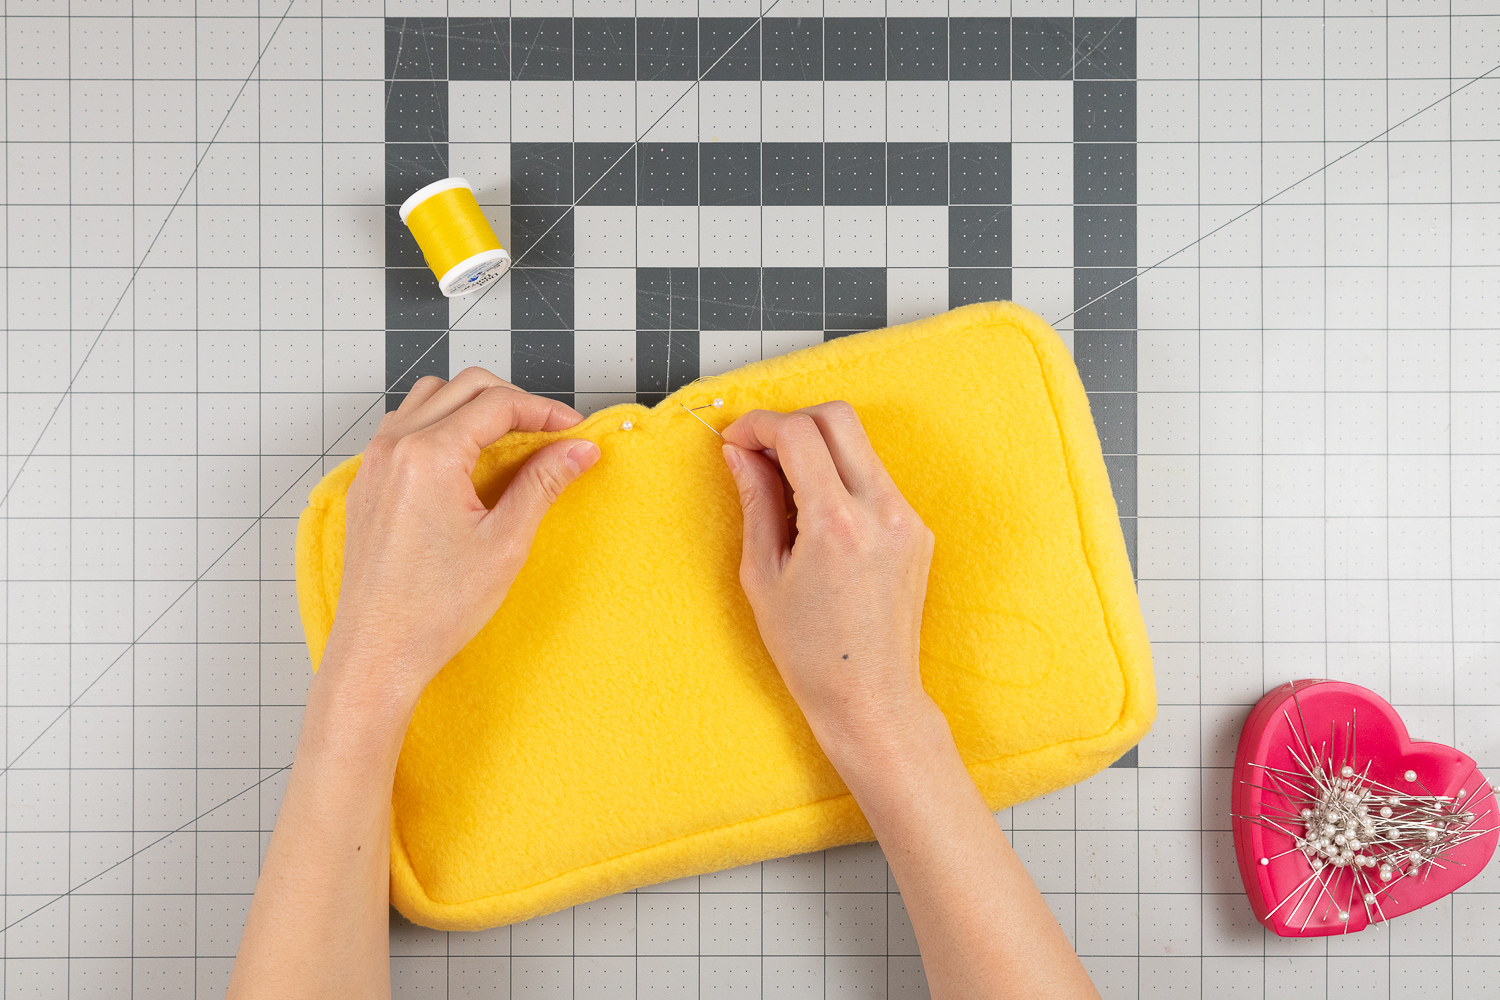
3. Flip and fill egg pillow
Flip your egg piece right side out through the opening. Cut two rectangle pieces of polyester batting to match the size of your egg rectangle. Insert them one by one into the opening, making sure they lie flat. Close the opening with a blind stitch.
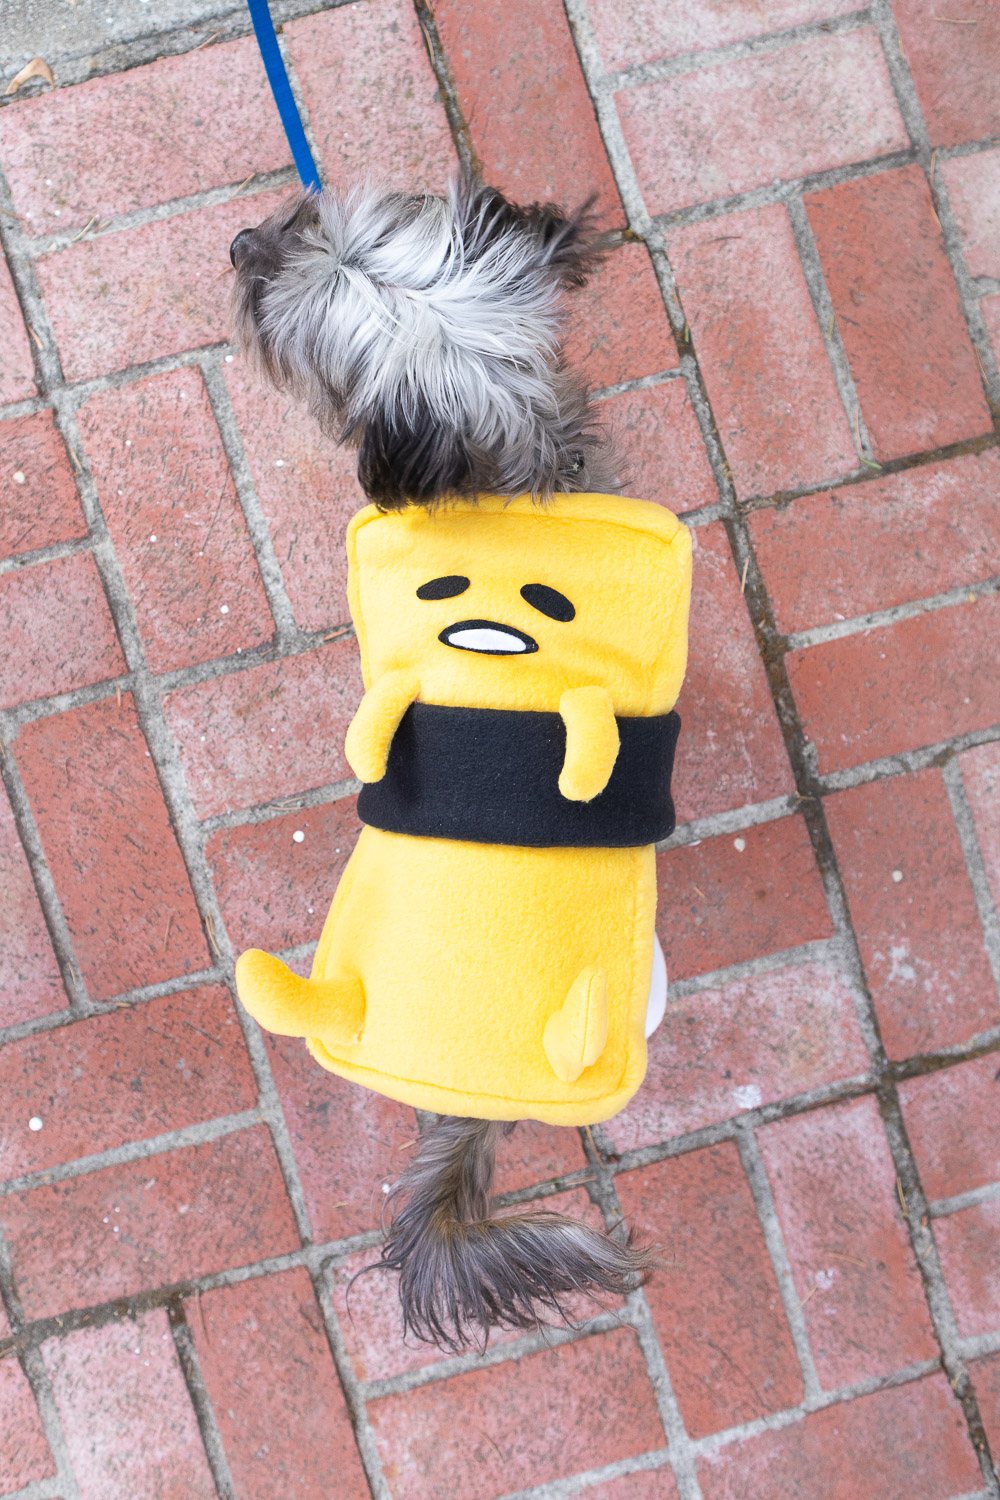
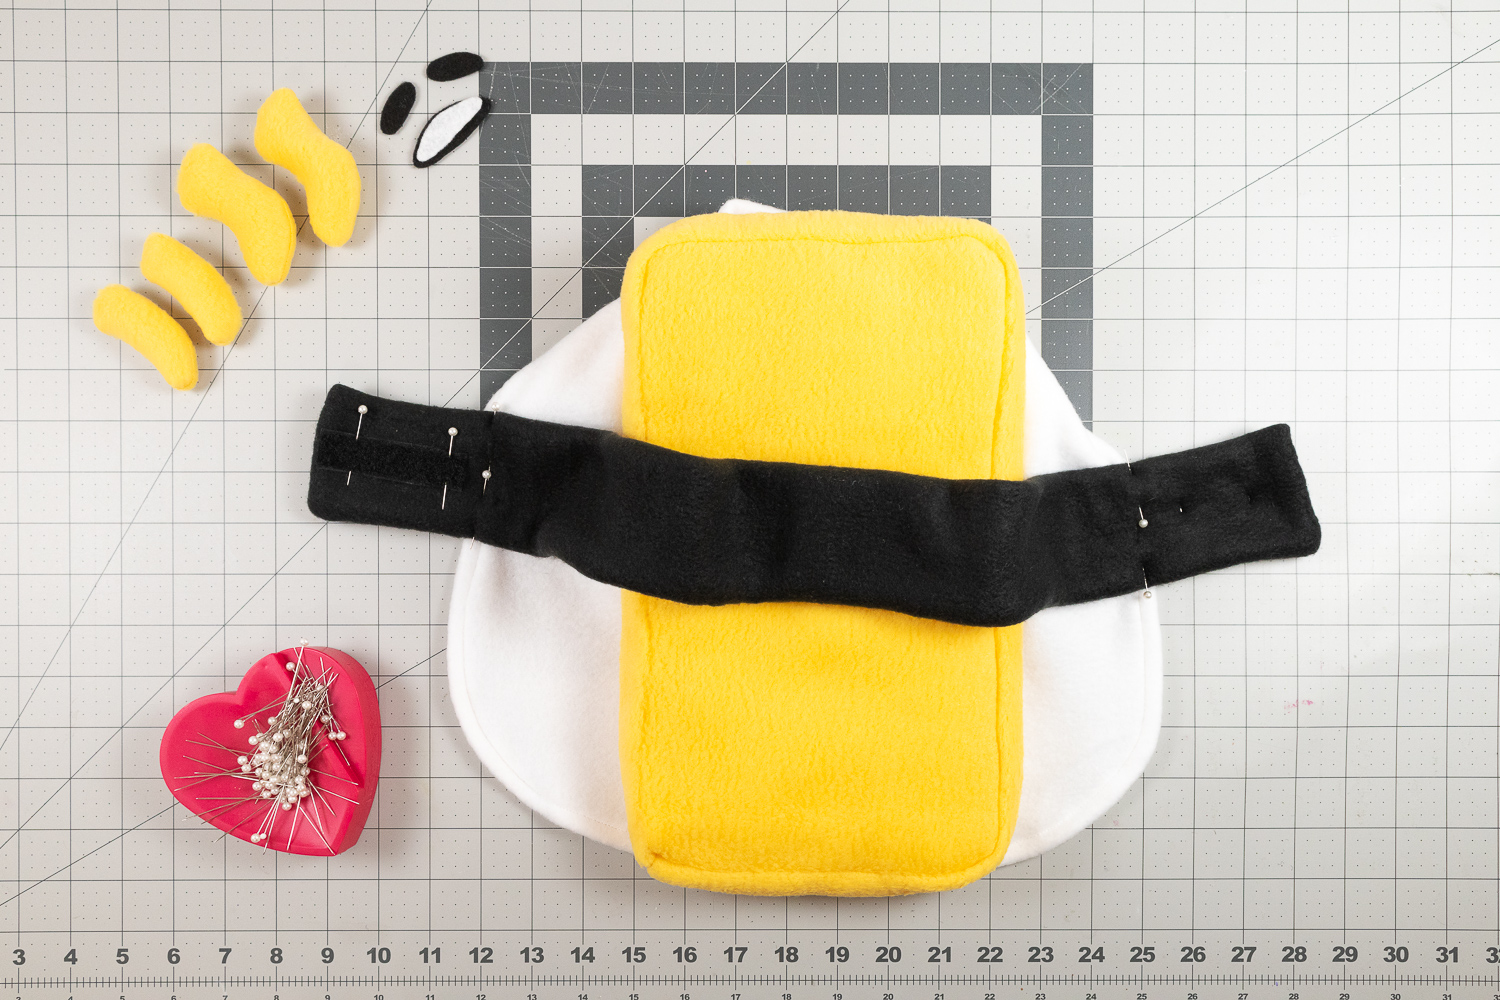
4. Add nori strap and Gudetama details
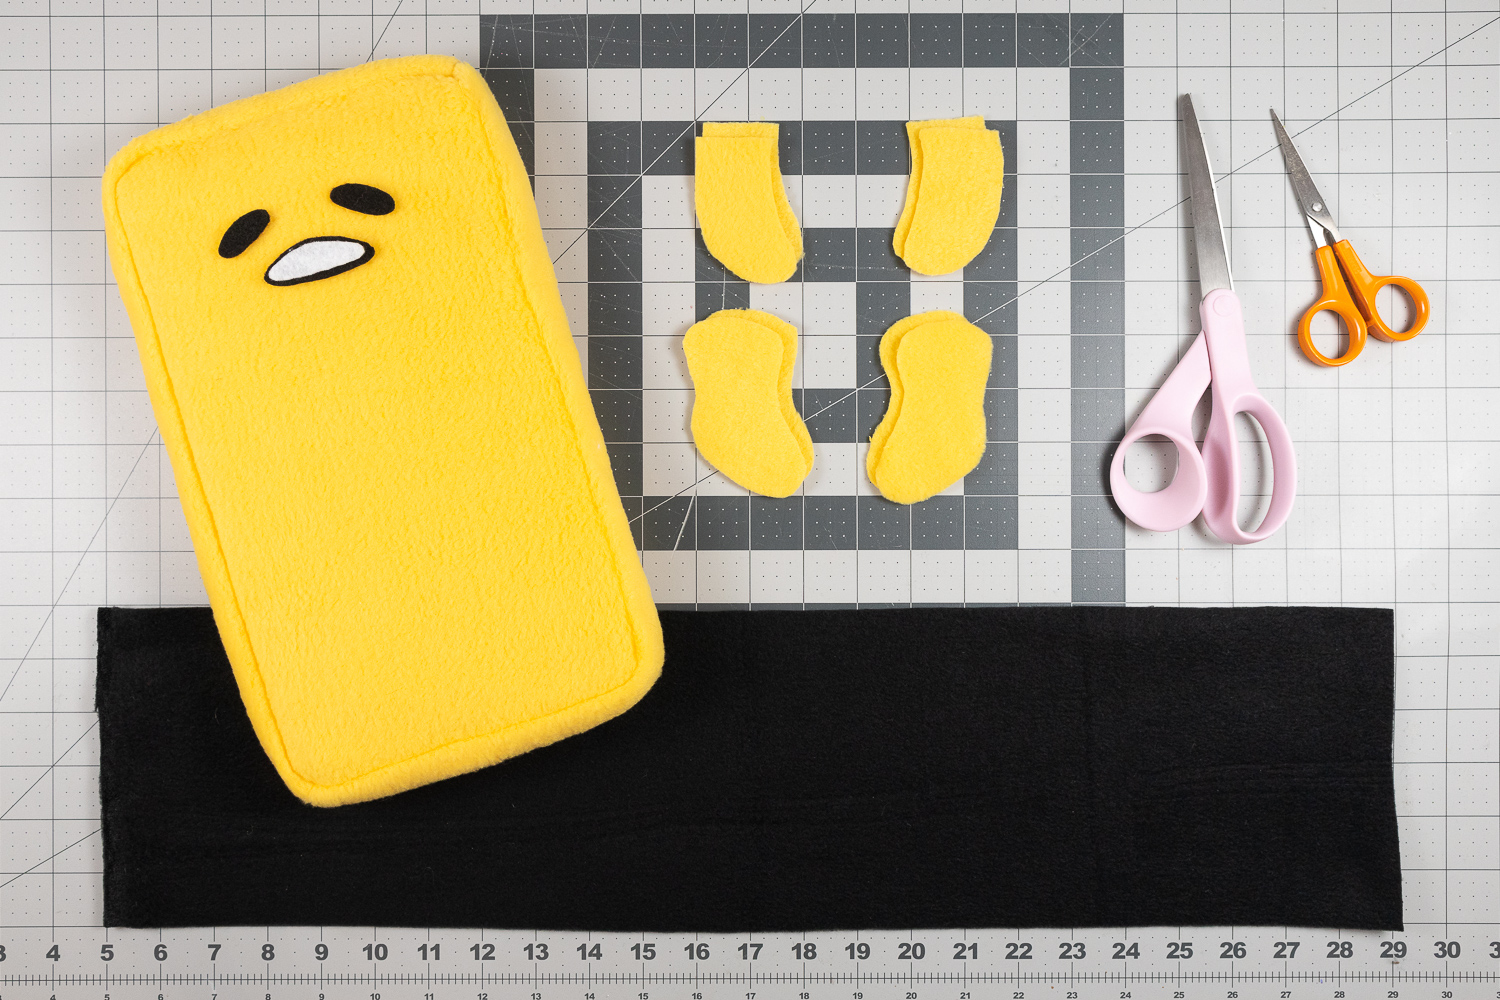
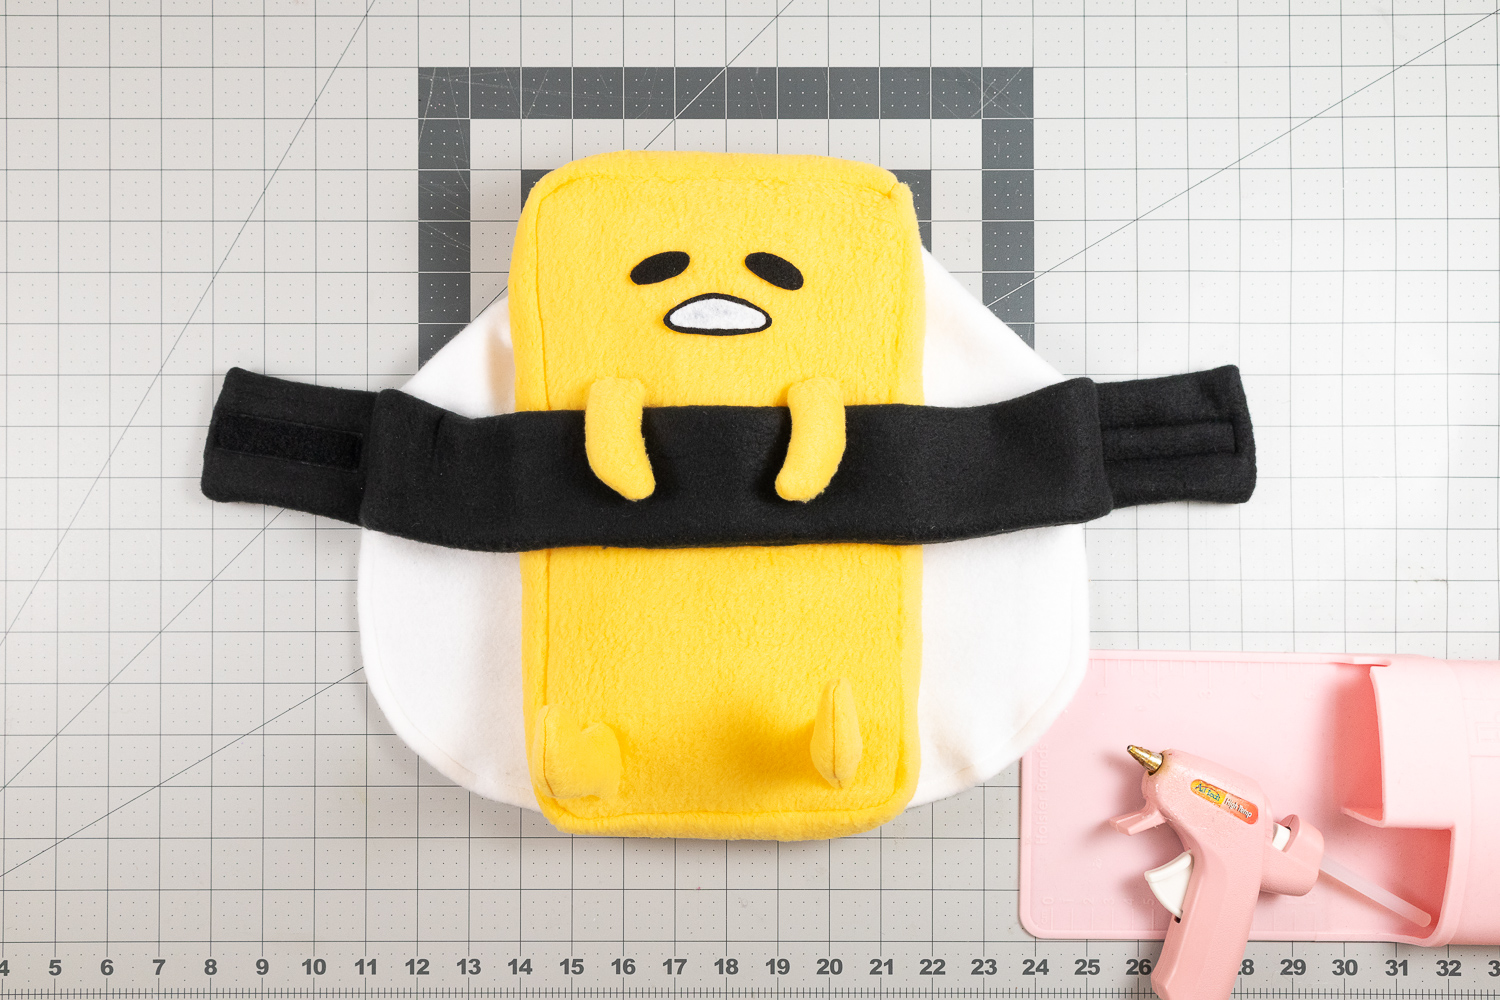
Face: Cut out black and white felt pieces for Gudetama’s face. Attach these pieces with hot glue.
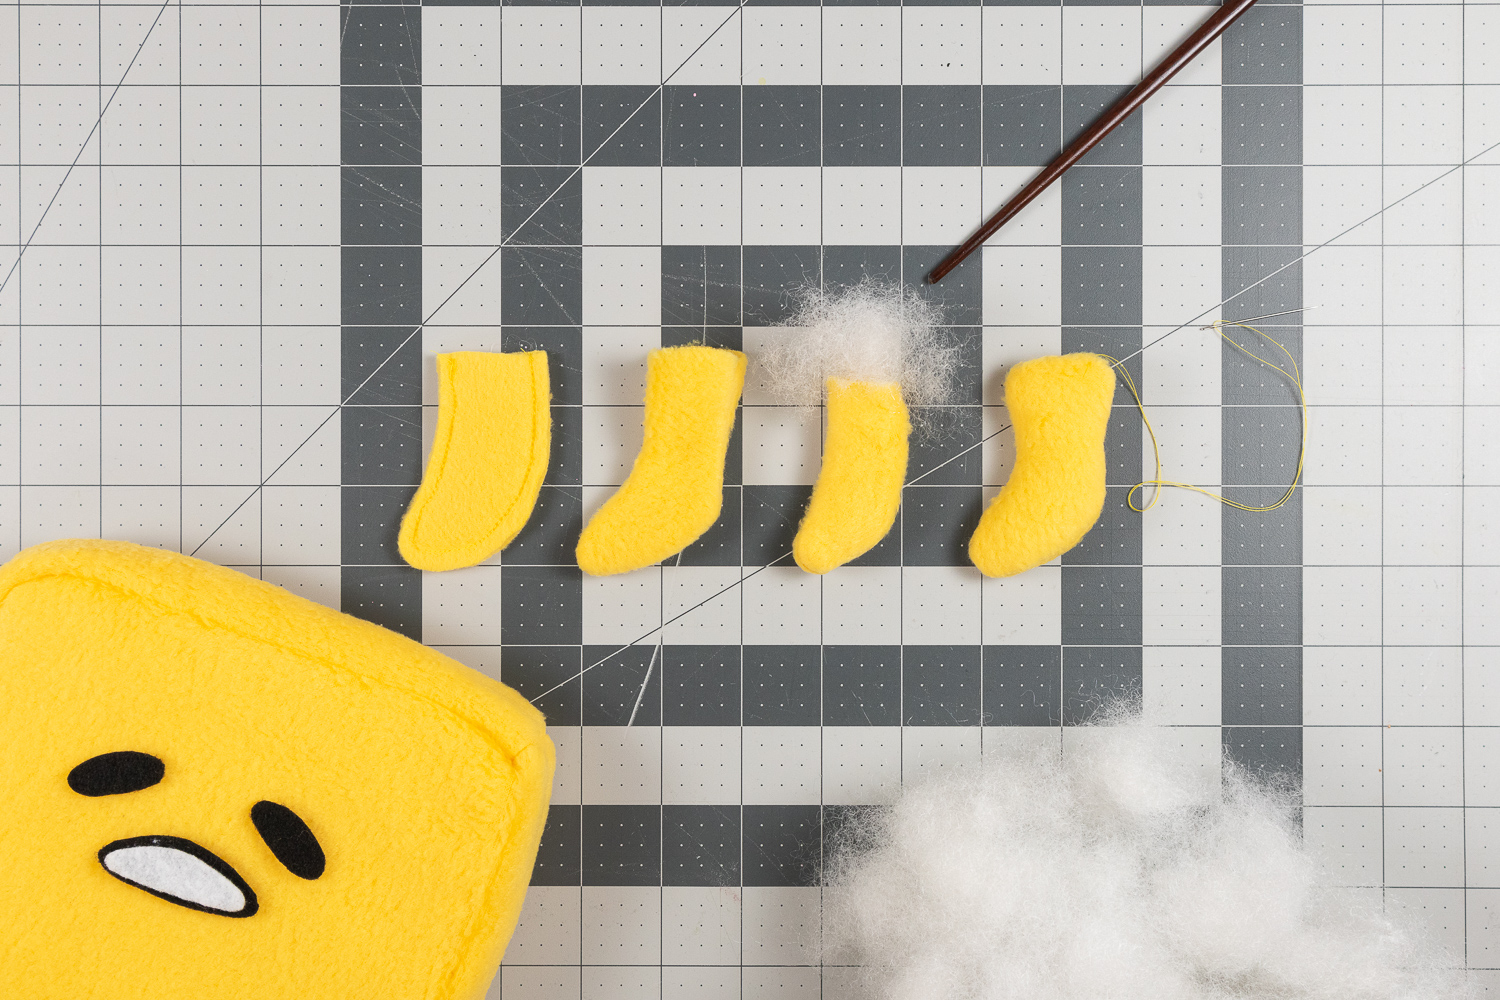
Arms and legs: Cut out arm and leg pieces from yellow fleece. Sew around the arm/leg pieces leaving an opening at the top. Flip right side out and fill with polyester, using a chopstick to disperse filling. Close the opening with a blind stitch.
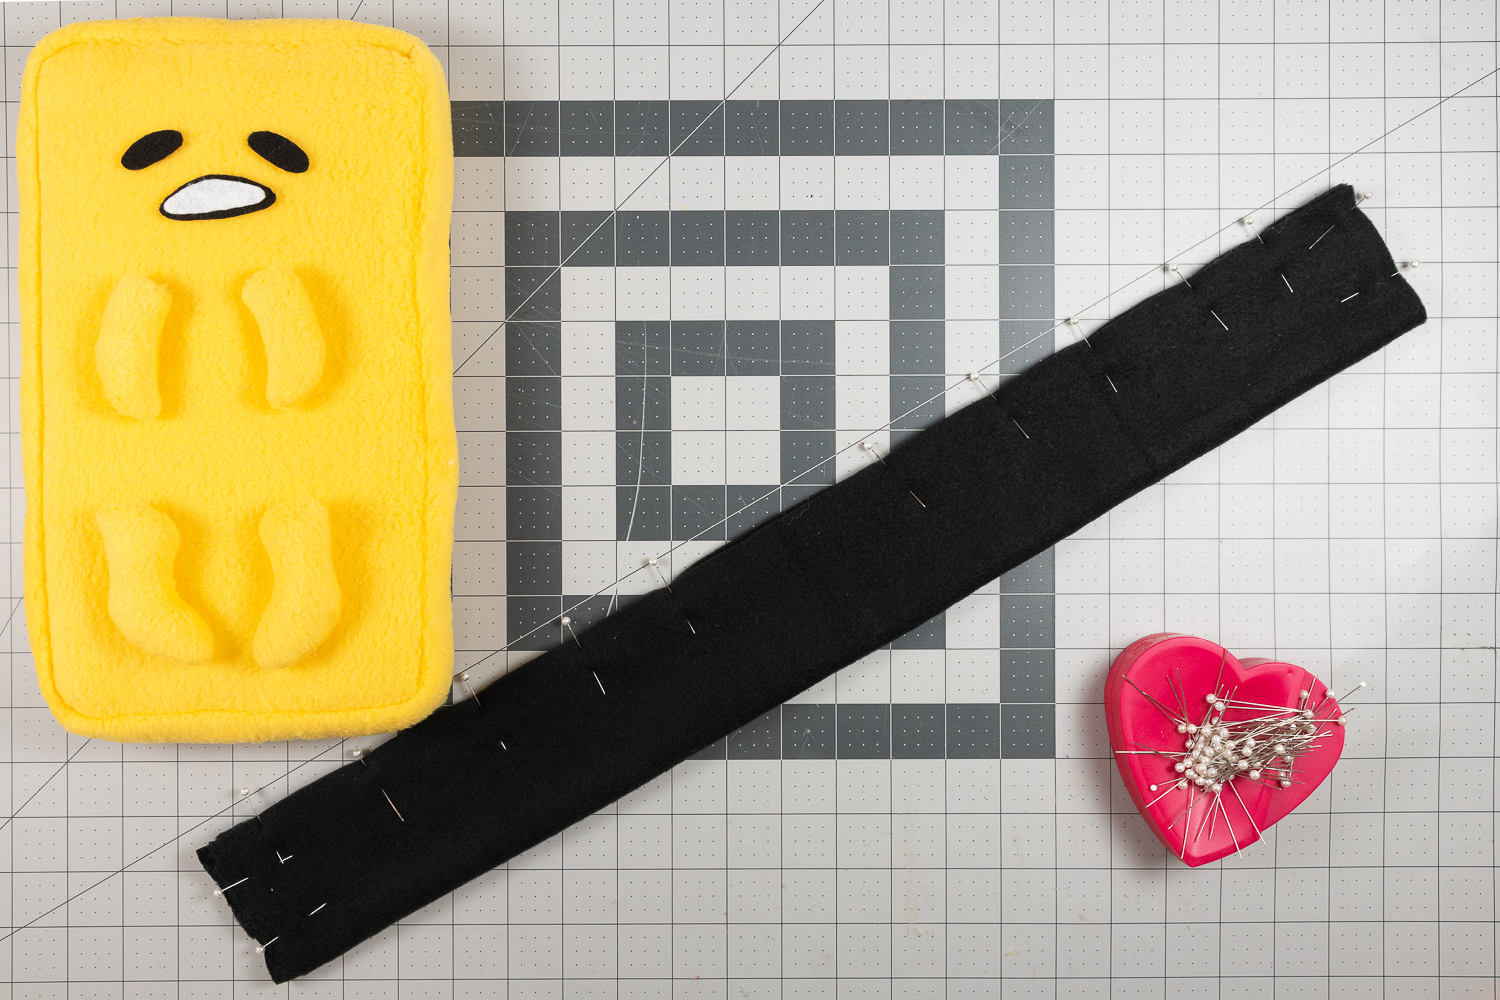
Nori strap: Cut a large piece of black fleece long enough to wrap around the egg, sushi rice jacket and your dog’s body. Fold the black fleece in half, right sides together. Pin all around the edges leaving a 4-5 inch opening along the long edge. Sew around edges and flip right side out through the opening. Use a chopstick to define corners. Then close opening with a blind stitch.
5. Assemble Costume
Place the white sushi rice jacket down, with the tamago piece on top. Place the nori strap horizontally over both pieces and pin in place. This would be a good time to check the placement on your dog (yes another try-on sesh!). Pin black VELCRO strips to both ends of the nori strap. Remember to check the VELCRO tape orientation! To keep your pet comfortable, always have the rougher side of the tape facing out. Sew the VELCRO strips onto the nori straps. Then sew the nori strap onto the sushi rice jacket. Use some hot glue to secure the center of the egg to the white fleece.
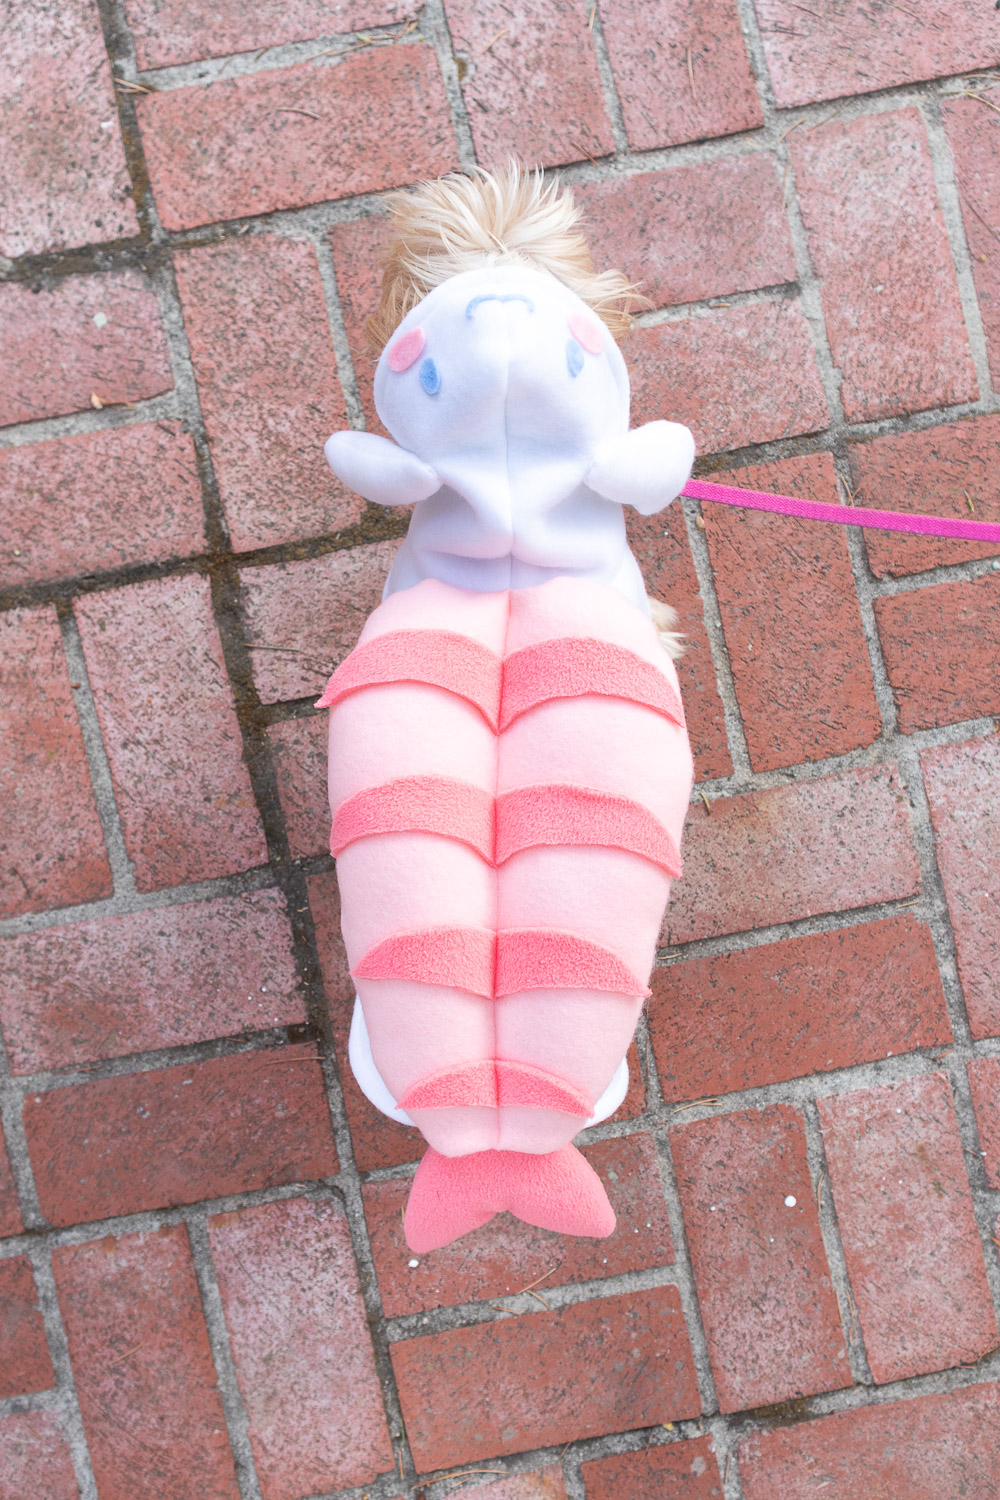
Cinnamoroll Ebi Nigiri Dog Costume
This ebi sushi dog costume is almost cute enough to eat! The adorable Cinnamoroll hood adds even more sweetness.
Ebi means “shrimp” in Japanese. Ebi nigiri sushi has shrimp that is butterflied and boiled before being placed on a ball of sushi rice.

** Refer to How to Make Sushi Rice Body first
How to Make Ebi (shrimp) Topping
Materials
Paper
Pencil
Peach fleece
Coral fleece
White fleece
Felt – Light blue, light pink
Sewing machine
Sewing pins
Hand sewing needle
Hot glue gun + glue sticks
Instructions
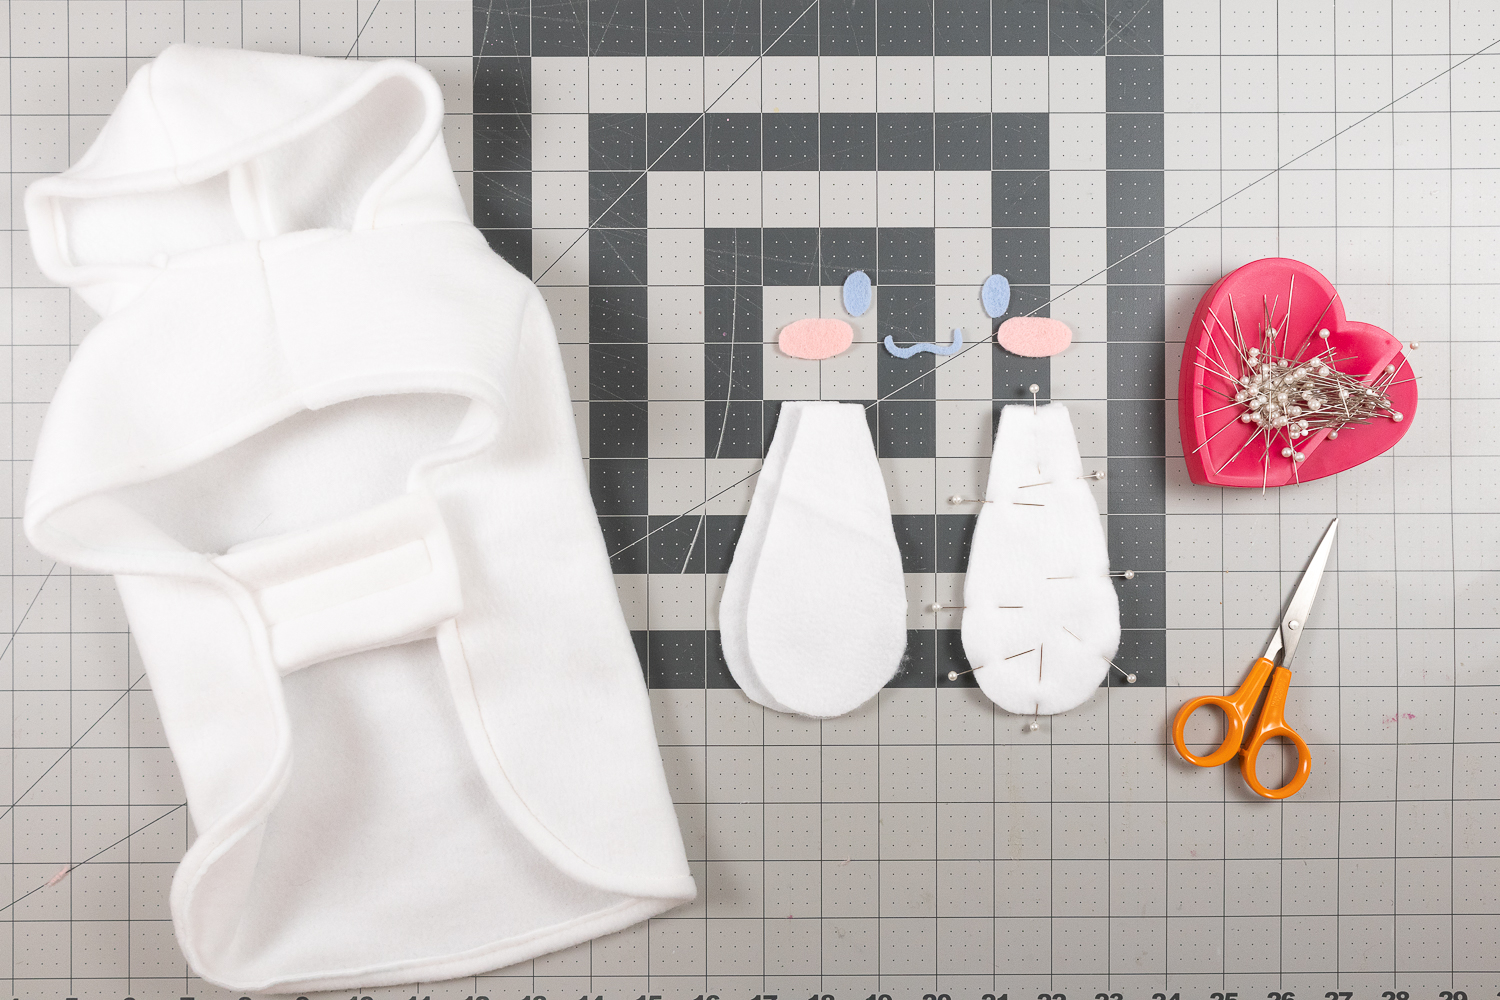
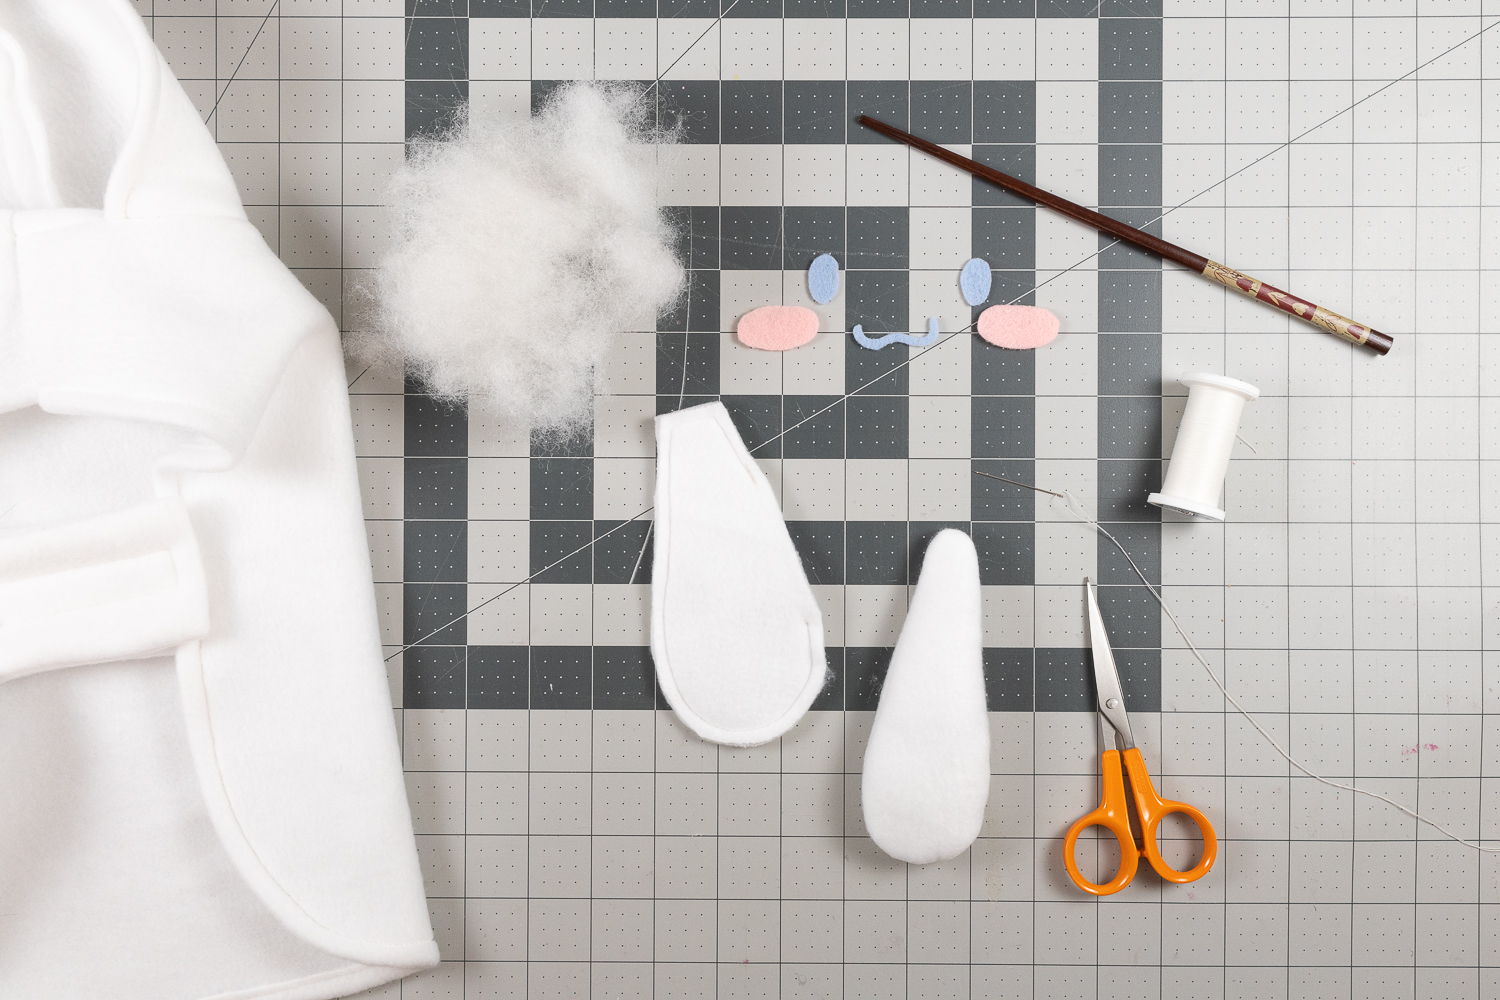
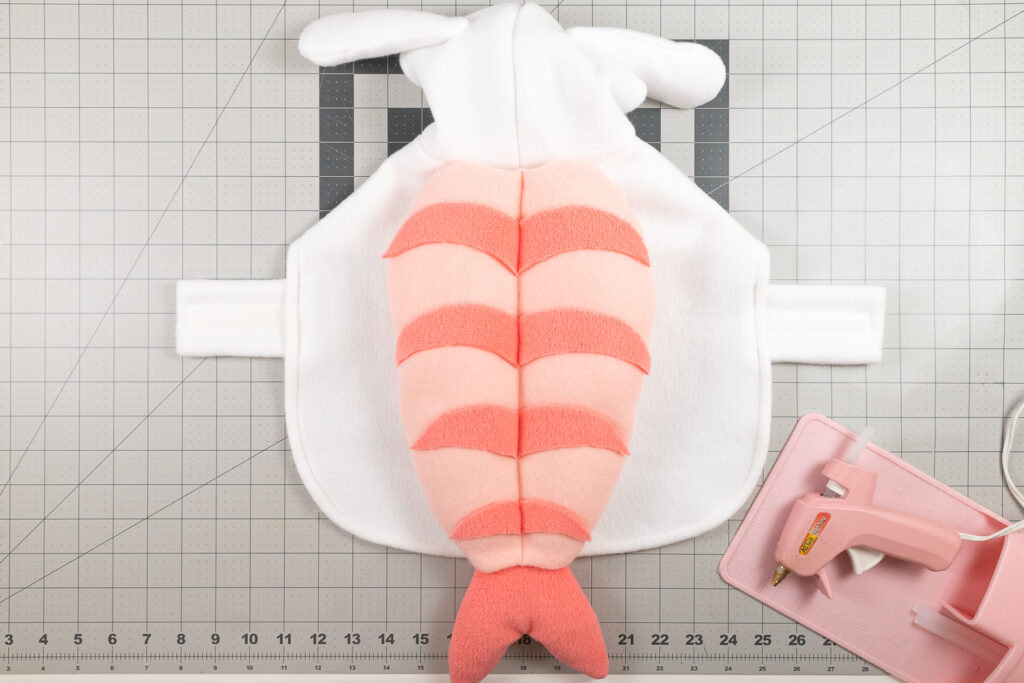
Refer to images of Cinnamoroll sushi for best results.
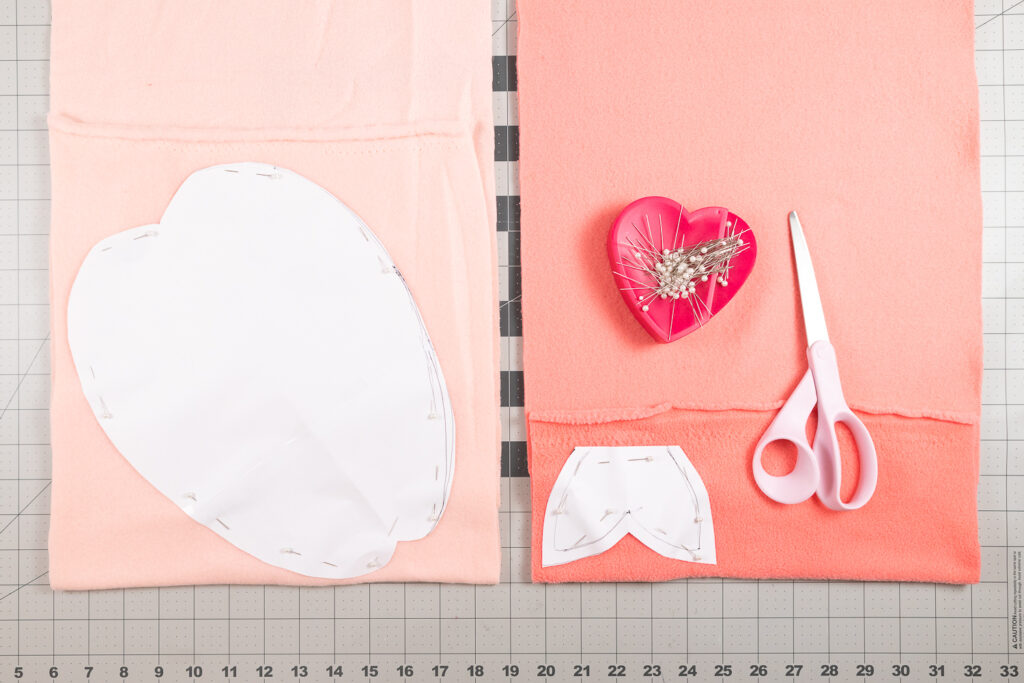
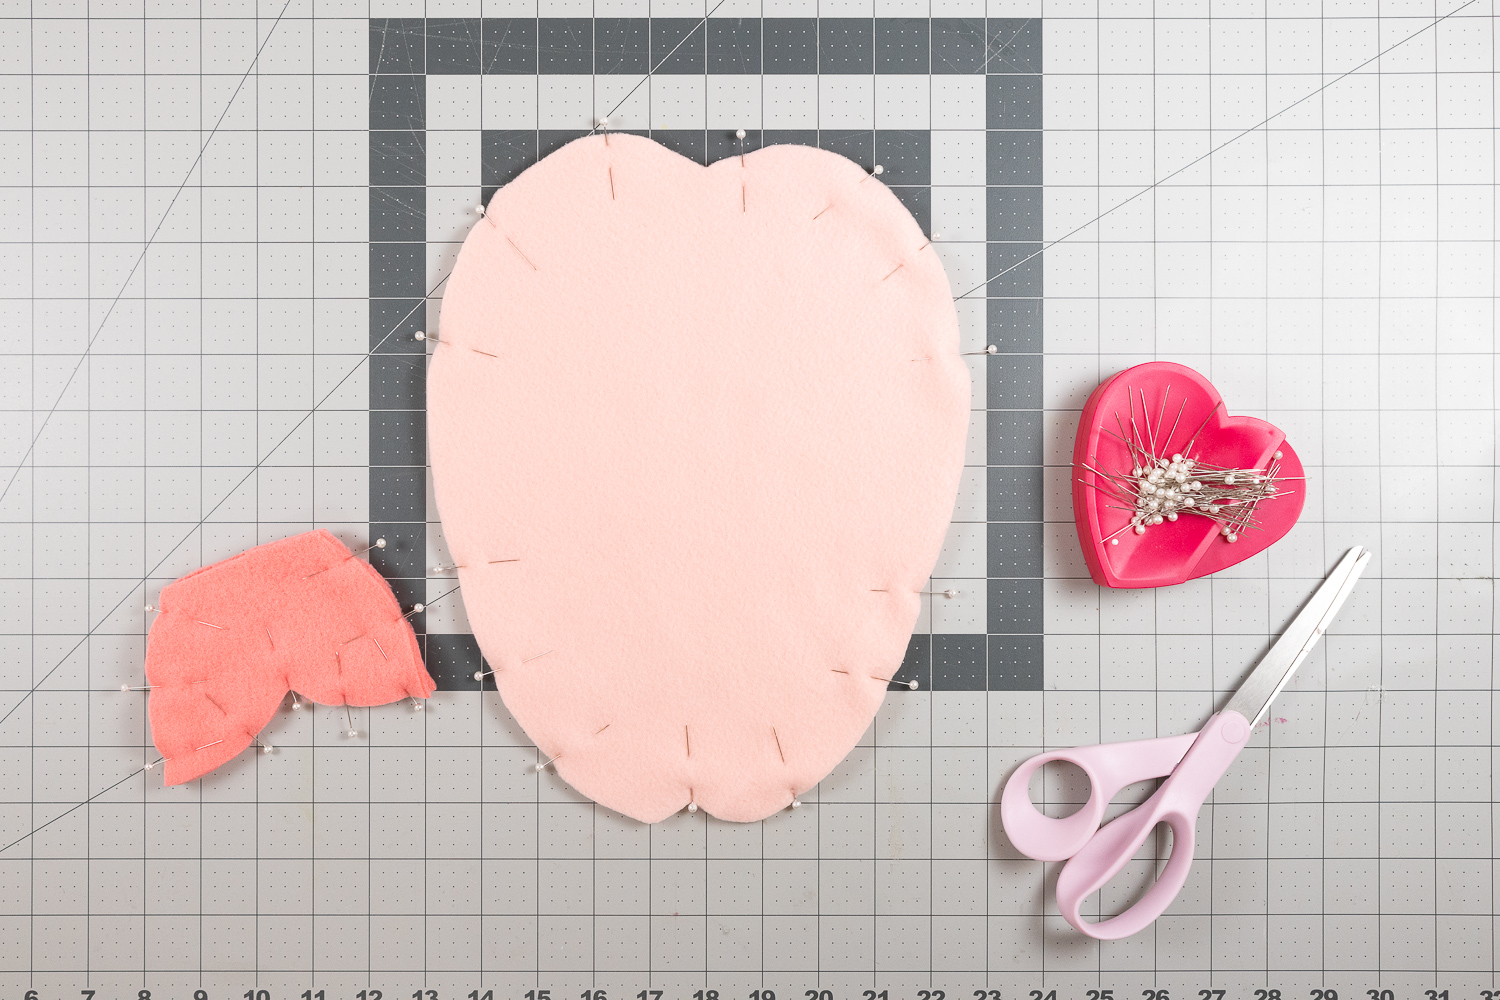
1. Cut out shrimp pieces
Sketch out two shapes for the shrimp on a piece of paper – one for the body and one for the tail. The length of the shrimp body should be roughly the length of your dog (from the neck to base of tail). Remember that these will puff up once they’re stuffed, so draw them a wider to accommodate this. Cut out two body pieces from peach fleece and two tail pieces from coral fleece.
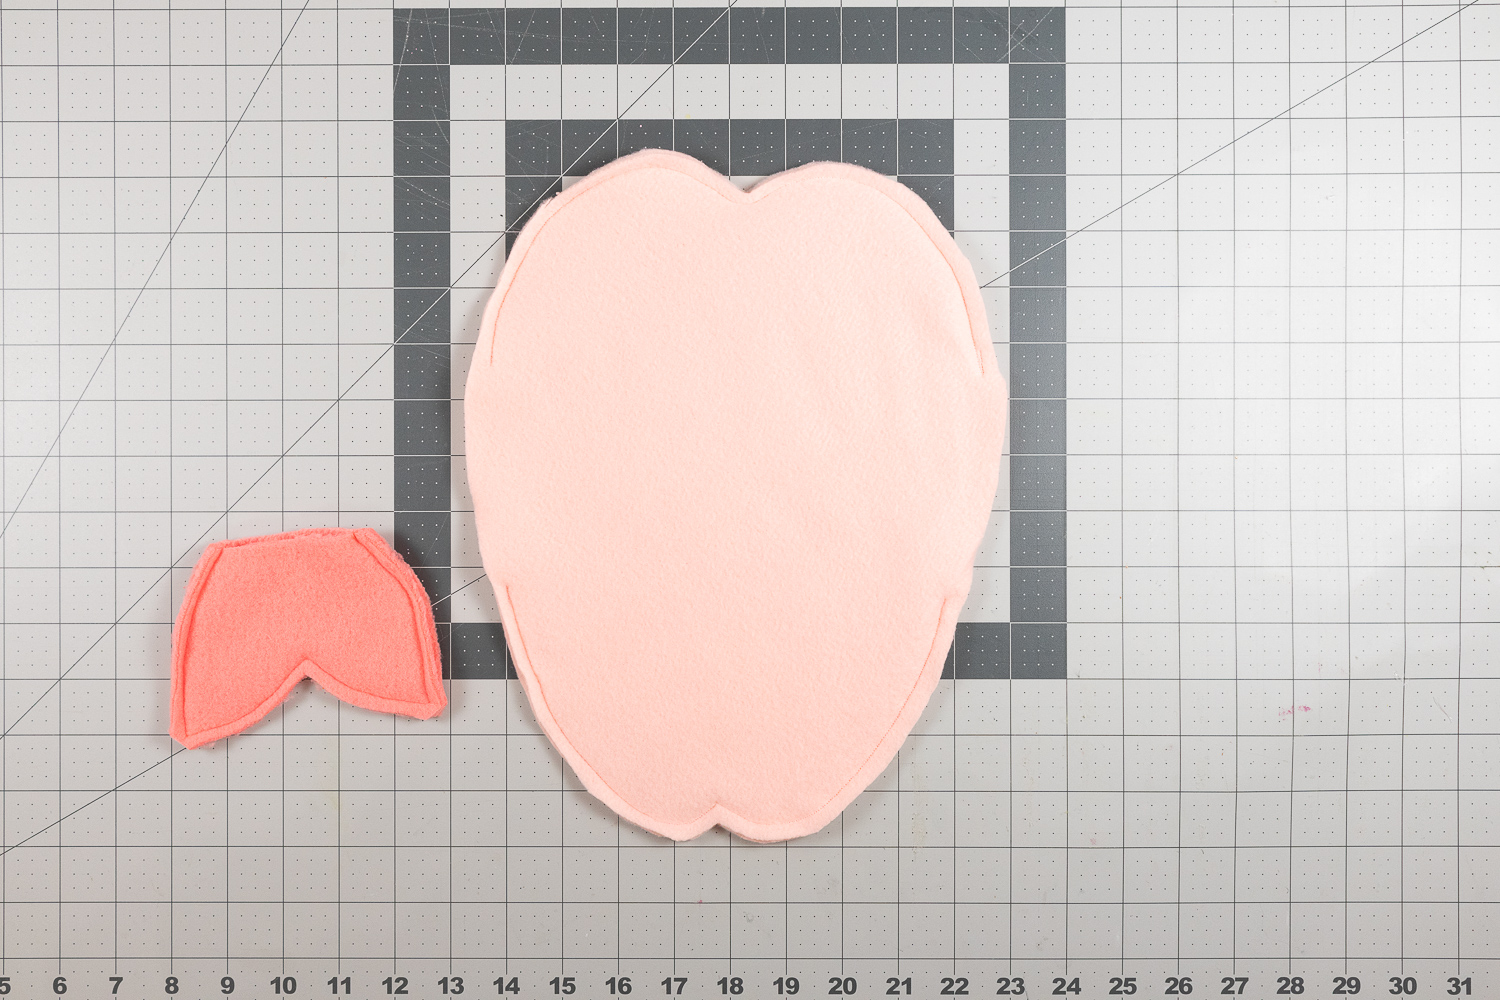
2. Sew shrimp Pillow
Place the two body pieces right sides together and pin all around leaving two openings (one on each side). Place the two tail pieces right sides together and pin all around, except for the base.
Sew along the pinned areas, then flip both pieces right sides out.
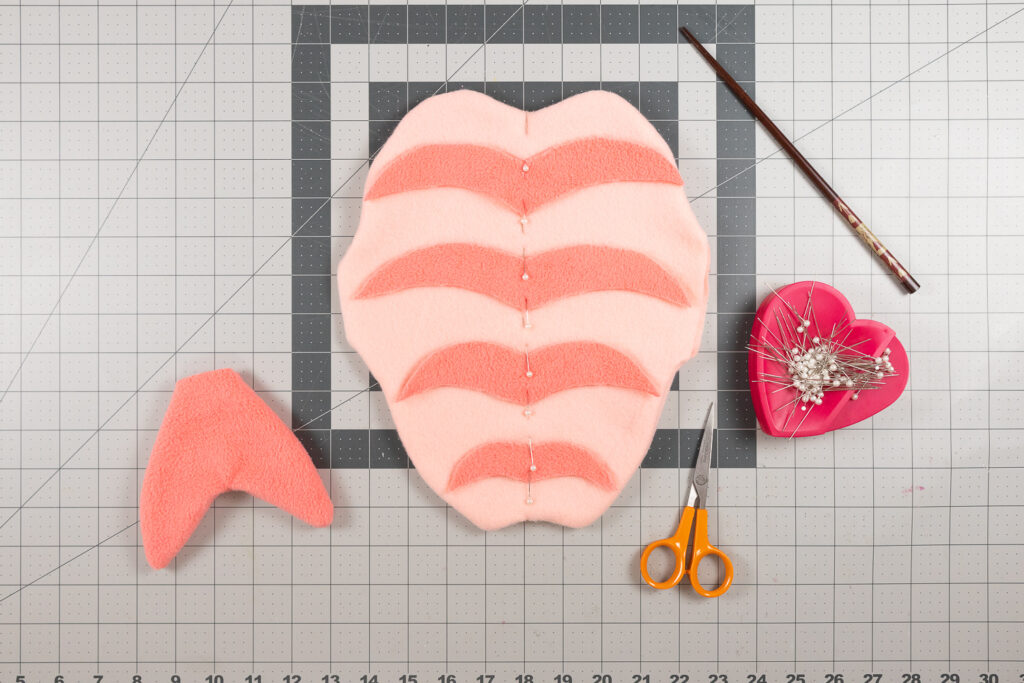
Cut several scalloped stripes out of coral fleece for the ebi body. Pin them to the body piece and sew straight down the middle. Then hot glue the stripes to hold them in place. This will help to create that butterflied shrimp look.
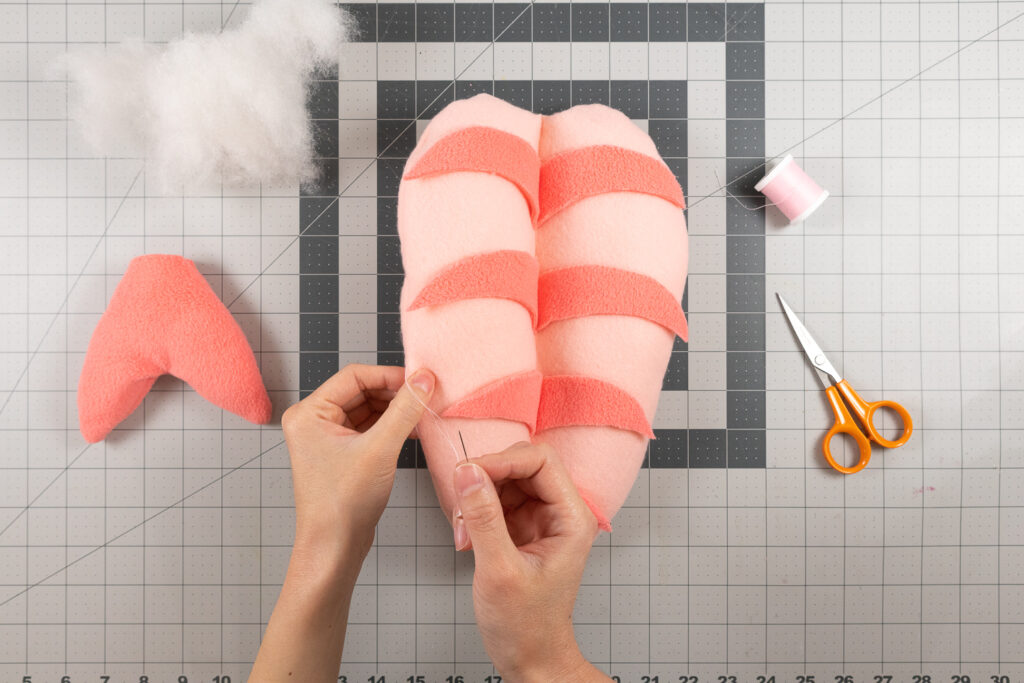
3. Stuff shrimp pillow
Stuff polyester filling into both sides of the shrimp body until plump and symmetrical. Close the openings with a blind stitch.
Stuff polyester filling into the tail. Hot glue the shrimp tail under the end of the shrimp body.
4. Add Cinnamoroll details
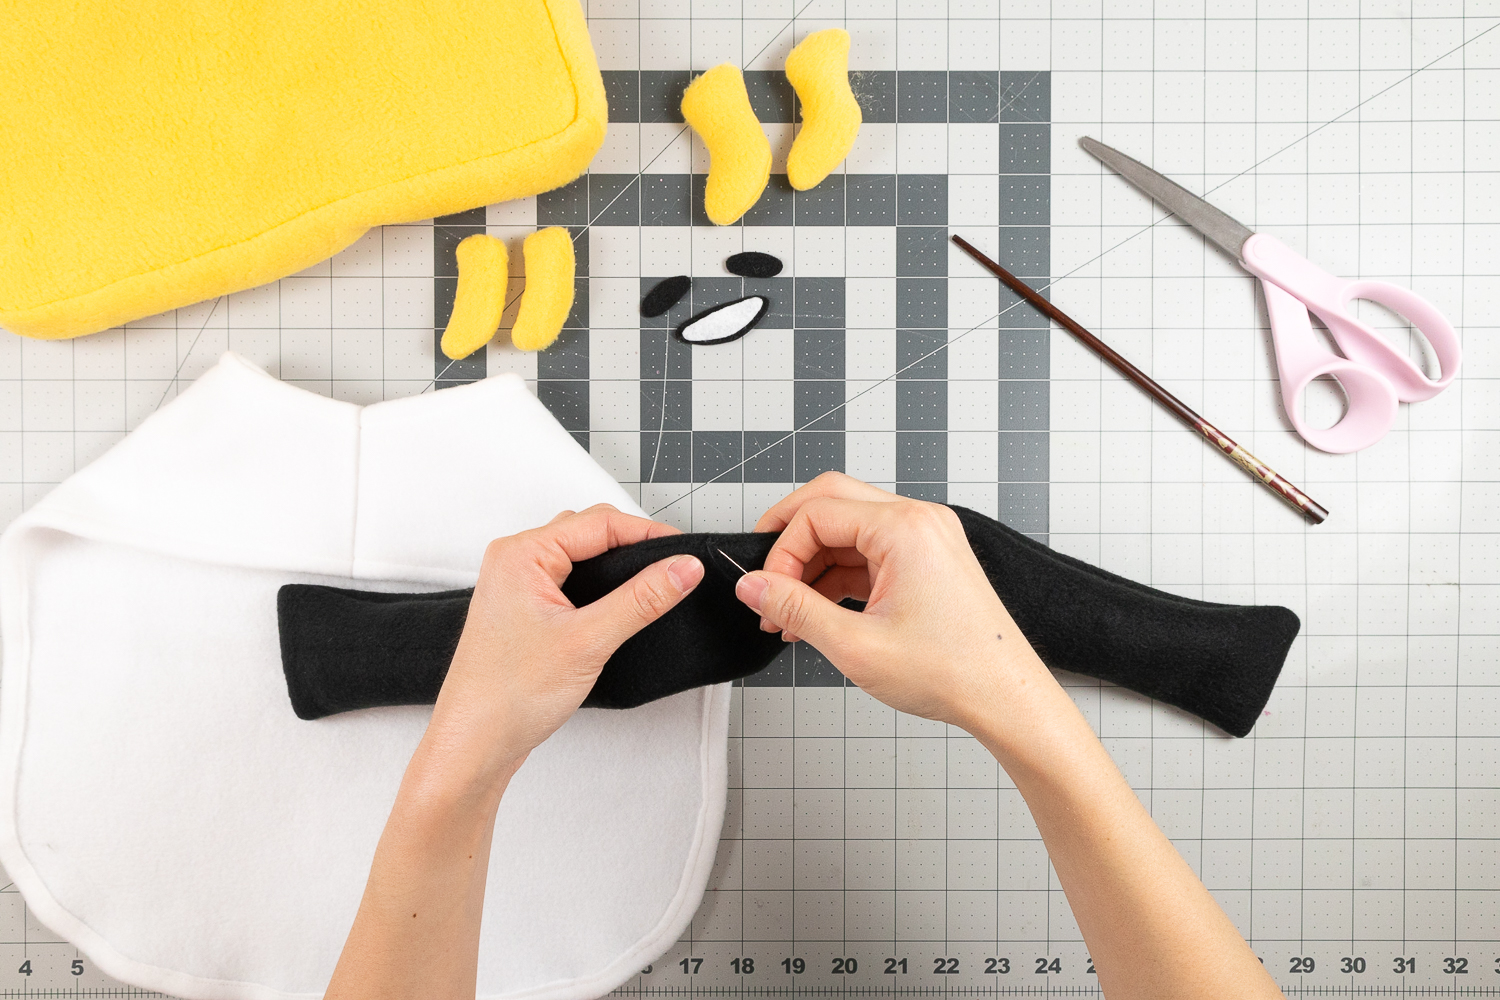
Ears: Cut out 4 ear shapes from white fleece. Pin two ears right sides together and sew all the way around, leaving an opening on one side. Flip the ear right side out, stuff with polyester filling and hand sew to close the opening. Repeat with the second ear. Sew ears to the top of the hood.
Face: Cut out eyes and mouth from light blue felt and two cheeks from light pink felt. Position them near the front of the hood then glue in place.
5. Assemble Costume
Finally attach the completed shrimp to the back of the white rice jacket with hot glue. You may want to have your pup try this on before gluing in place. I found that for Penny, I only needed to glue down the middle part of the shrimp along her spine.
Pin this photo!
Happy Crafting!
If you loved these sushi costume tutorials, let me know! Tag me in your costume photos on Instagram!
Want more Sanrio crafts? Check out these fun tutorials:
- Sanrio Tamagotchi Easter Eggs Keychains
- Sanrio Halloween Pom Pom Garland (On the Sanrio Sweet Happy News Blog)