Sanrio Tamagotchi Easter Egg Keychains
These Sanrio Tamagotchi Easter egg keychains were inspired by the real thing! Remember when Tamagotchis came out in the 90’s? It was a huge hit and almost every kid had one hiding in their backpack. I had a purple one with hot pink accents. Keeping my virtual pet alive was addicting and challenging! If you didn’t feed it or pick up it’s poop on time, it would get sick and die. It was really like caring for a tiny pet in the palm of your hand. I was (and still am) equally obsessed with Sanrio! I remember saving my money so I could go to the Sanrio store in the mall and buy items from the latest Hello Kitty, Pochacco or Chococat collection. These childhood memories have a special place in my heart and makes me want to revisit them.
Some of the below links are affiliate links and if clicked, I may make a small commission at no cost to you. As an Amazon Associate I earn from qualifying purchases.
The Inspiration
Recently I saw a photo of the new Hello Kitty Tamagotchis and thought the design was so adorable! I wasn’t about to buy a set of them (I already have two real pets at home!) but thought they could serve as inspiration for my next project. I searched more online and found this photo of Sanrio Tamagotchi candy cases. A lightbulb went off in my head and I decided I HAD to make Easter egg versions of Sanrio Tamagotchis!!
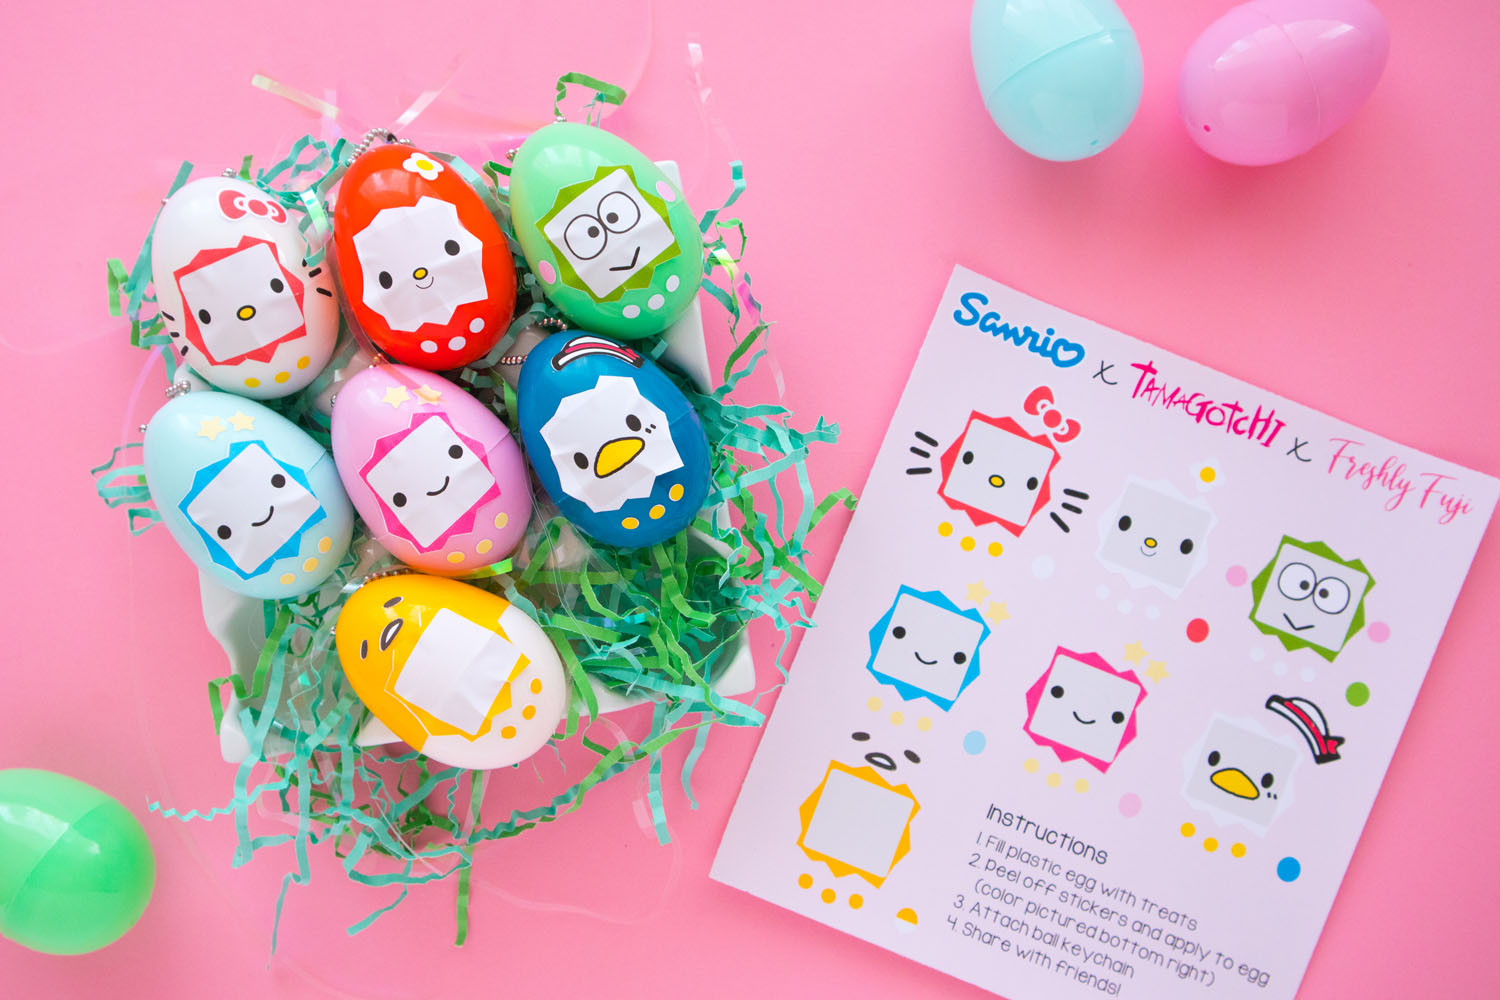
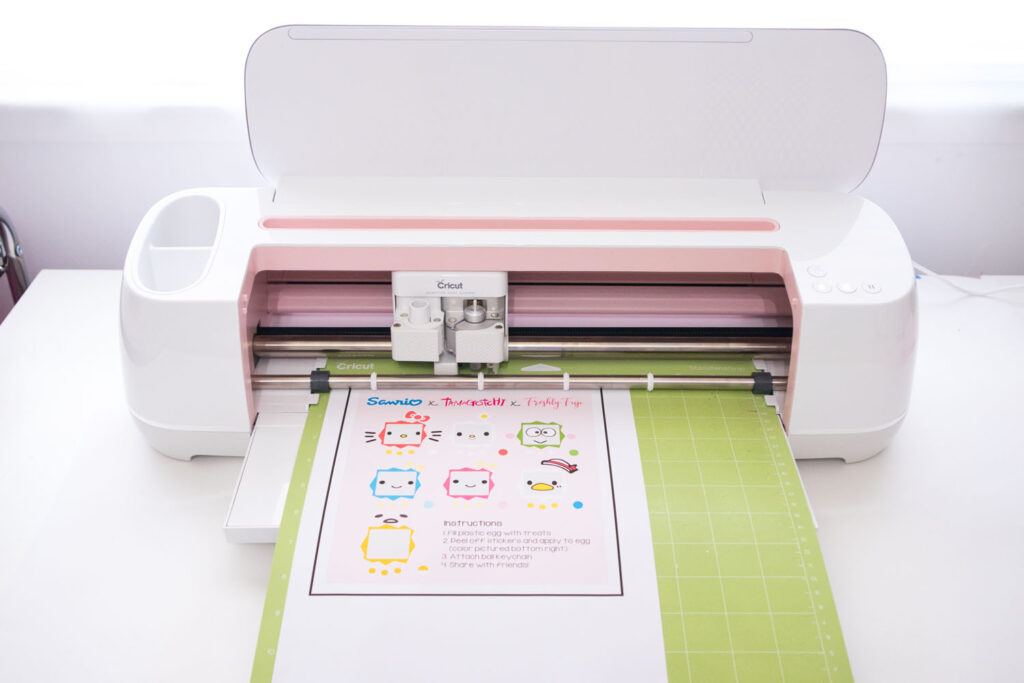
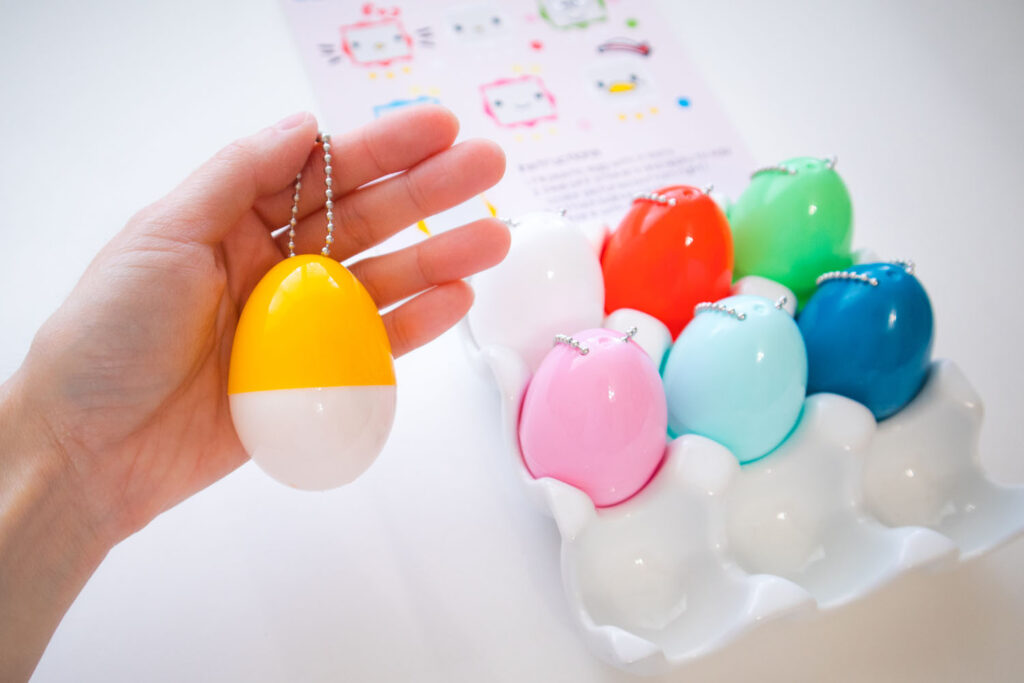
I figured I could make stickers using Cricut’s Print then Cut feature and apply them to plastic eggs for a similar look. Fortunately Target had the PERFECT colors of Easter eggs this year. It was only $1.00 for a set of 12! (I did have to purchase additional white plastic eggs from Hobby Lobby for the Hello Kitty and Gudetama eggs.) These plastic eggs were practically made to be Tamagotchis! Did you see their perfect placement of the holes at the top?! 😜
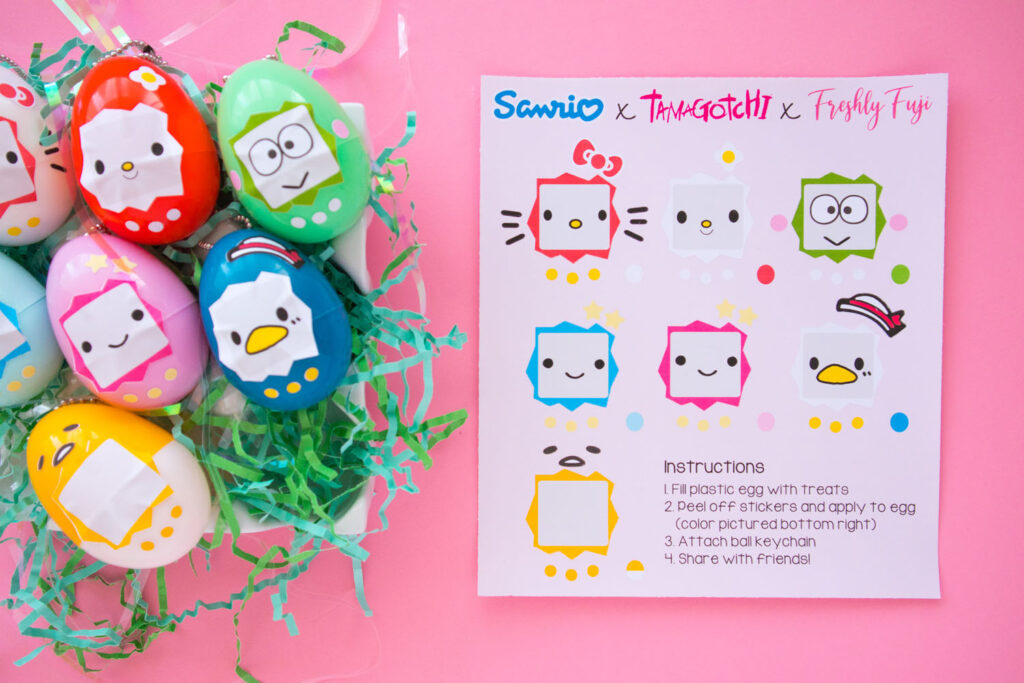
FYI – The actual sticker sheet will be slightly different from the one shown above. I originally designed these stickers in Design Space unaware that I could not share the design with Cricut users (since I uploaded some elements). To resolve this problem, I redesigned them outside of Design Space. Now you can download the files and upload them to Design Space on your own! The revised design looks slightly different from the sticker sheet pictured above, but functions the same. I’ve renamed them “Kawaii Easter Eggs” to avoid using brand logos. To keep the sticker page look, I made two files (one for the stickers and one for the background) that you’ll need to resize and attach before proceeding to Print Then Cut.
Once the stickers have been printed and cut out, you can apply the stickers to your eggs! You could also use these stickers on colored hard boiled eggs if you prefer. You just won’t be able to attach keychains.
Let’s get cracking!
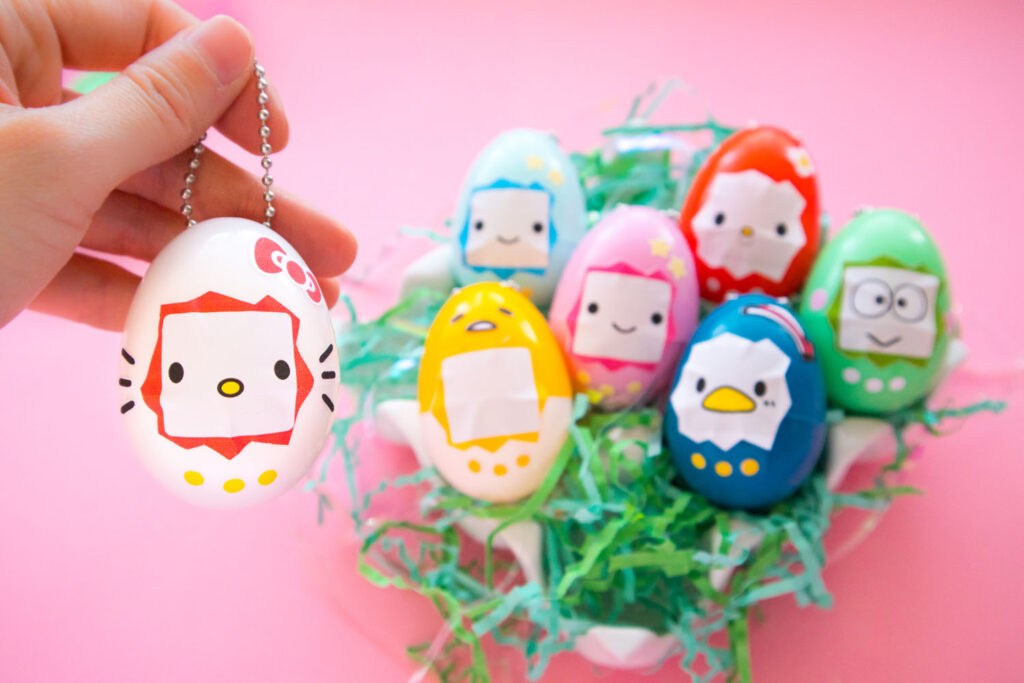
This project is designed to make 7 super cute Tamagotchis inspired by your favorite Sanrio characters. They are so fun to make and give away! Stuff them in Easter baskets or gift them to your favorite Sanrio or Tamagotchi collector!
Disclaimer: This is NOT a licensed Sanrio or Tamagotchi product. This project was inspired by the Sanrio X Tamagotchi product and is intended for personal use only.
Materials
Plastic Easter Eggs – This set has almost the perfect combination of colors! You may want to purchase white easter eggs separately to complete the set.
Cricut machine (Explore Air 2, Explore 3, Maker, Maker 3)
Printable vinyl – I used this product since it’s thinner and more flexible than sticker paper.
Brayer (recommended)
Paper cutter or scissors
Instructions
Tips before starting
Calibrate your machine. If your machine was not calibrated recently this is a good time to do it. Calibration ensures your cut will line up precisely with the images you are printing. Here are the instructions for how to calibrate your machine.
Fix Lighting. Because the Print Then Cut operation relies on sensors to direct the machine where to cut, poor lighting or bright light directed at your machine may cause cutting problems. Make sure your machine is in a well lit space with even lighting before proceeding.
1. Download design
Go to my Free Stuff Library and download the Kawaii Easter Eggs zip file. Extract all the items in the folder. There will be two png images – one for the stickers and one for the the pink background.
2. Upload design to Cricut Design Space
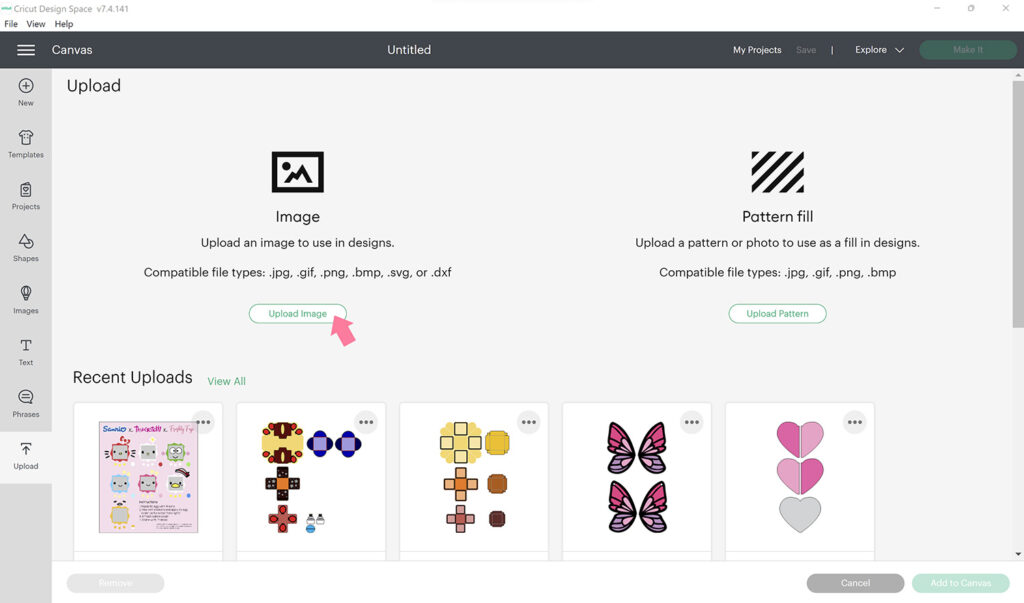
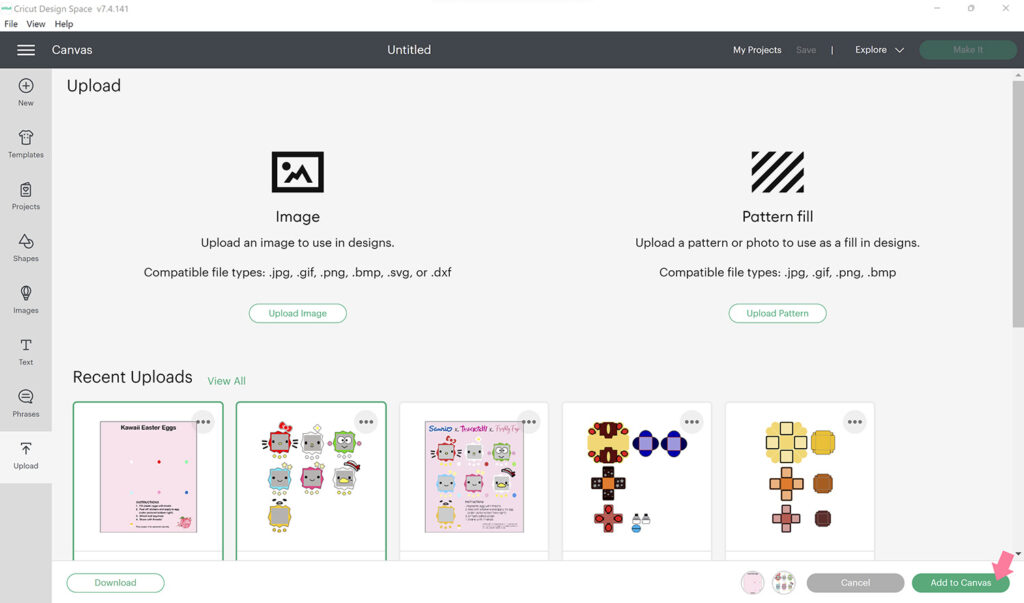
Open a new project then click the Upload button on the left panel. Click the Upload Image button then search for the first design file (the stickers image) on your computer.
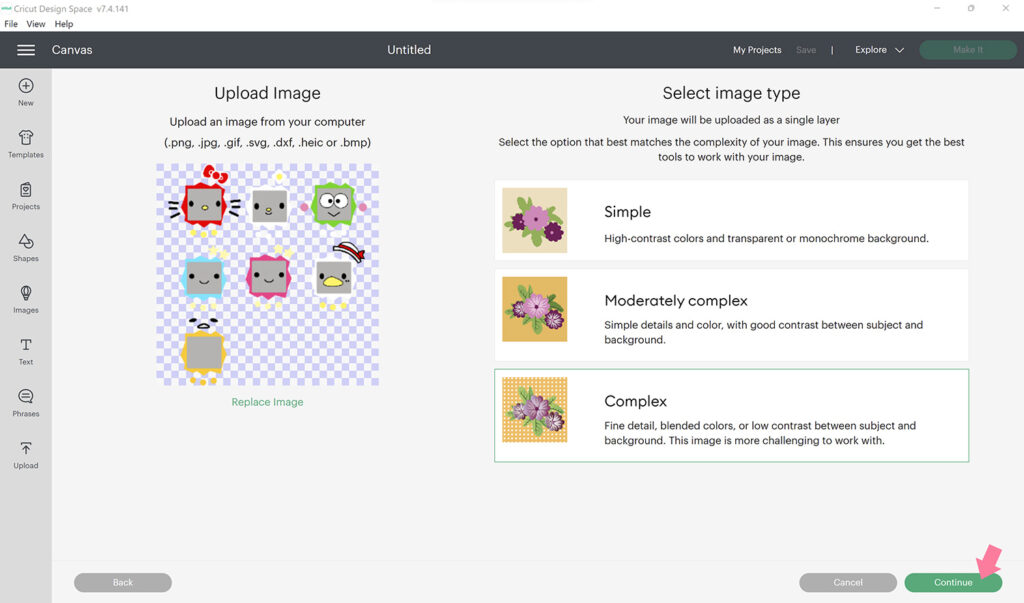
Once the image preview appears, select Complex for the image type (this will allow you to see all the colors and details for this design). Then click the Continue button.
The next screen will ask you if you want to remove any background. This is already done in my design process so click Apply & Continue.
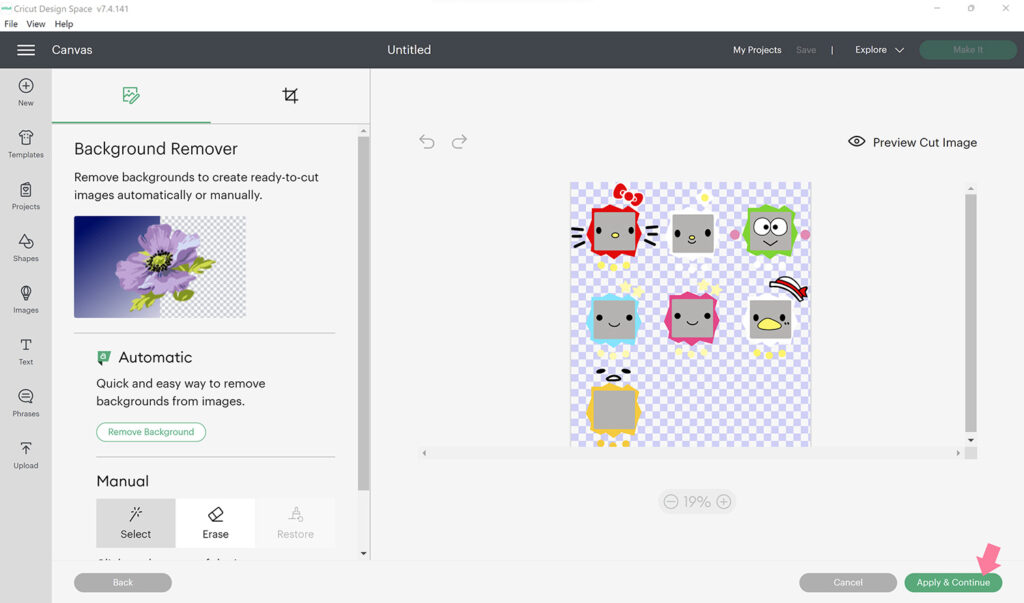
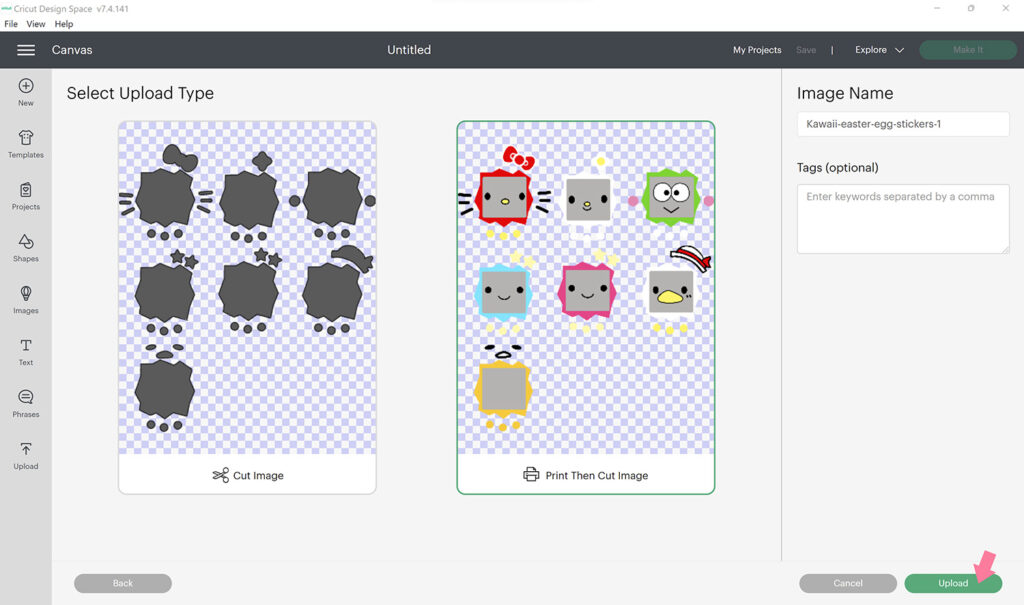
The next screen will ask you for the Upload Type. Select the right image that says “Print Then Cut Image” then click the green Upload button.
Repeat the same process for the second design file (the pink background). Once both files are uploaded, select both of the files and click the green Add to Canvas button.
3. Resize and attach designs
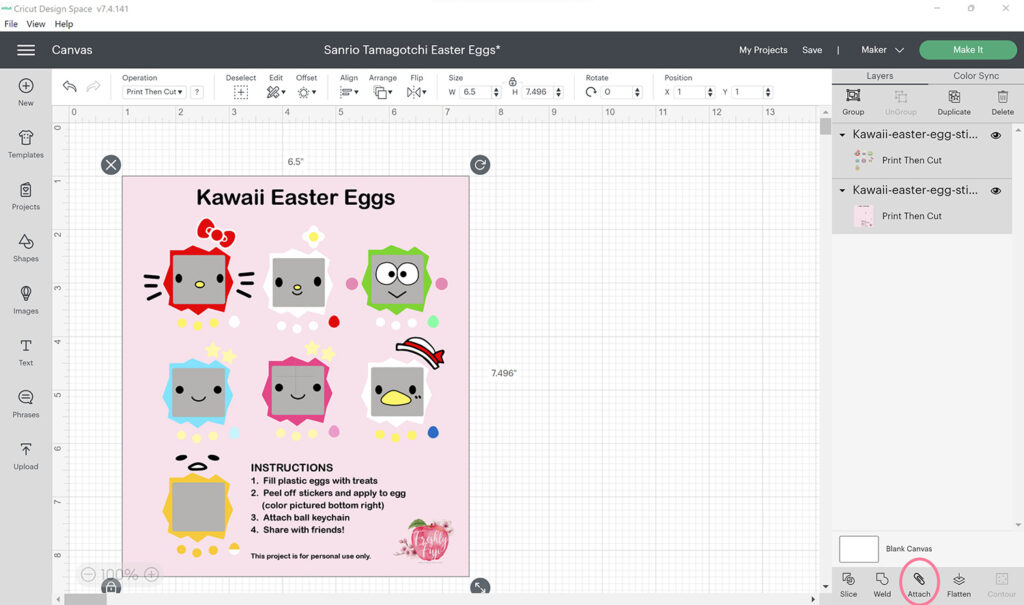
Once uploaded, the images may appear larger than intended so you will need to resize them. Click on the pink background image and resize it to 6.5 inches wide. You can do this manually by dragging the diagonal arrow so the width is 6.5 inches OR you can type “6.5” in the width section found on the Edit bar.
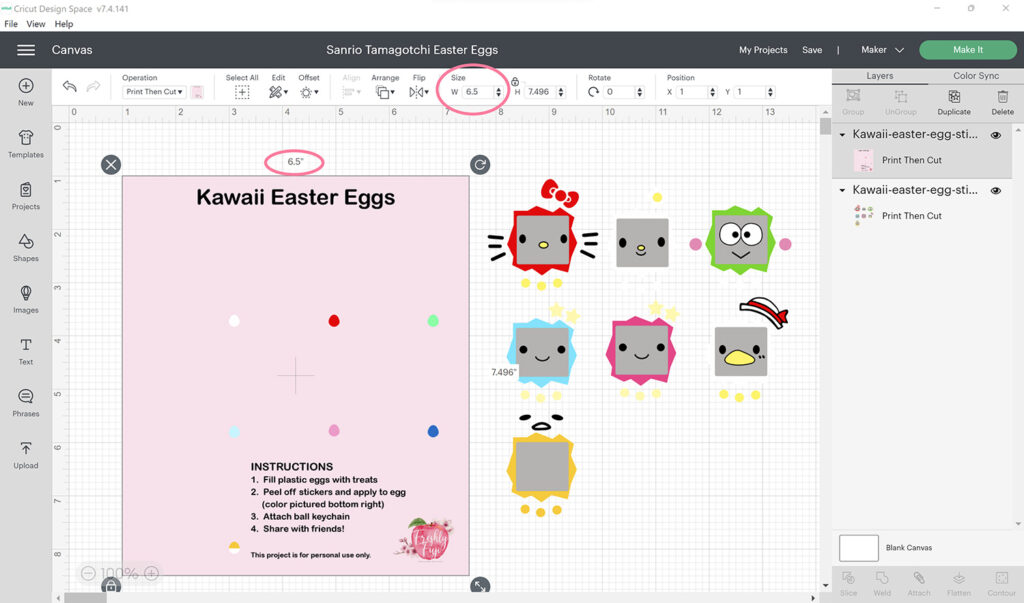
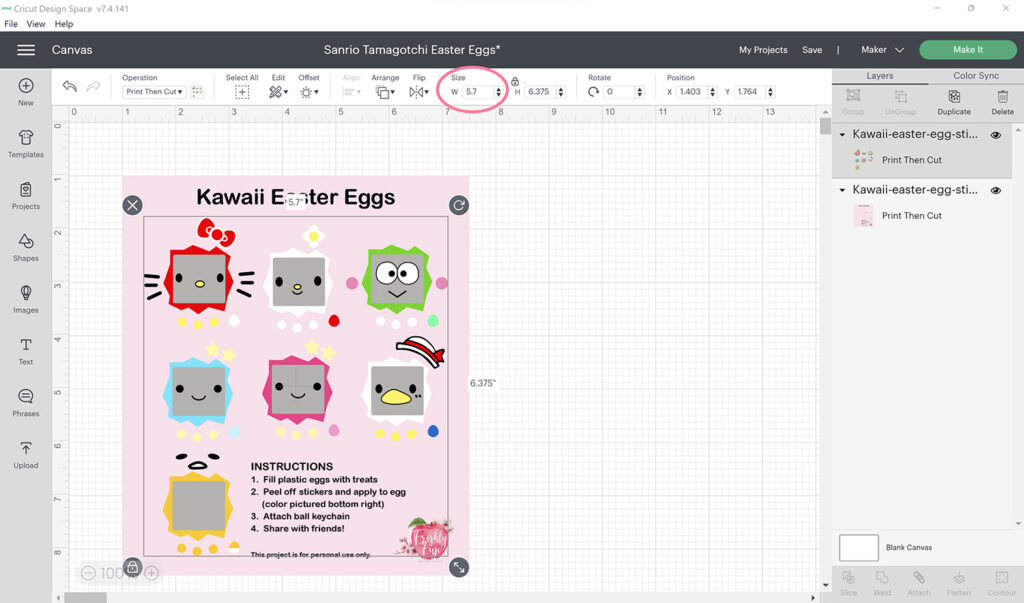
Next click on the stickers image and resize it to 5.7 inches wide. Then click and drag the stickers image onto the pink background image. You can use the Align function to help you center the placement of the stickers. If the stickers end up behind the pink background, click on the Arrange dropdown to send them to the front.
Select both the pink background image and stickers image. Do this by holding down shift while clicking on both images OR by clicking and dragging your mouse over both images. You should see both images highlighted on the Layers panel. Now click the Attach button on the bottom right. This will “attach” the stickers layer to the background layer so they will print out exactly as shown on your canvas.
4. Print design on printable vinyl
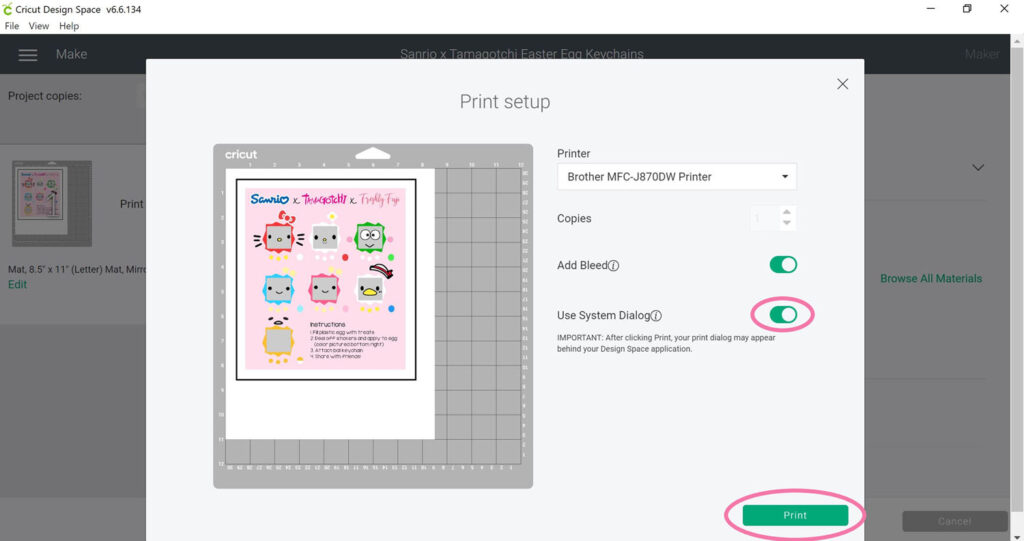
To proceed with making your stickers, click the green Make It button, then the green Continue button. Load one printable vinyl sheet into your printer tray (be sure to check which side of the sheet will be printing). Click the green Print button. A new dialog box will open. Make sure to turn on “Add Bleed”. I also turn on “Use System Dialog” as this allows me to adjust the quality of the printing. I always set the color mode to “Vivid” and the print quality to “Best” when printing stickers to ensure the image is crisp and fully saturated. Your printer will print a black registration box around your sticker design in preparation for cutting. Once finished printing, allow the vinyl to dry completely before moving on to the next step.
5. Cut printable vinyl
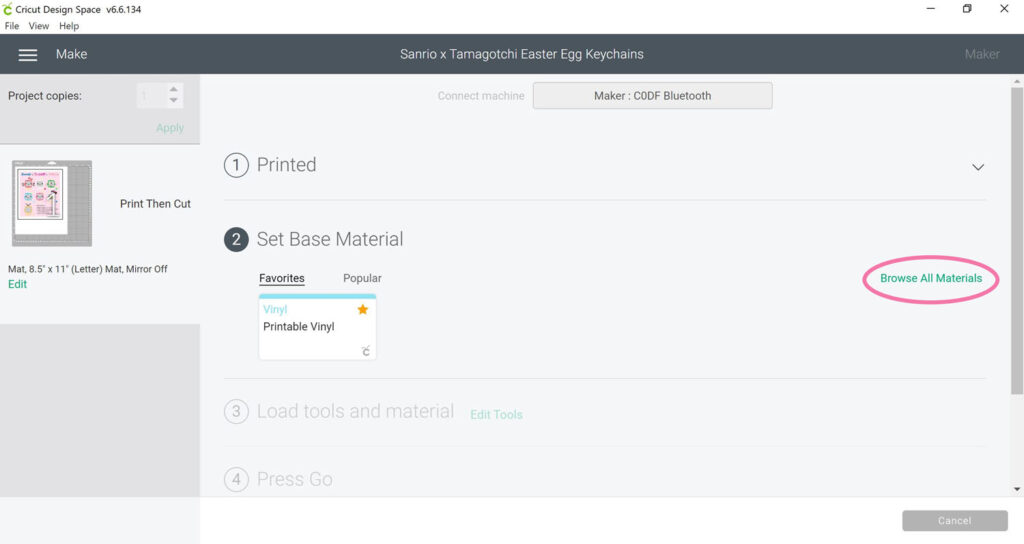
Set the base material to “Printable Vinyl”. You can find a complete list of materials by clicking on the green Browse Materials link.
Place the printable vinyl sheet onto your cutting mat, printed side up. Align the top left corner with the lines on the grid as shown in your Design Space preview. Use a brayer to ensure the vinyl sheet is fully adhered to the mat with no bubbles. Load your fine point blade into your machine. Insert the cutting mat into your machine and hit the flashing arrow button. Once the machine pulls in the mat, hit the flashing Go button. The machine will scan the black registration box around your image then cut out the stickers.
After your printable vinyl sheet has been cut, unload the mat by pressing the flashing arrow button. Flip the mat over and carefully peel the mat away from the vinyl to avoid curling it.
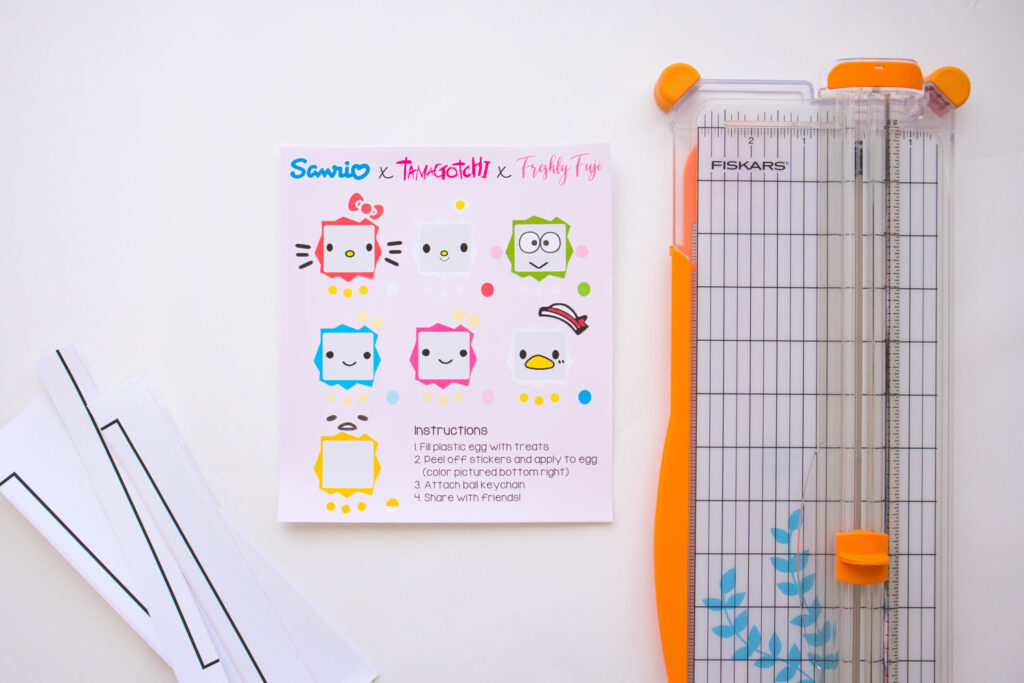
6. Trim sticker sheet
Trim around your sticker sheet using a paper cutter or scissors. This is especially nice if you’re going to be giving the sticker sheet as a part of a gift! Keep reading for gift ideas. You can skip trimming if you’re eager to use them right away!
7. Attach keychain to eggs and fill with treats
Thread ball keychain through the two holes at the top of the plastic egg and secure. Add any treats and close the egg. Repeat with the other eggs.
8. Apply stickers to eggs
Finally, peel off stickers and apply them to the corresponding eggs. The suggested egg colors are found on the sticker sheet at the bottom right of each character. The hardest part is applying the large screen sticker. Start by positioning the middle part of the sticker and then gently pressing down the edges. There will definitely be creases since the egg’s surface is quite round, so don’t worry if it’s not totally smooth and perfect. It’ll still be super cute!
Gift ideas!
Make a DIY kit: Place 7 plastic eggs, ball keychains, small treats, and a sticker sheet into a goodie bag. Give to your favorite crafty pal!
Party favors: Assemble the eggs and give one to each party guest.
Fill an egg carton: Use a half dozen egg carton and add a mix of filled eggs and small toys. Decorate the outside of the carton for an eggstra fun touch!
Easter basket décor: Attach a single keychain as decoration for your Easter basket or hide some inside for a fun surprise!
So Kawaii!
Did you love this project as much as I did? If you end up making these kawaii (cute in Japanese!) Easter eggs, tag me on Instagram. I would love to see and share your creations. Happy crafting!
If you’re interested in more Easter craft ideas, check out my Peeps Pizza project!
Head back to my blog for more DIY projects and inspiration!
YVONNE
THESE ARE ADORABLE.