How to Make a Tie Dye Wreath Pillow
It’s the most wonderful time of the year! One of my favorite things about the holidays is decorating my home and making it feel festive. I love how seasonal pillows can bring so much character to my home, but I hate having to store them all once Christmas is over. I like using pillow covers because after the holidays you can take them off the pillow form and store them flat. You can even personalize plain pillow covers to match your home’s style and color palette.
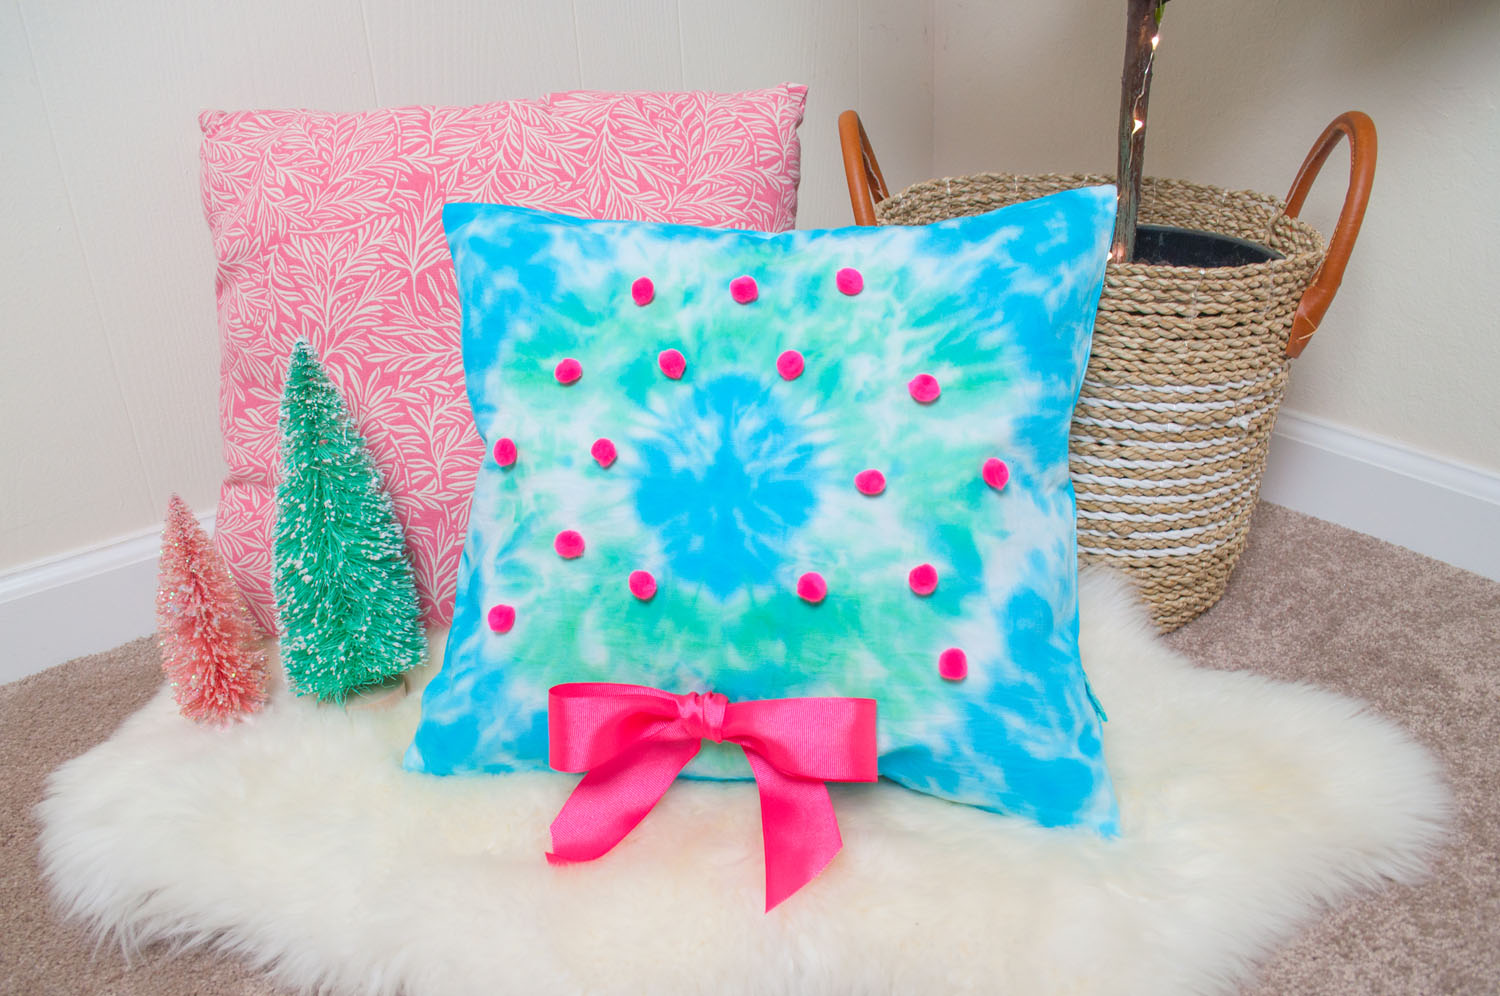
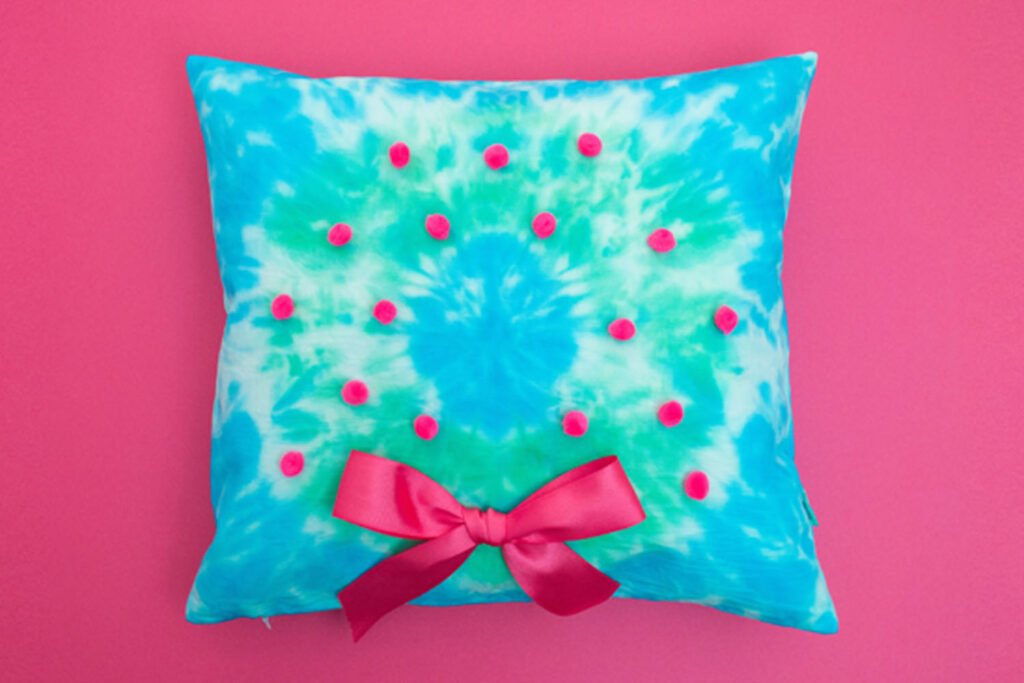
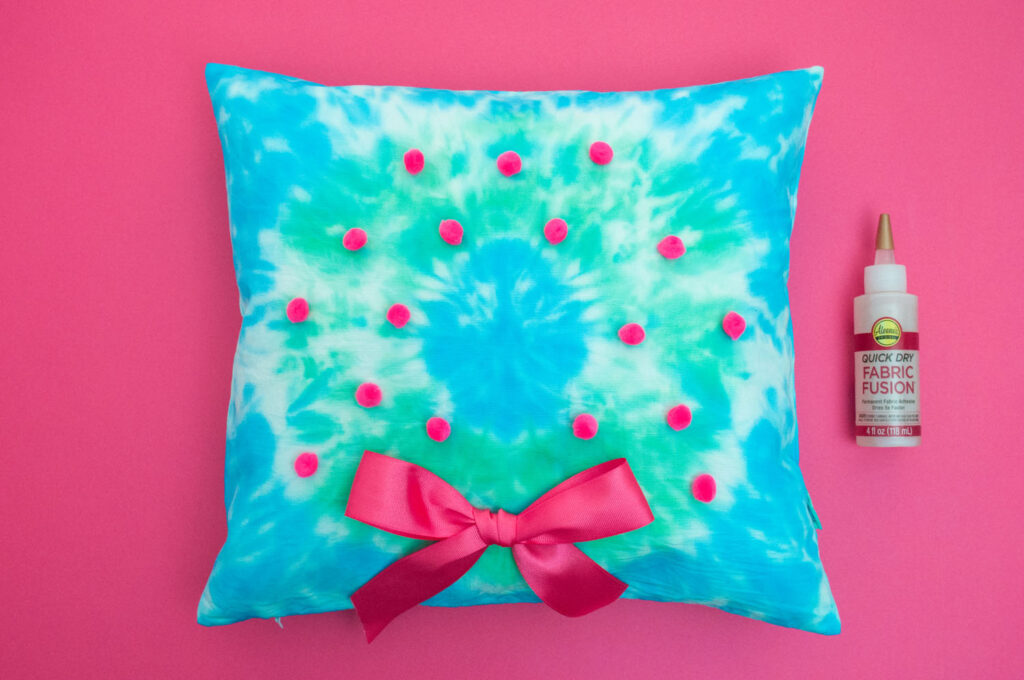
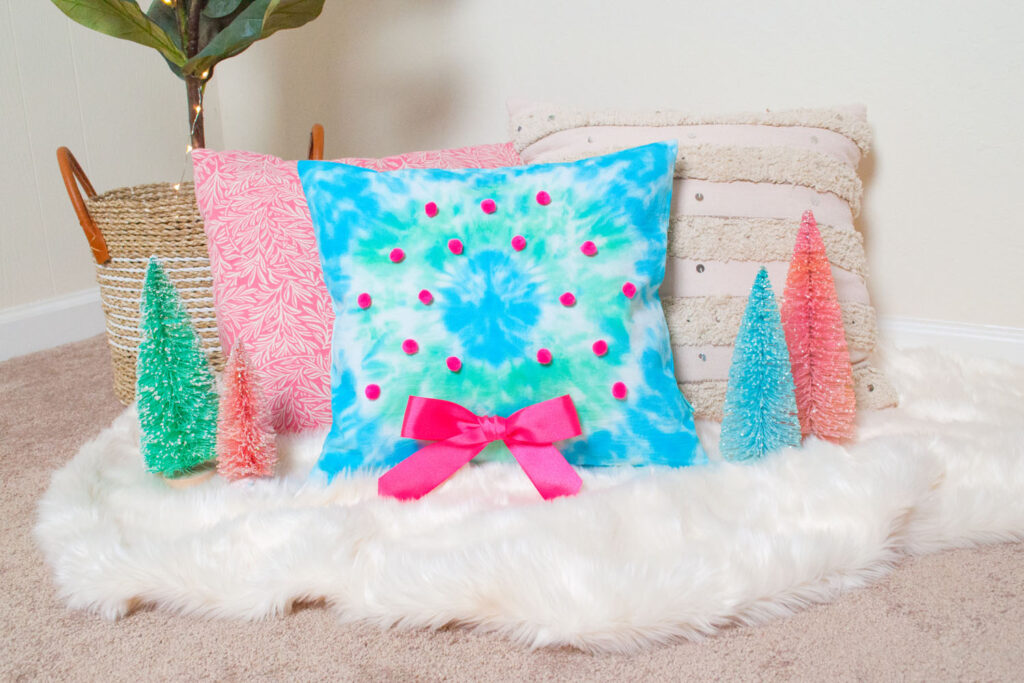
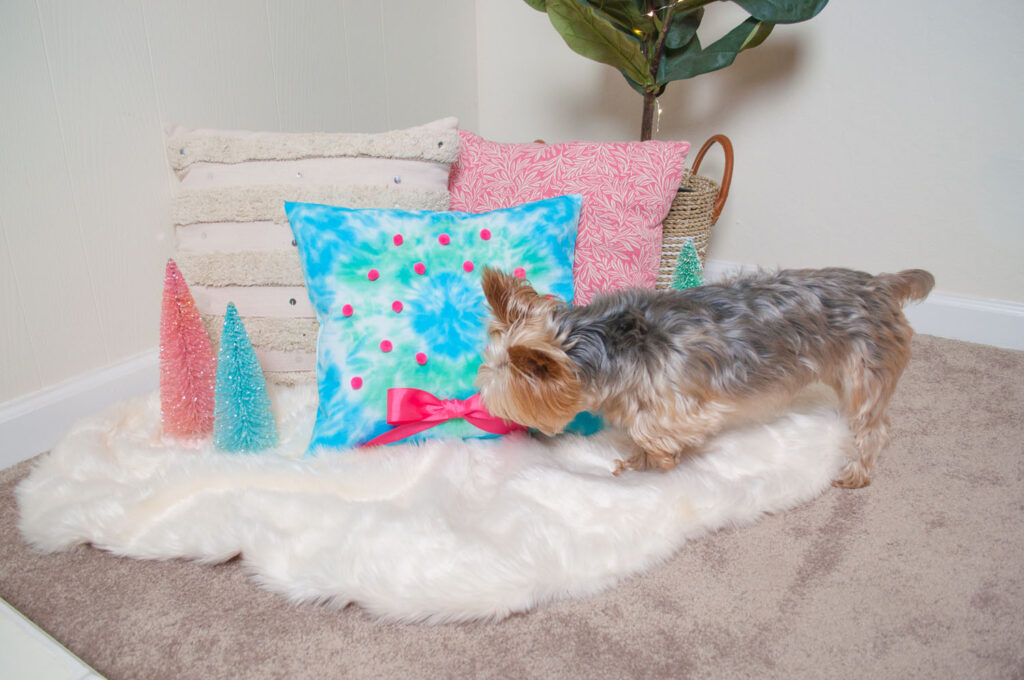
One of my new favorite ways to do just that is with tie dye! It’s been a major trend this year and it’s not going away for winter! I was inspired by the classic holly wreath, so I took a plain white pillow cover and used Tulip Tie Dye to make a pillow that perfectly matches my existing holiday decor. I even added some holly pom pom “berries” and a bright pink bow. Don’t these colors just scream holly-day?! If you have a different color scheme in mind, Tulip Color has tie dye in a variety of colors so you can make your tie dye holiday dreams come true! If you want to learn how to make this wreath pillow, keep reading and watch my short video of the process.
The following DIY tutorial and video is kindly sponsored by Tulip Color. As always, the concept and content are all my own. A few of the below links are affiliate links. As an Amazon Associate I earn from qualifying purchases, at no cost to you.
Materials
- White cotton pillow cover (This one is cotton canvas and measures 16” x 16”)
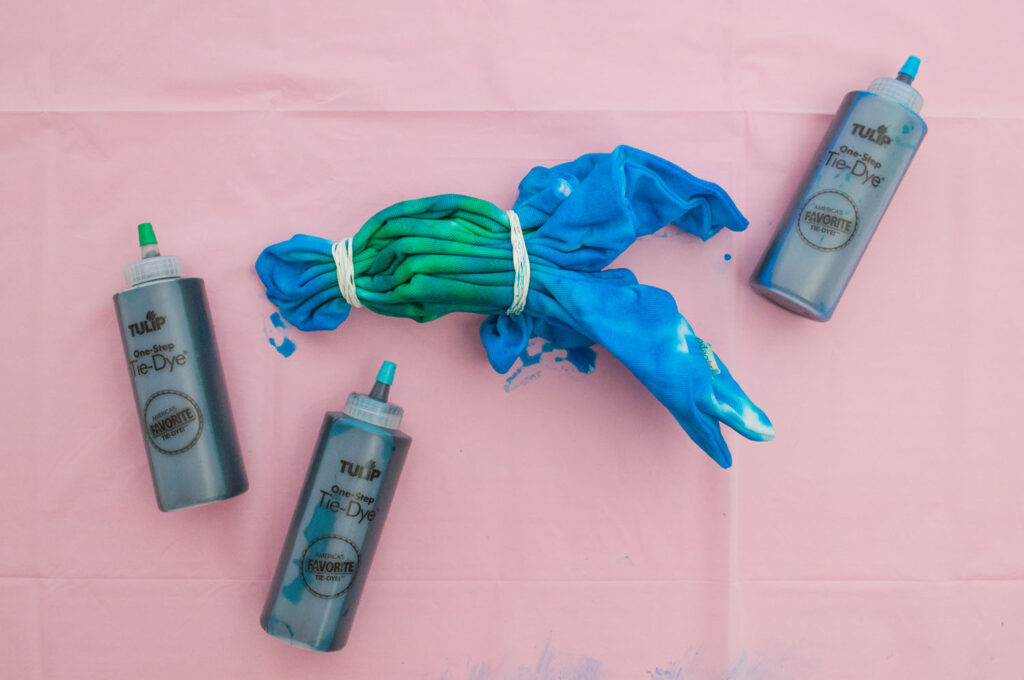
- Tulip 1-Color Tie Dye Kits in Green, Teal, and Turquoise
- Glove and rubber bands (included in above kits)
- Water
- Kraft paper
- Scissors
- Compass
- Washable marker
- Plastic table covering
- Plastic wrap
- Hot pink ribbon, 1.5”
- Hot pink pom poms, ½”
- Aleene’s Fabric Glue
Instructions
Watch this video to learn how to make a tie dye wreath pillow!
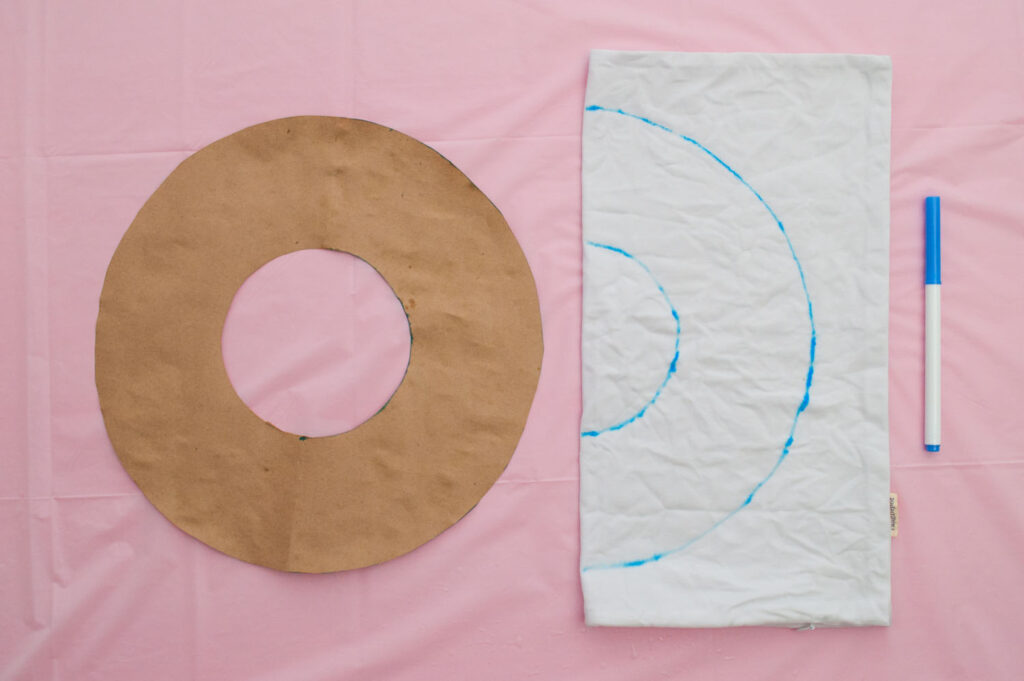
1. Make wreath pattern. Using a compass, draw and cut out a large circle from kraft paper. Cut out a smaller circle from the middle. For this 16” pillow, I made a 12” large circle and 5” inner circle. If you don’t have a compass, you can trace around a plate and mug.
2. Prepare pillow cover. Dampen pillow cover and fold in half. Fold the wreath pattern in half and place the fold along the folded edge of the pillow cover. Trace the outer and inner parts of the circle with a washable maker.
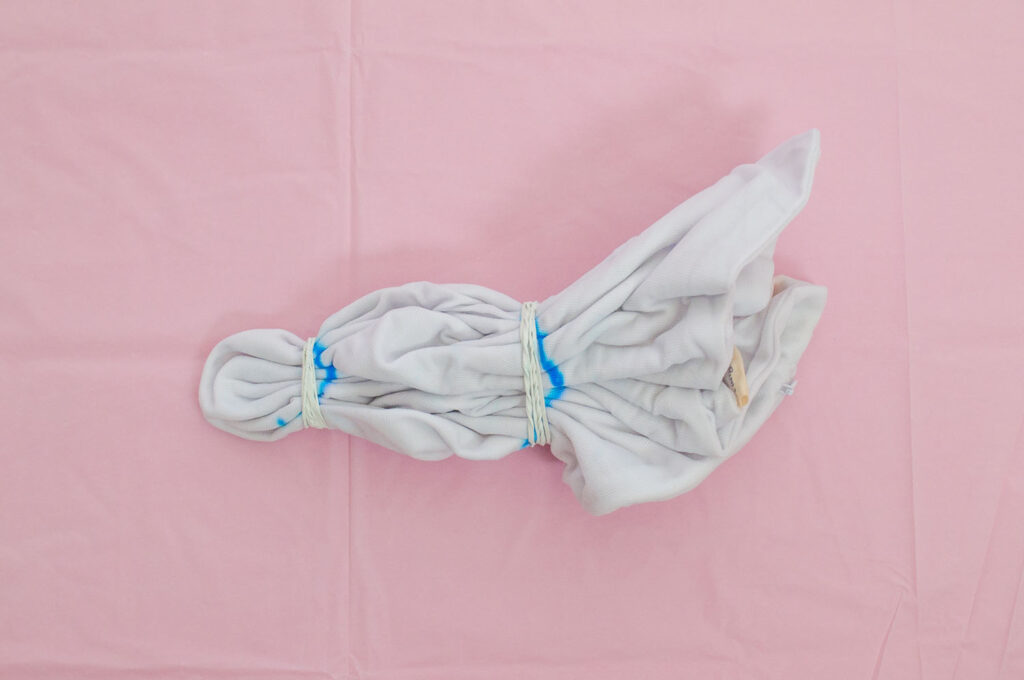
- Fold and rubber band. Starting with the outer circle, fold small accordion style pleats to form a straight marker line. Secure with two rubber bands. Repeat the same steps with the inner circle. The tighter you tie the rubber bands (and the more you use), the more the dye will resist this area. This will result in more white areas in your design.
- Tie dye. Add water to the fill line of the tie dye bottles. Shake well, making sure no extra powder is left at the bottom. Add green and teal dyes to the section between the rubber bands (the wreath). Add turquoise dye to the inner and outer sections. Avoid oversaturating the fabric. This can cause muddy colors and negate the tie dye effect.
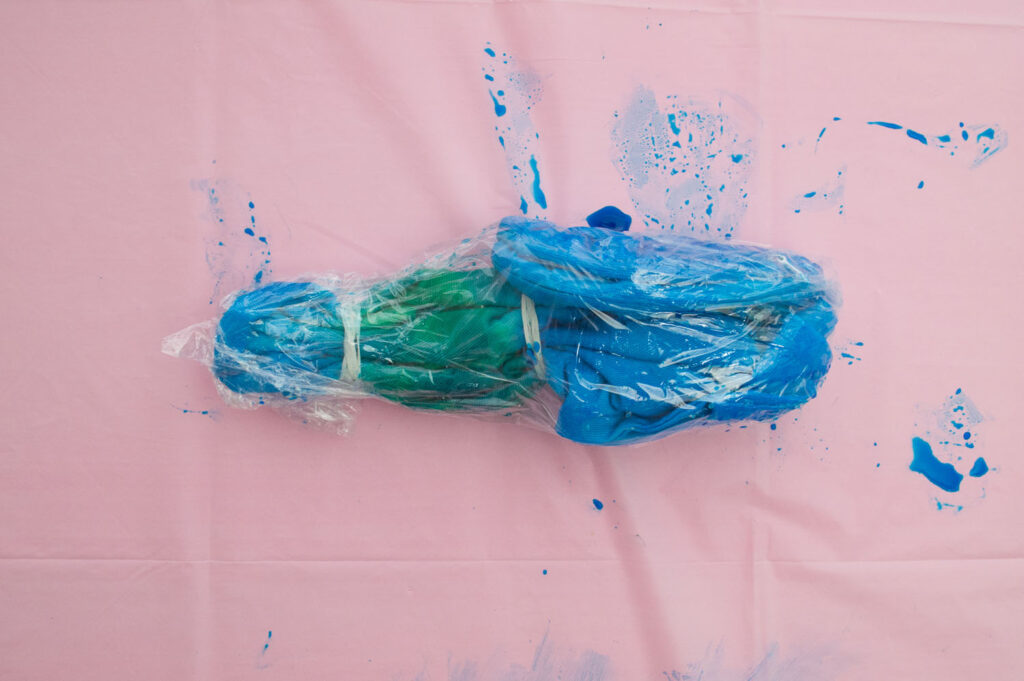
- Allow to set, then rinse and dry. Wrap your tied pillow cover tightly with plastic wrap or place in a plastic bag. Allow to set overnight then rinse until the water runs clear and line dry. Iron out wrinkles if needed. The longer you let your dye sit on the fabric the bolder the colors will be! On first attempt, I only left it for the recommended 6-8 hours and the results were too light for my liking. Note that this pillow is made of a thicker cotton fabric with a tighter weave. This may have affected how the dye bound to the fibers. I left the second pillow (shown here) wrapped up for almost 24 hours and was much more satisfied with the results.
- Decorate your wreath. Tie a bow with your ribbon and attach it to your pillow with fabric glue. Then arrange your pom pom “berries” where you want them before gluing them down. I highly recommend this fabric glue – it dries in 5 minutes! If your pillow cover fabric is thin, consider adding a sheet of paper inside so the glue won’t leak through.
Stuff your pillow and deck the halls!
Even my dog Penny is in the holiday spirit!
Wasn’t this project so fun? I love how this pillow adds so much personality to my home! Hope you’re feeling inspired to make your own tie dye pillows. Tag me on Instagram so I see what you’ve created! Happy crafting!
Save these pins!
For more projects and inspiration, visit TulipColor.com!
Ready for more Christmas inspiration? Check out my other Christmas home decor and DIY projects!