Personalized Dog Bone Pillow – Holiday Gifts for Dogs Made with Cricut Joy
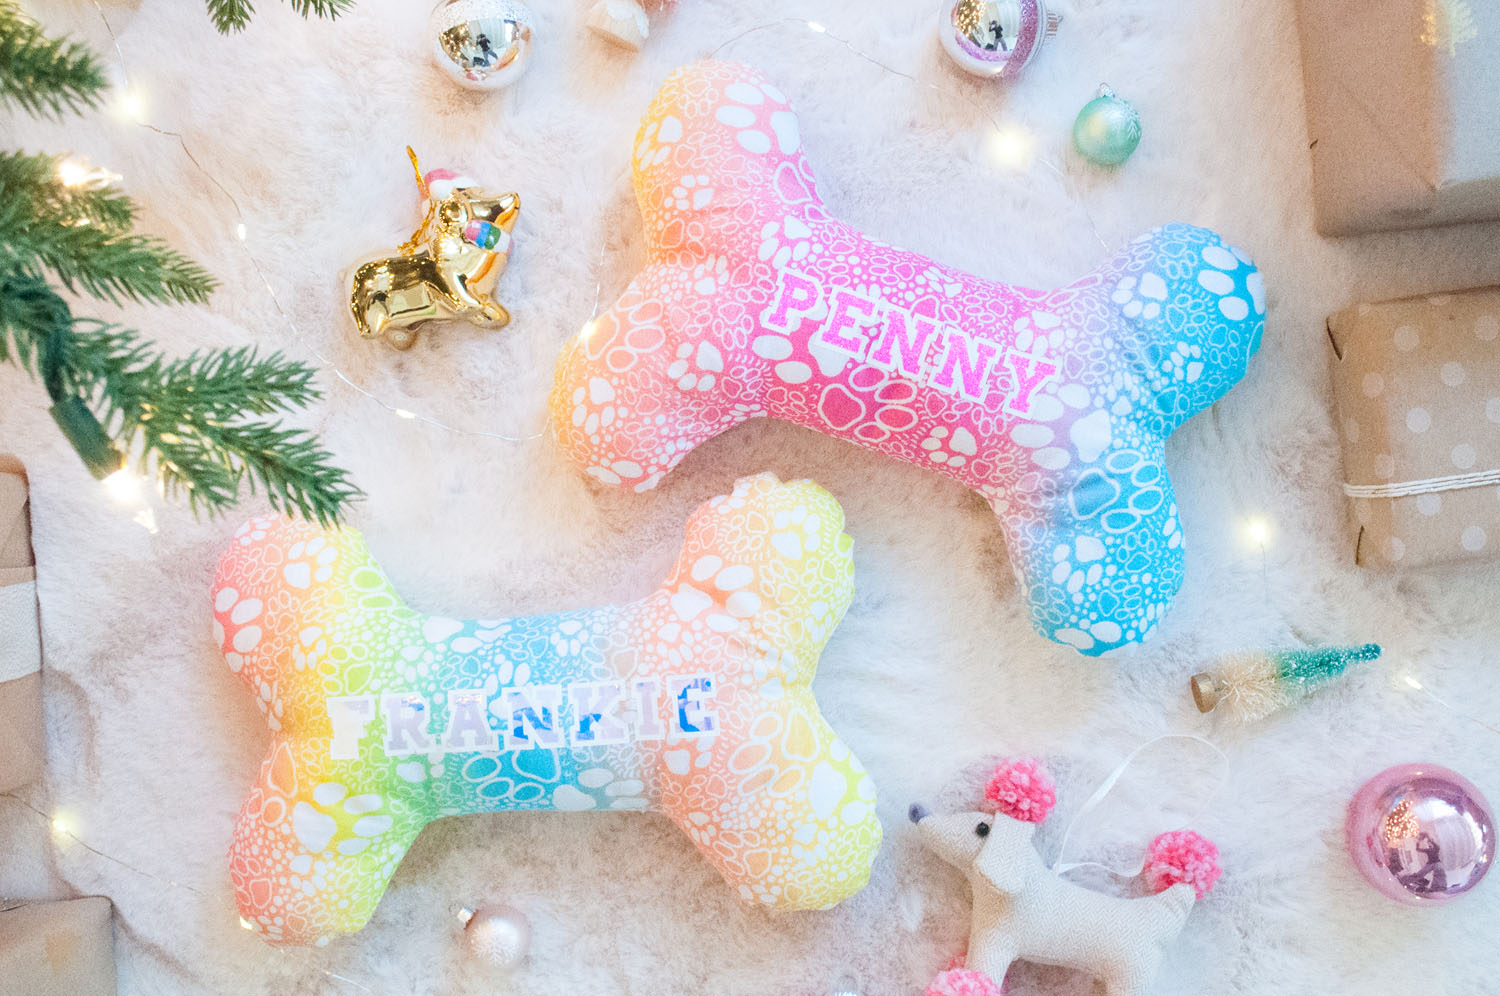
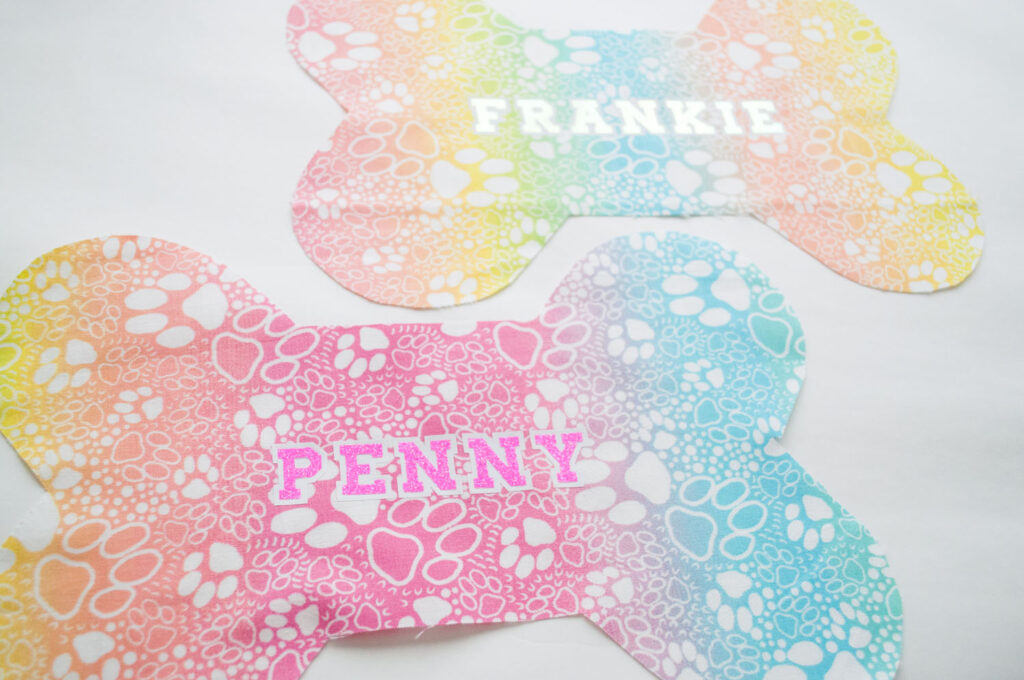
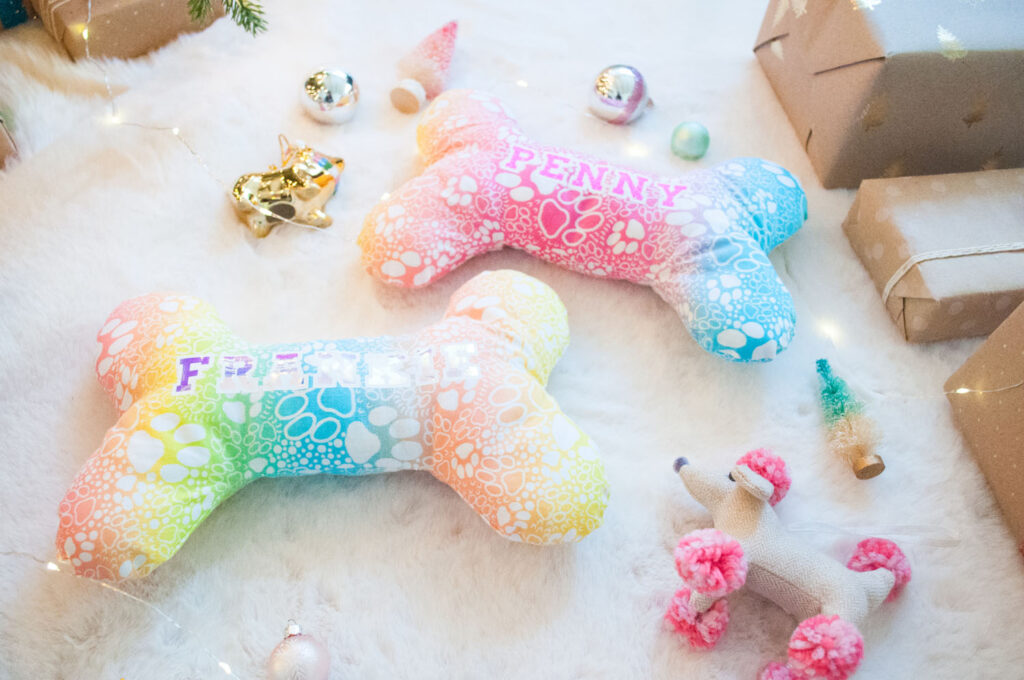
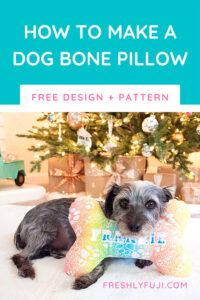
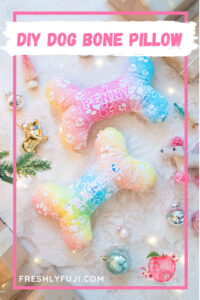
A personalized dog bone pillow is the perfect handmade gift for your dog! Making gifts for my loved ones is one of my favorite ways to show them I care during the holidays. Of course my two pups are always included in the DIY fun too! This year I decided to make them custom dog bone pillows. They love to prop their little heads on pillows for naps and I wanted to give them comfy (and cute!) pillows of their own to rest on. Isn’t the rainbow gradient pattern just PAWsome?! To make them even more special I even added their names using my Cricut Joy!

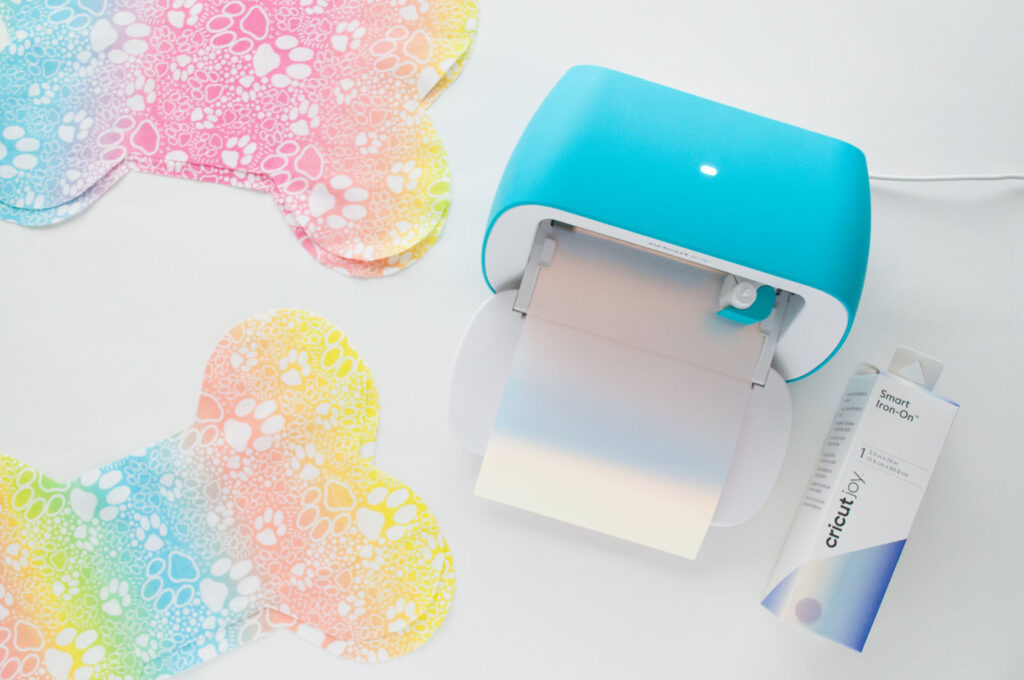
Having a Cricut Joy makes personalizing gifts like these so much easier! I can design projects in minutes and cut the Smart Iron-On material without a mat. There are so many colors and styles of Smart-Iron to choose from, you’re bound to find something that perfectly matches your next project. I love that I can squeeze this small but mighty machine onto almost any surface (especially when I have a lot of projects going on!) and quickly customize a gift for someone special. Want to see how I used my Cricut Joy to personalize these holiday gifts for my dogs?
Keep reading to see my dog bone pillow tutorial!
This project was kindly sponsored by Cricut. Content and opinions are all my own. This post contains affiliate links. I may earn a small commission when you click on the links, at no cost to you.
For this project, you will need the following materials and basic sewing skills. I chose white for the letter outline and used a glitter and holographic Iron-On for the letter fill (“Penny” and “Frankie” respectively). I love using this layered technique for a professional look that makes the letters pop! You can opt to remove the outline if you prefer to use just one color. Note that glitter and holographic iron-on should only be used as the top layer. Please keep this in mind when selecting your Iron-On materials for your design.
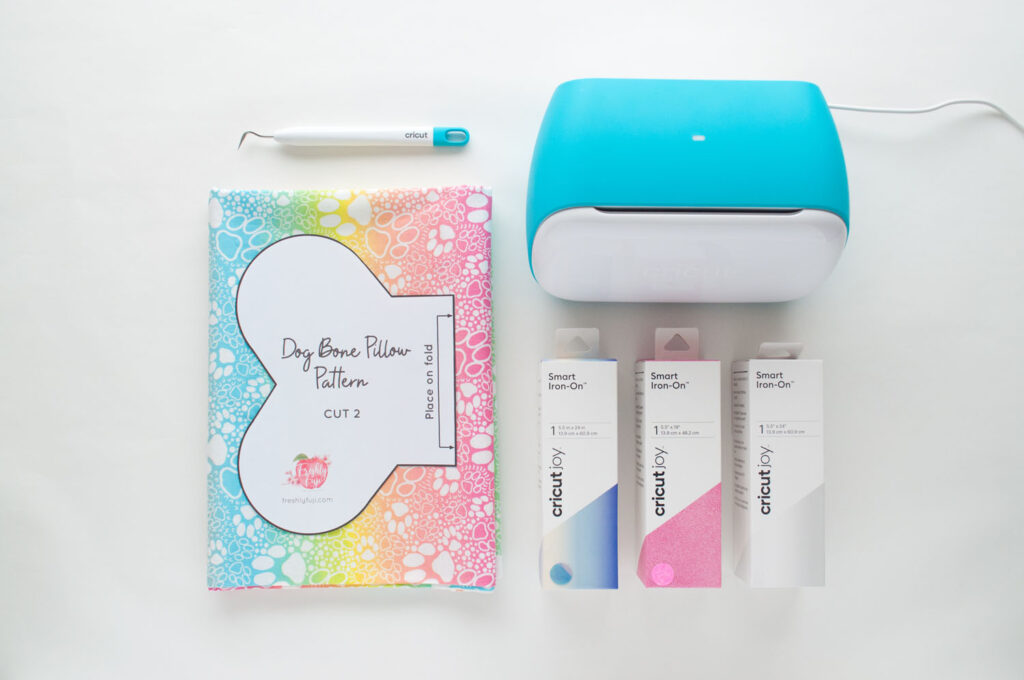
Materials
Dog Bone Pillow Pattern – Download from my Freebie Library!
Cricut Joy *You can use these machines too – Explore Air 2, Explore 3, Maker, Maker 3
Smart Iron-On (for letter outline) – White
Smart Iron-On Glitter (for letter fill) – Fluorescent Pink OR
Smart Iron-On Holographic (for letter fill) – Translucent Blue
Cotton fabric
Fiber fill
Sewing machine
Fabric scissors
Needle and thread
Instructions
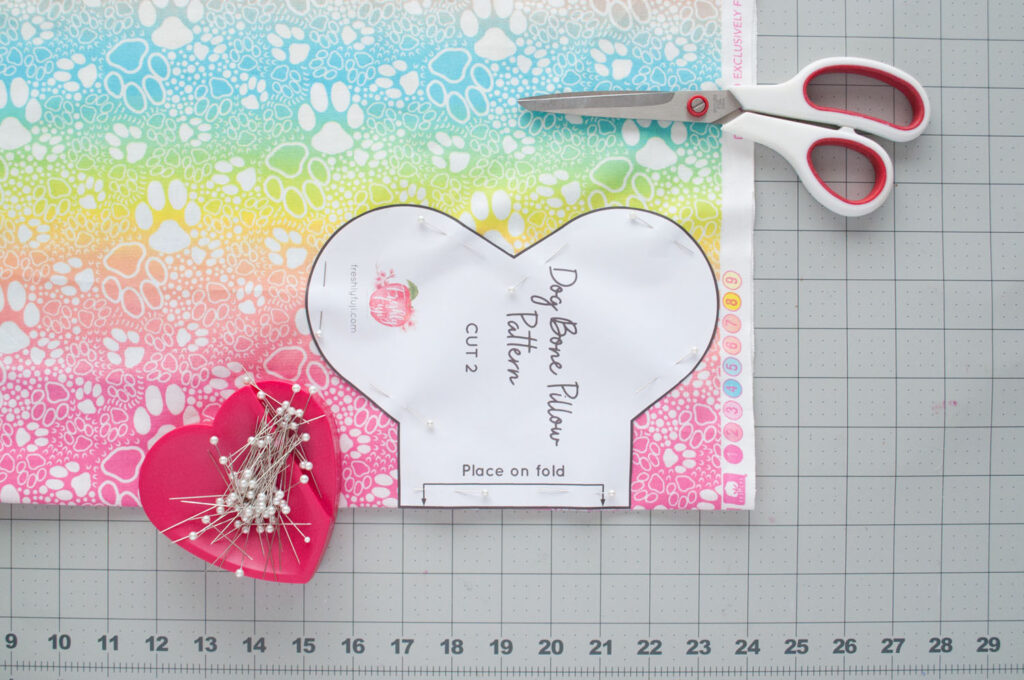
Step 1: Cut Out Fabric
Download the dog bone pillow pattern linked in the materials section. Using the pattern I’ve provided, cut out two dog bone pieces from your fabric. If you have the Cricut Maker, you can use my design file linked in the next section to cut out your fabric pieces.
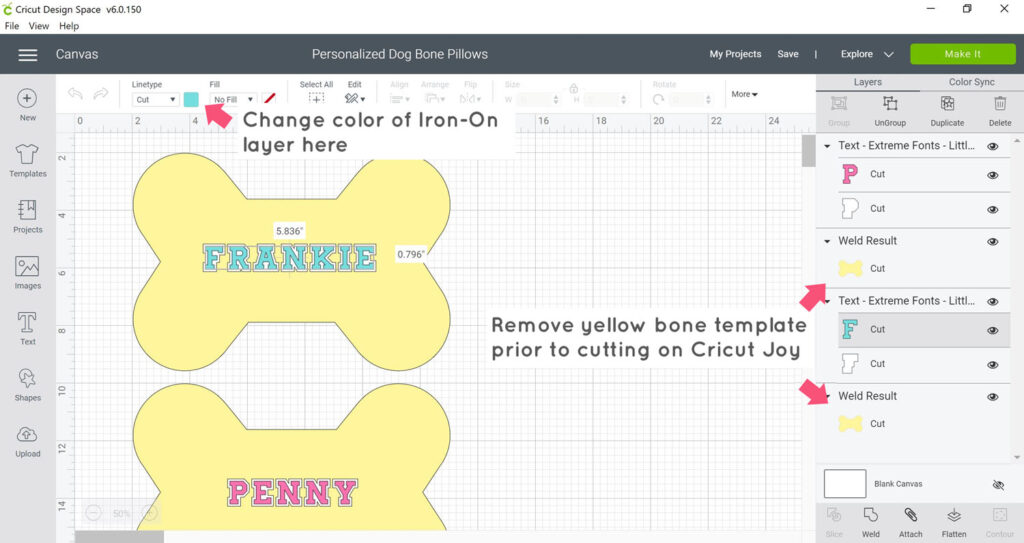
Step 2: Edit Design in Cricut Design Space
Go to my design in Design Space. Change the name of your dog, Iron-On colors, and size of text if desired. This allows you to better visualize what your design will look like on the pillow. Before proceeding, remove the yellow dog bone template.
Step 3: Cut Smart Iron-On
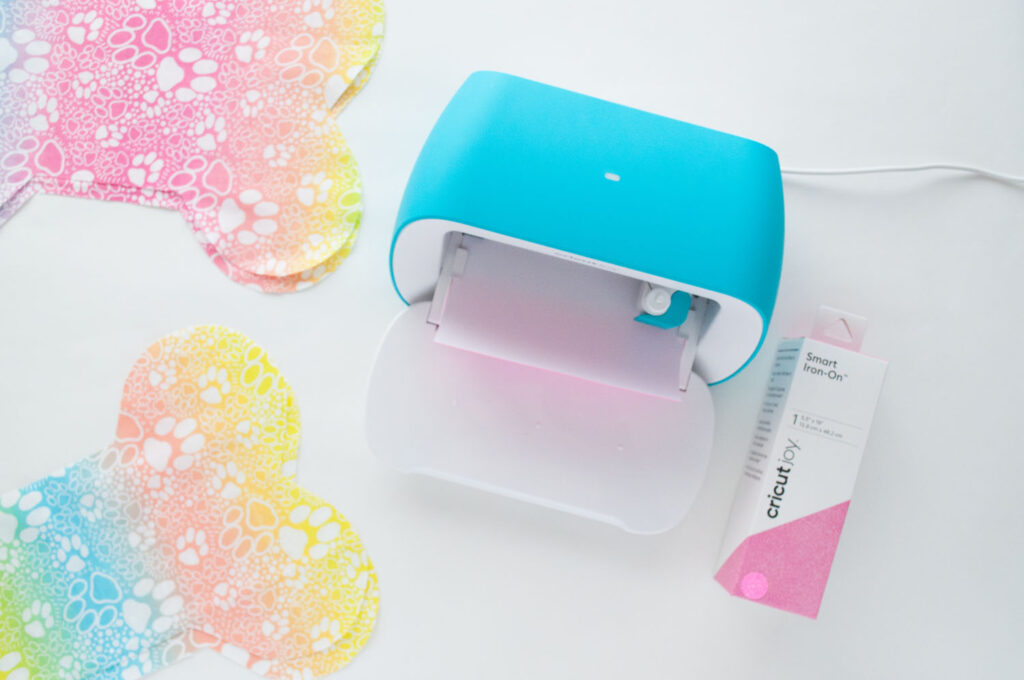
Select Cricut Joy machine and click “Make It” button. Then select “Without mat” when prompted. Your first material to cut should be highlighted in white. Trim your Iron-On material to the dimensions listed in this section. Turn Mirror On. This allows your design to face the right direction when applied to your material.
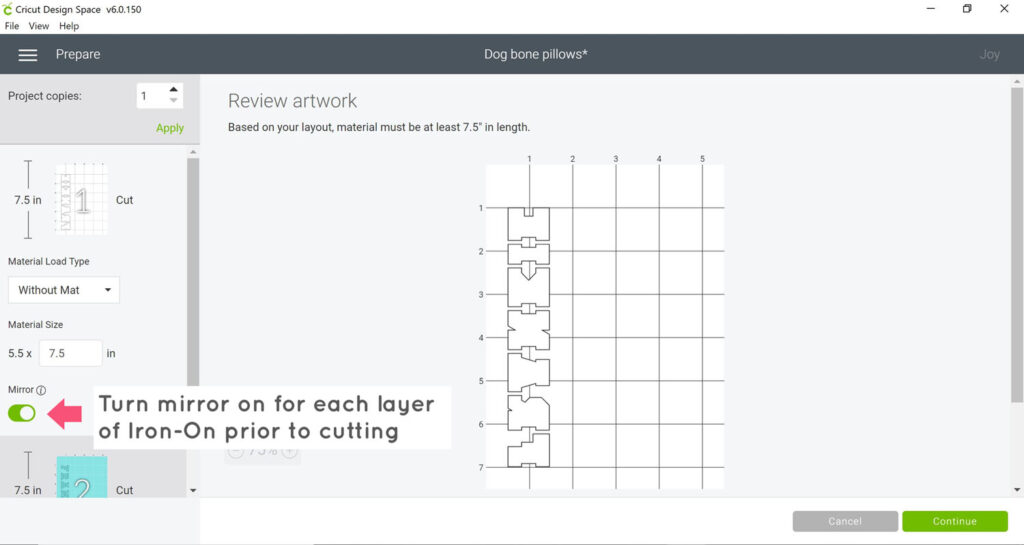
Hit “Continue” button. Choose your material (Smart Iron-On) then load your first Iron-On color shiny side (liner) down. Click “Go” and allow the machine to cut. Once your machine has completed cutting, click “Unload” button and remove it from the machine. Repeat this process with your second Iron-On material making sure to select the right material (Smart Iron-On Holographic, Smart Iron-On Glitter, etc.) and turn Mirror on.
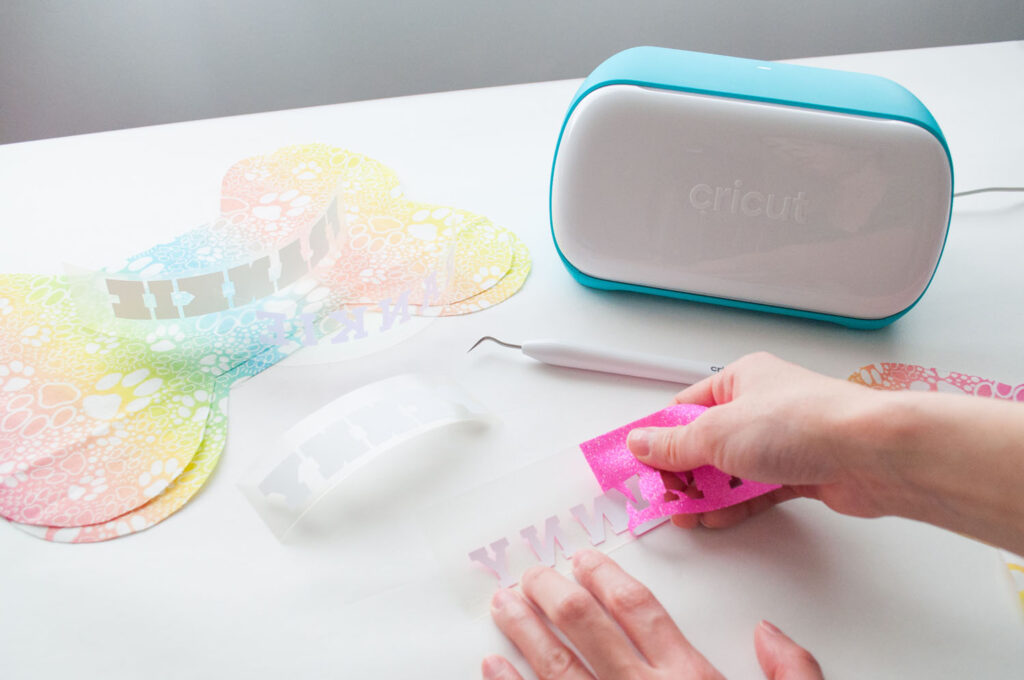
Step 4: Weed Excess Material
Once all of your Iron-On materials have been cut, weed the excess material. You can use your weeding tool to help lift off the corners and remove any small pieces. Pro Tip: Trim off any excess material around your design prior to weeding and save the scraps for future projects.
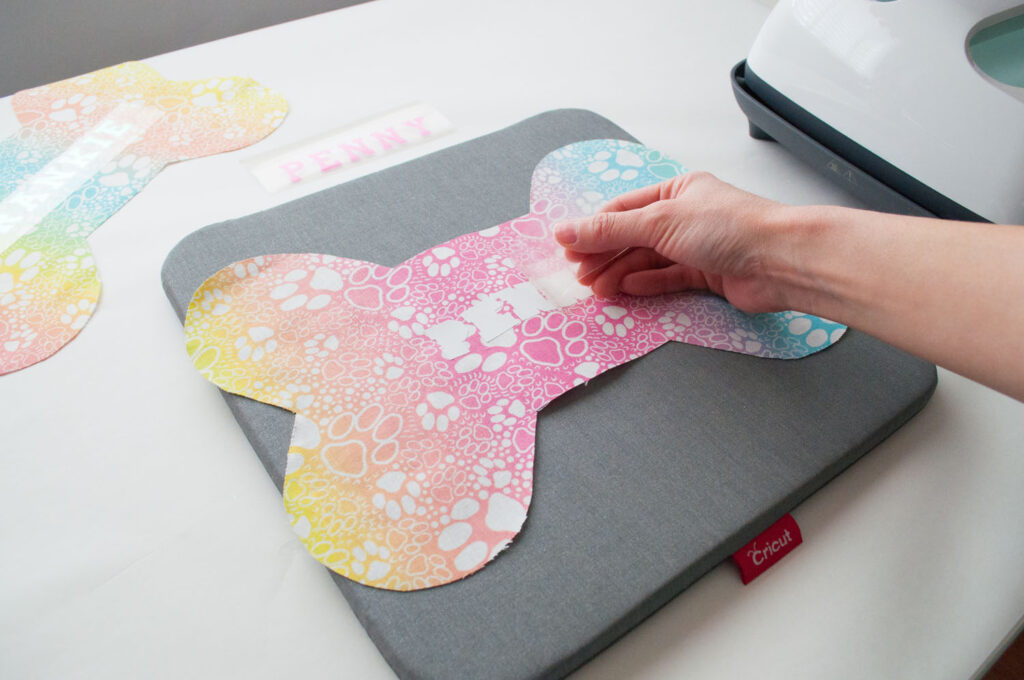
Step 5: Apply Design to Fabric
First Iron-On Layer
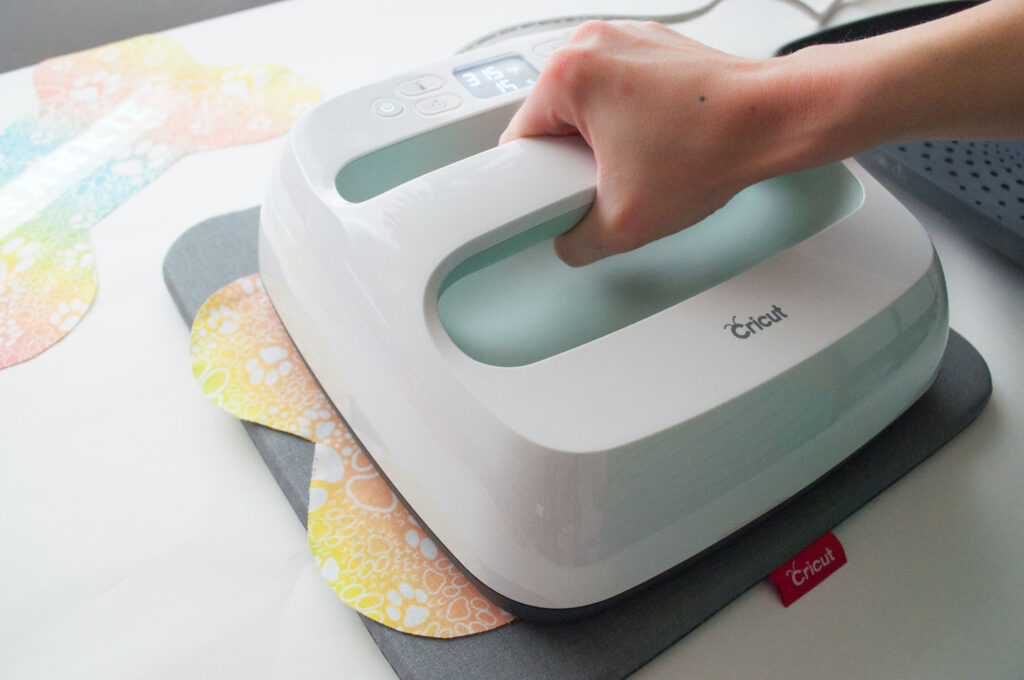
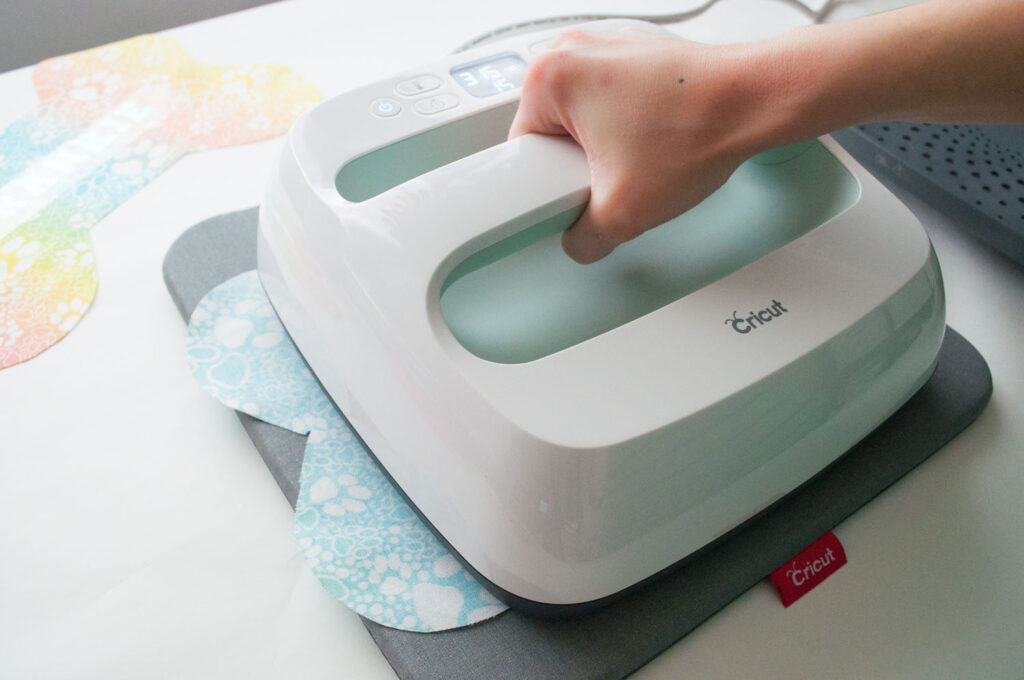
Preheat your EasyPress to 315 F. Follow the Cricut Heat Guide to determine the temperature if you’re using a different base material. Place one of the bone fabric pieces onto your EasyPress mat and preheat for 5 seconds. Place first Iron-On (white) design onto the center with the shiny (liner) side up. The backing will stick to your fabric. You can use a tape measure to make sure your design is centered. Place EasyPress over design and press for 1-3 seconds. Allow to cool slightly and peel off liner.
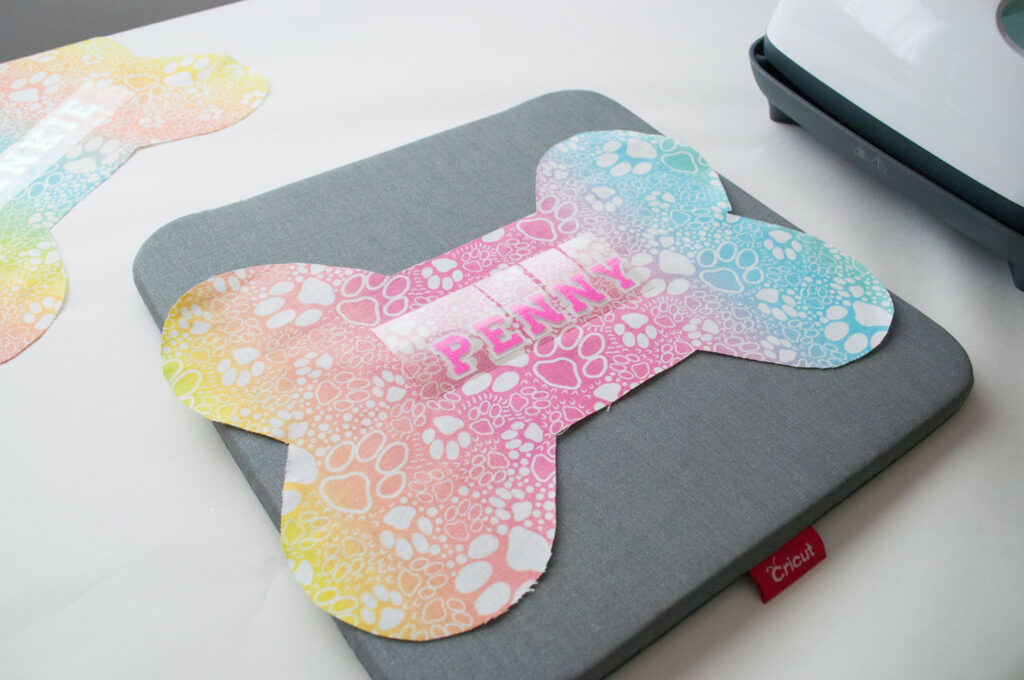
Second Iron-On Layer
Position the next Iron-On (glitter or holographic) right over your first layer. Pro Tip: If your letters are not lining up perfectly with the first layer, cut between each letter and apply them individually. Make sure that either the liner or another protective barrier (ie. piece of fabric) is covering all of the Iron-On designs. The EasyPress plate should not make direct contact with Iron-On material. Press for 15 seconds. After that, flip over your material and press for another 15 seconds. Carefully peel off liner once completely cool. Check out EasyPress Layering Technique for more detailed instructions.
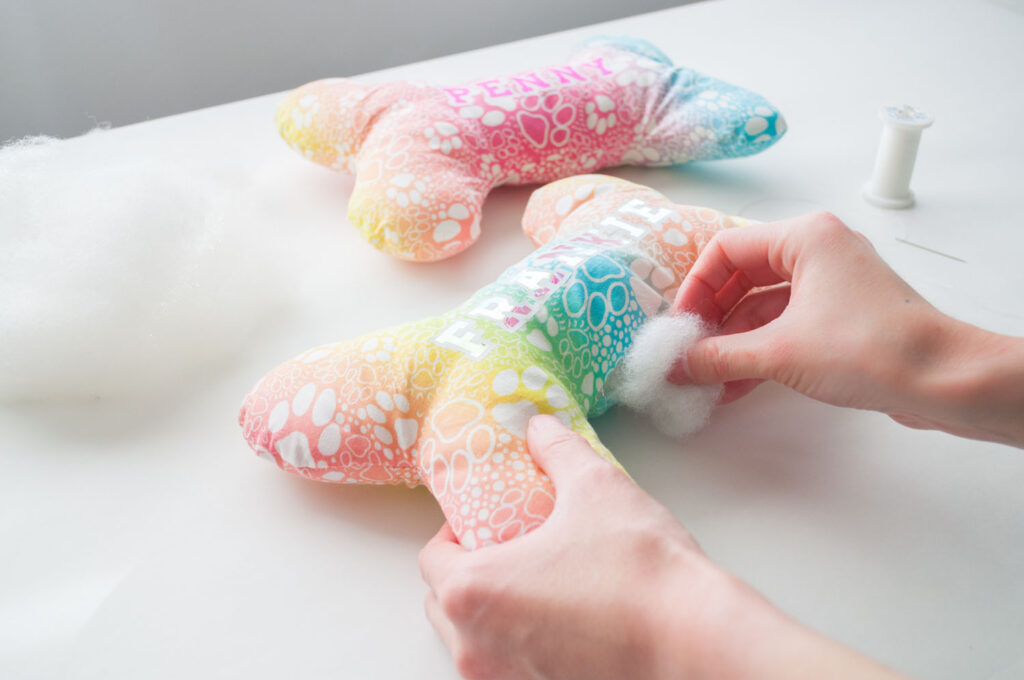
Step 6: Sew Pillow
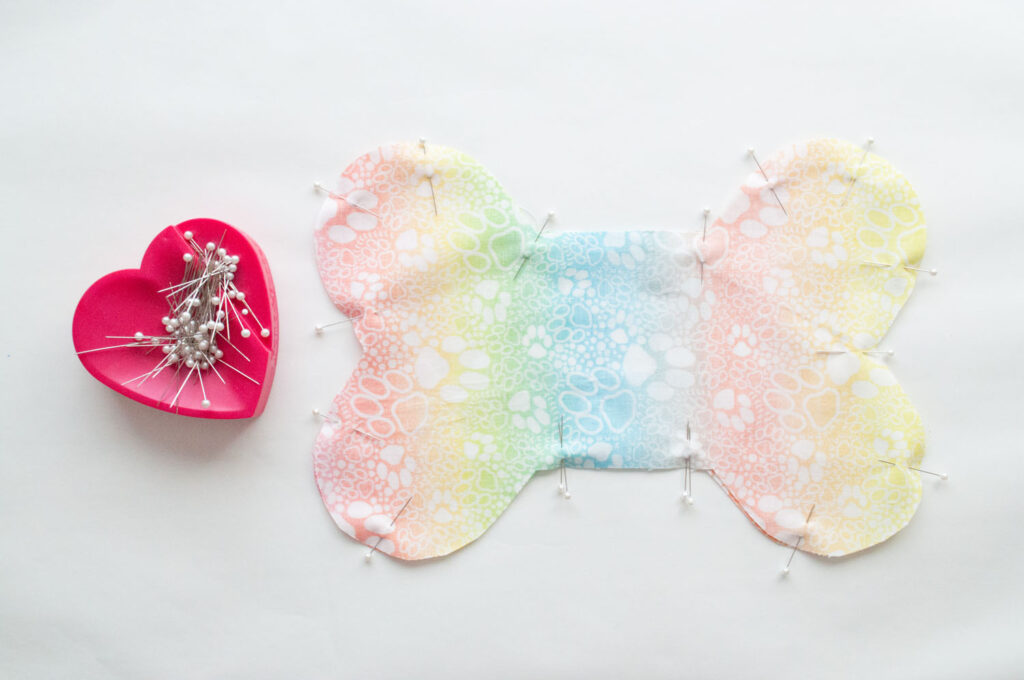
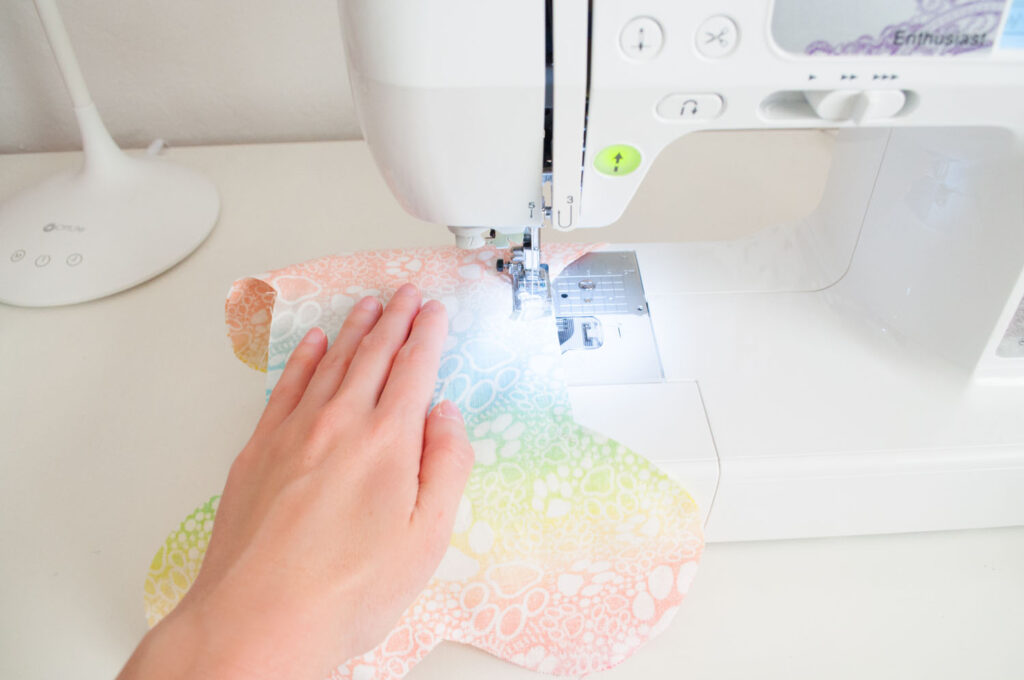
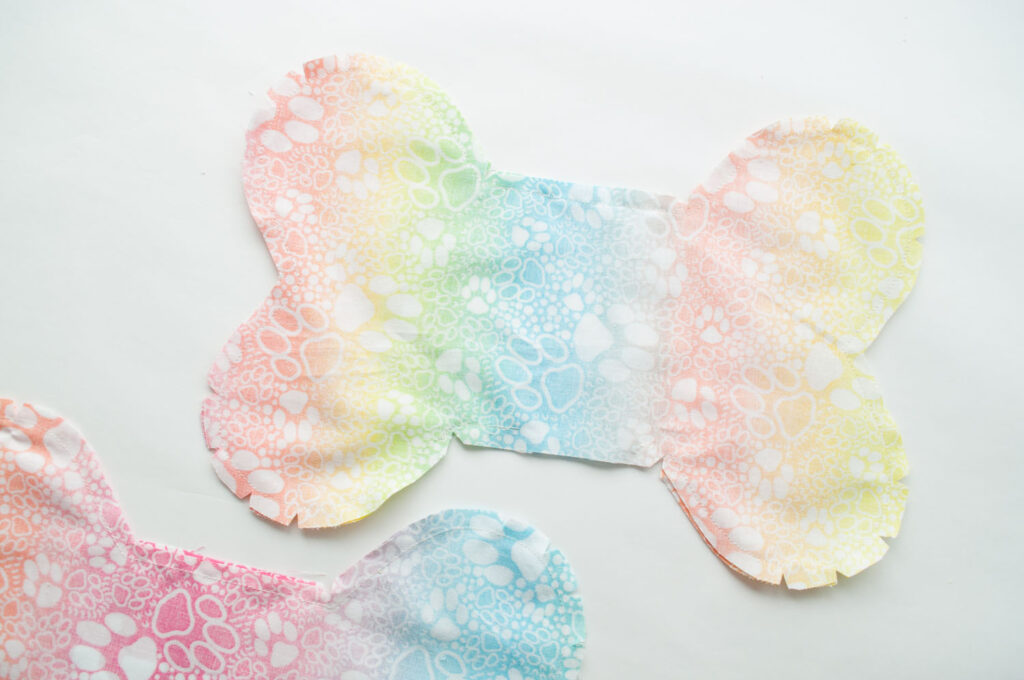
Pin right sides of the bone cut outs together. Sew around the pillow using a 1/4” seam allowance and leaving a 3” gap in the middle. Cut small notches in the corners and around the curved edges. This minimizes creasing along the seam. Flip pillow right side out and stuff with fiber fill. Hand sew the opening using a blind stitch to close the pillow.
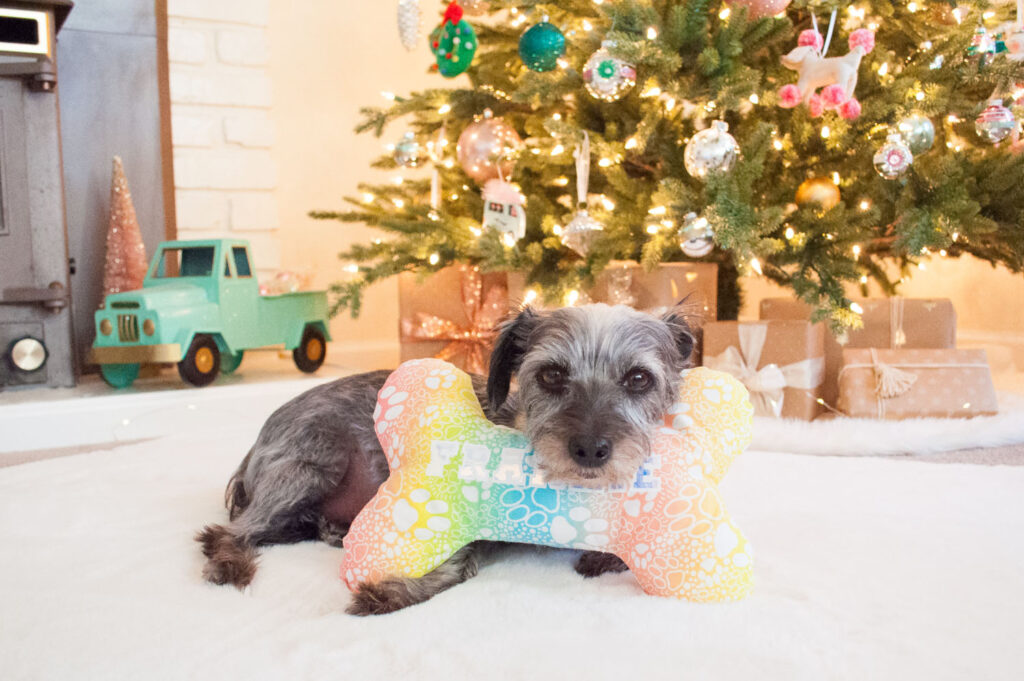
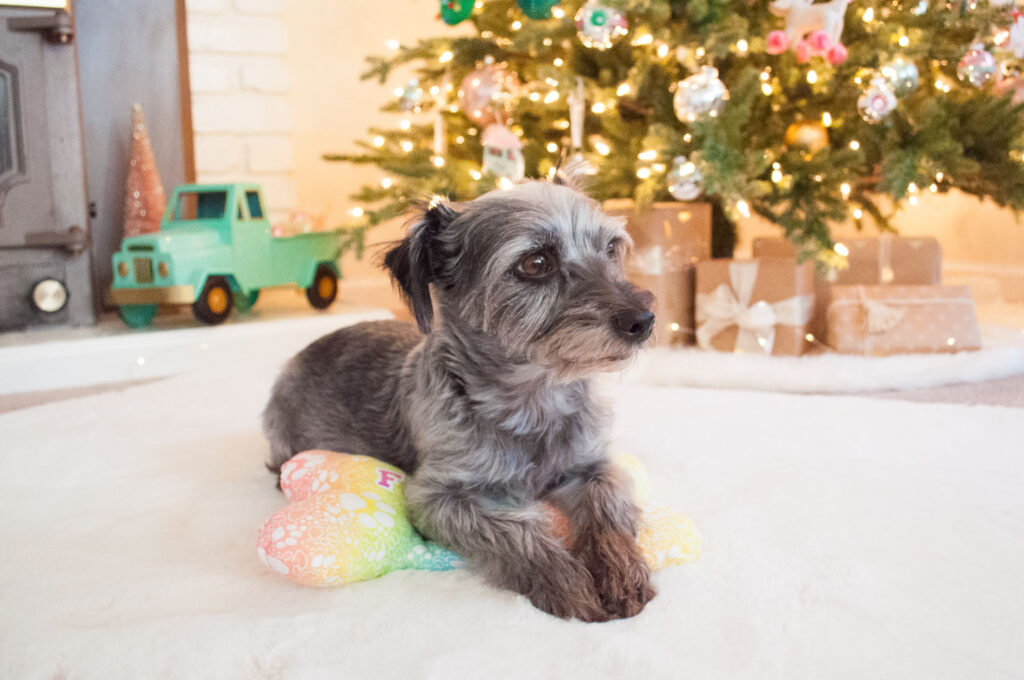
Gift the dog bone pillow to your pup!
As soon as I finished this pillow, I gave it to my dog Frankie to test out. Looks like he approves! 😀
Wasn’t that so much fun? I hope you enjoyed this tutorial and feel inspired to make some dog bone pillows as gifts for your pups this year. Dogs are part of the family and deserve handmade gifts too! If you make these pillows, write me a comment or tag me on Instagram. I can’t wait to see how yours turned out. Happy crafting friends!
Pin this project!

If you’re looking for another project for your dog, learn how to make a personalized pet bandana with your Cricut Joy!
If you don’t have a Cricut Joy yet, but want to get one for yourself or as a gift, check out my Cricut Joy Holiday Gift Guide.