Sunshine Front Door Decor with Cricut Joy
This is a sponsored post written by me on behalf of Cricut. All opinions are 100% mine.
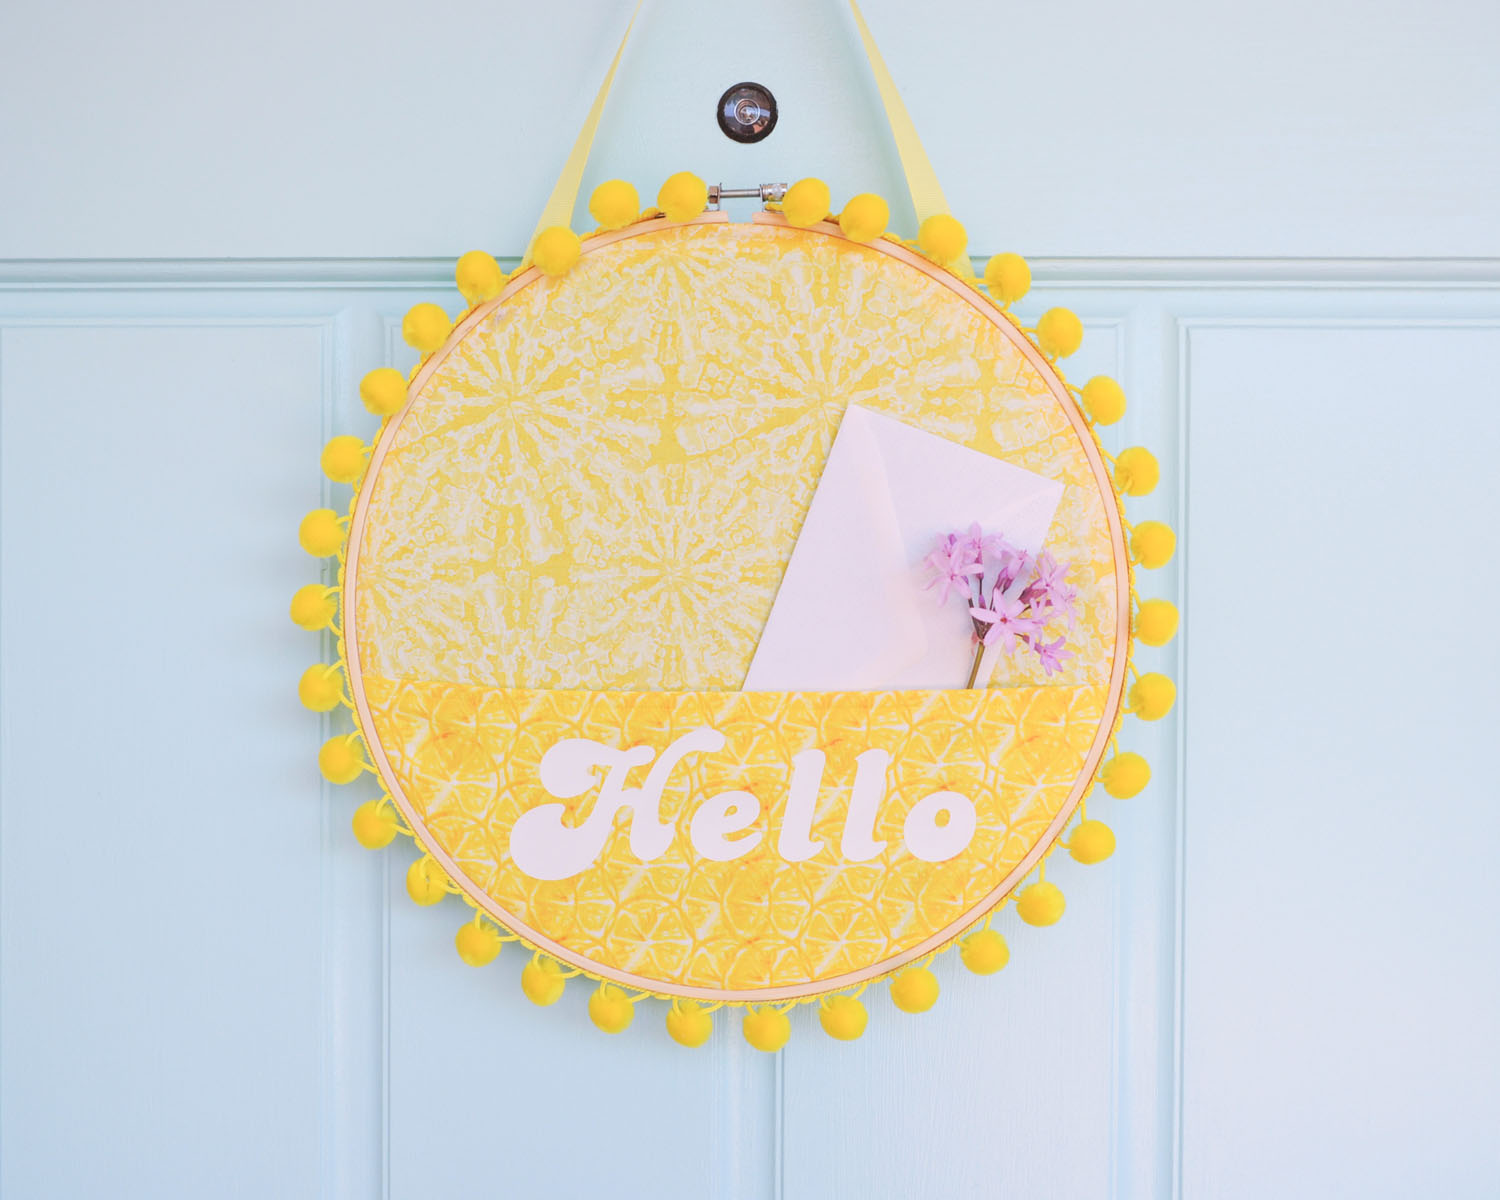
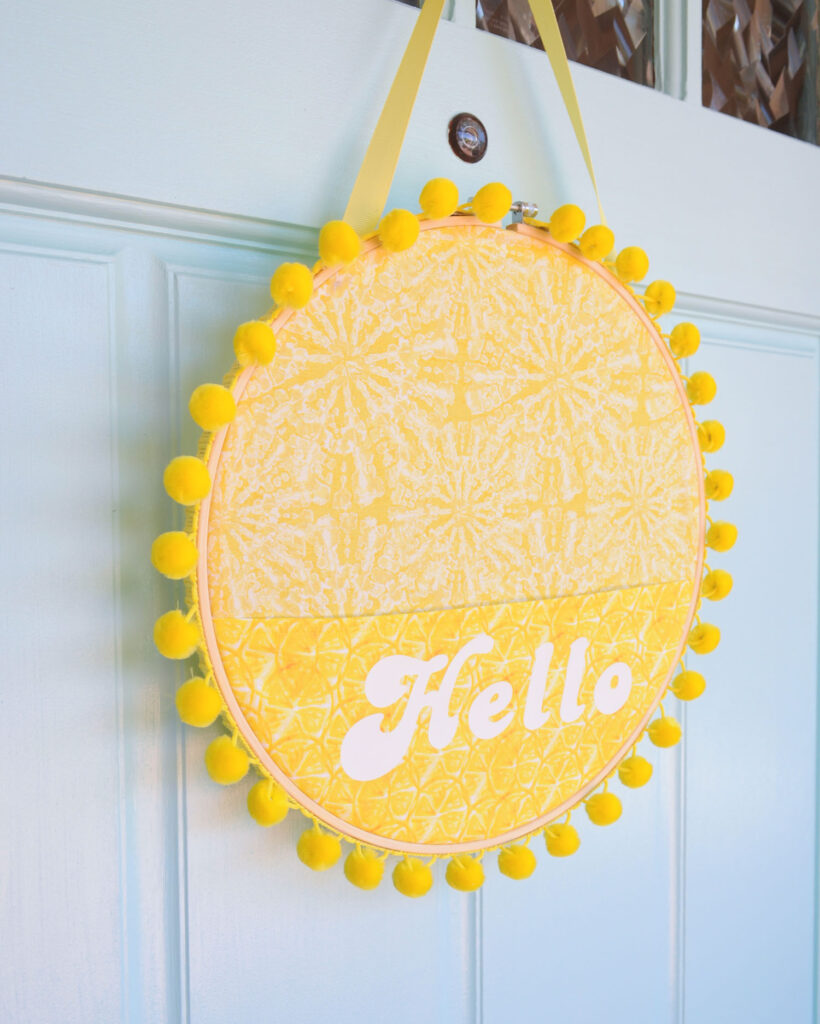
Summer is here and one of my favorite things about it is having more hours of sunlight! Sunshine always seems to put me in a good mood so I wanted to give our freshly painted front door some summer lovin’ too. I partnered with my friends at Cricut to show you how to make this cheerful front door décor with help from their newest machine, Cricut Joy.
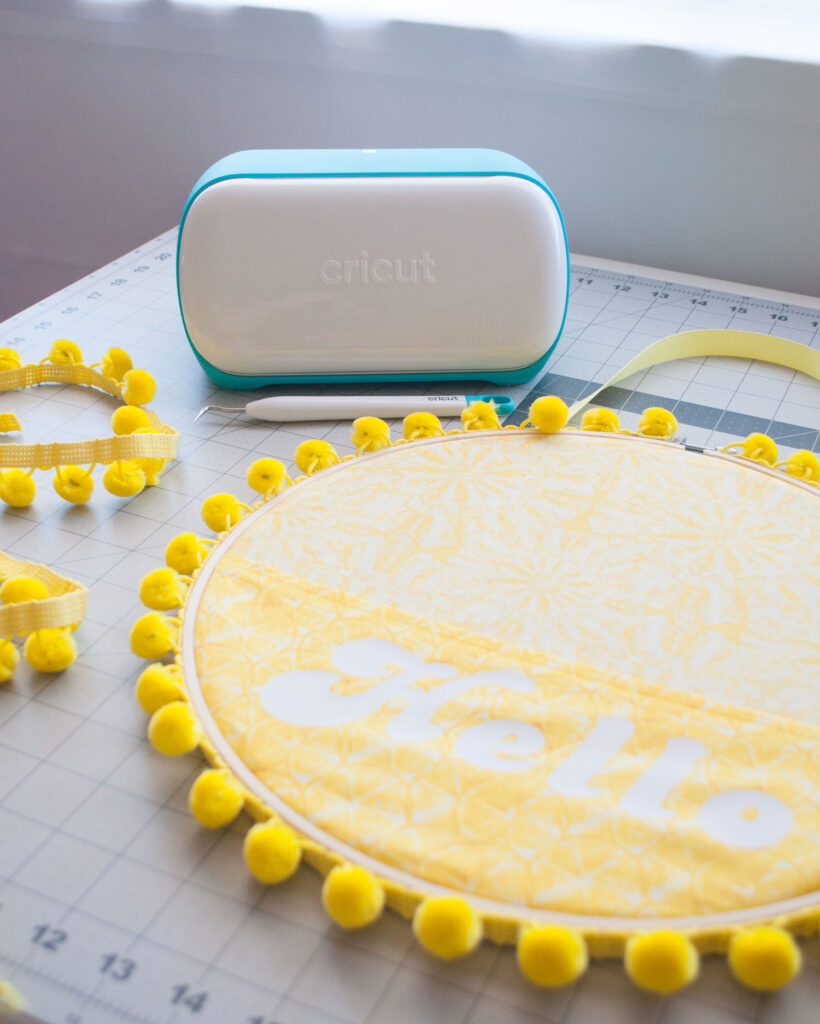
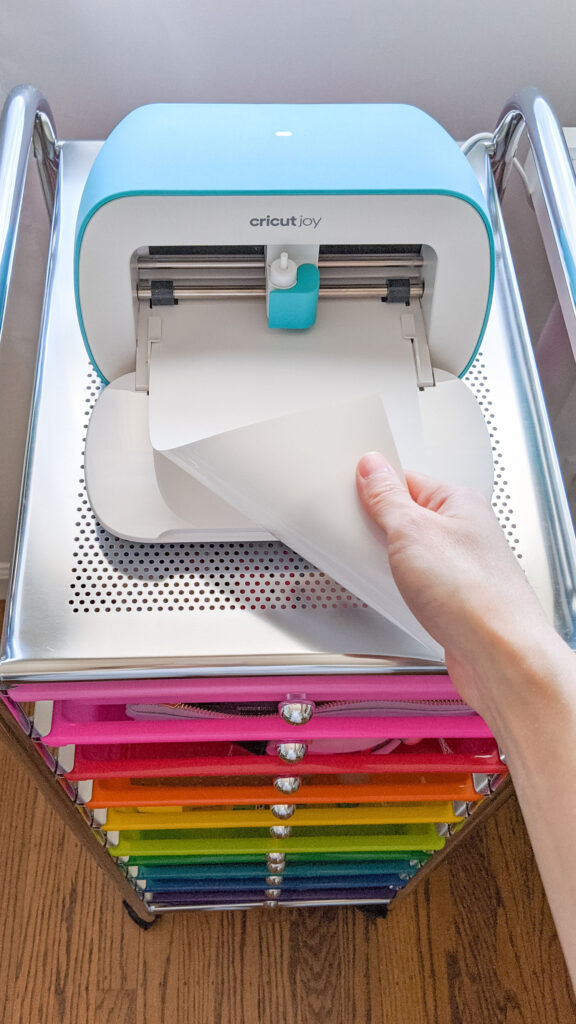
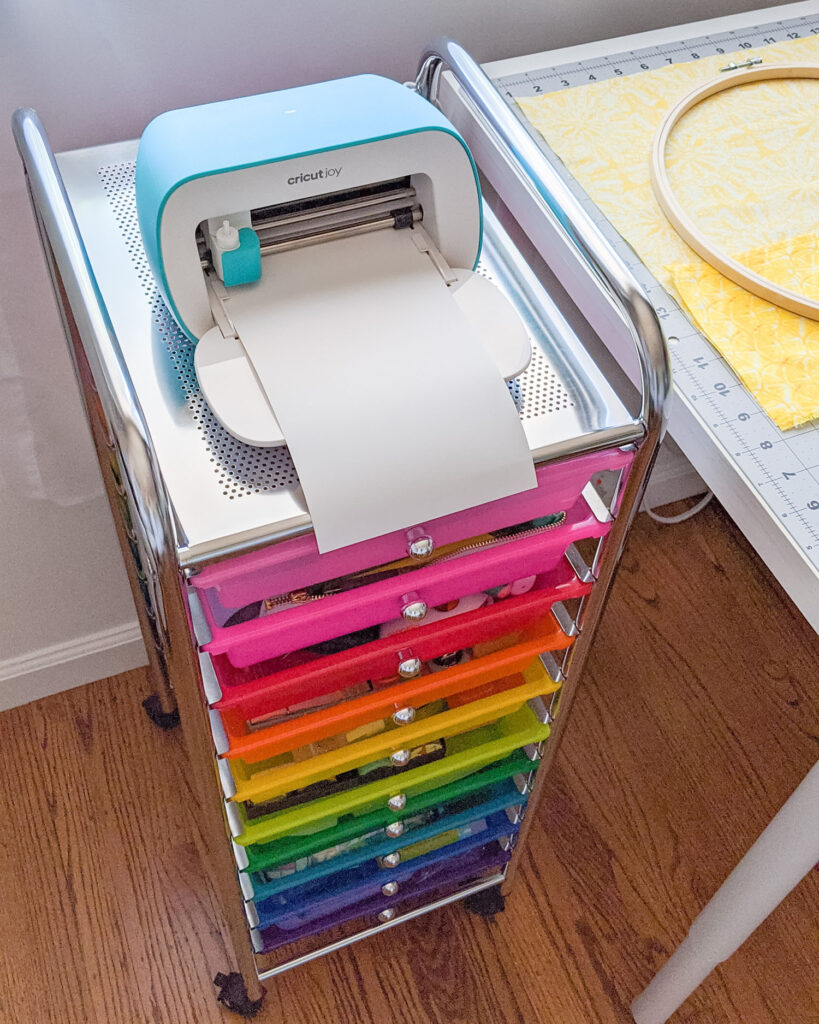
If you haven’t heard of the Cricut Joy, it’s Cricut’s newest (and smallest!) smart cutting machine. It’s petite size means I can craft almost anywhere I want. In fact, I’ve been crafting with it all around the house, including on top of my rainbow craft cart! Did I mention the Cricut Joy is quick and easy to use? It’s true! Once I pulled it out of the box and plugged it in, I was able to connect it to my computer (via bluetooth) and start crafting. I’ve been so impressed with how I can quickly whip up projects for my home or my pups in 15 minutes or less.
If you’re a Cricut Access member, you have a bunch of projects ready for you at your fingertips. You can choose from pre-made projects or design your own all within Cricut Design Space, which is available for desktop and mobile devices (yes, smartphones and tablets!). My favorite thing about this machine is how it uses Cricut Smart Materials. These include Smart Iron-On and Smart Vinyl that can be cut WITHOUT a mat! It’s truly time-saving. Today I’ll walk you through how I used my Crciut Joy and Smart Iron-On to make this sunny front door décor (with a pocket!). You’ll be walking on sunshine in no time! 🙂
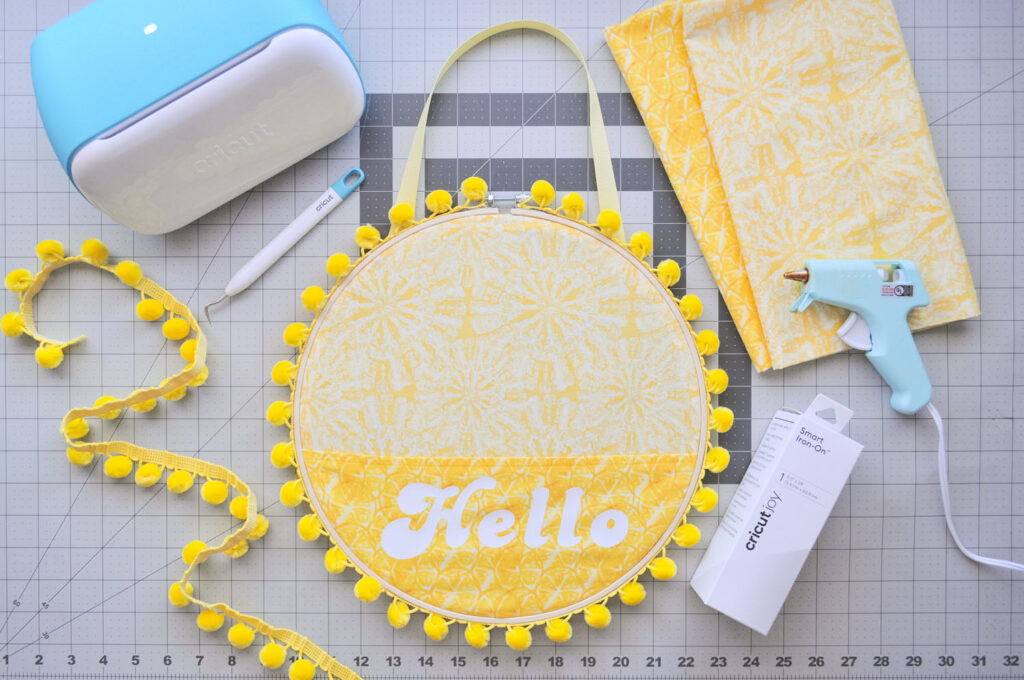
Materials:
Cricut EasyPress Mat or fluffy towel
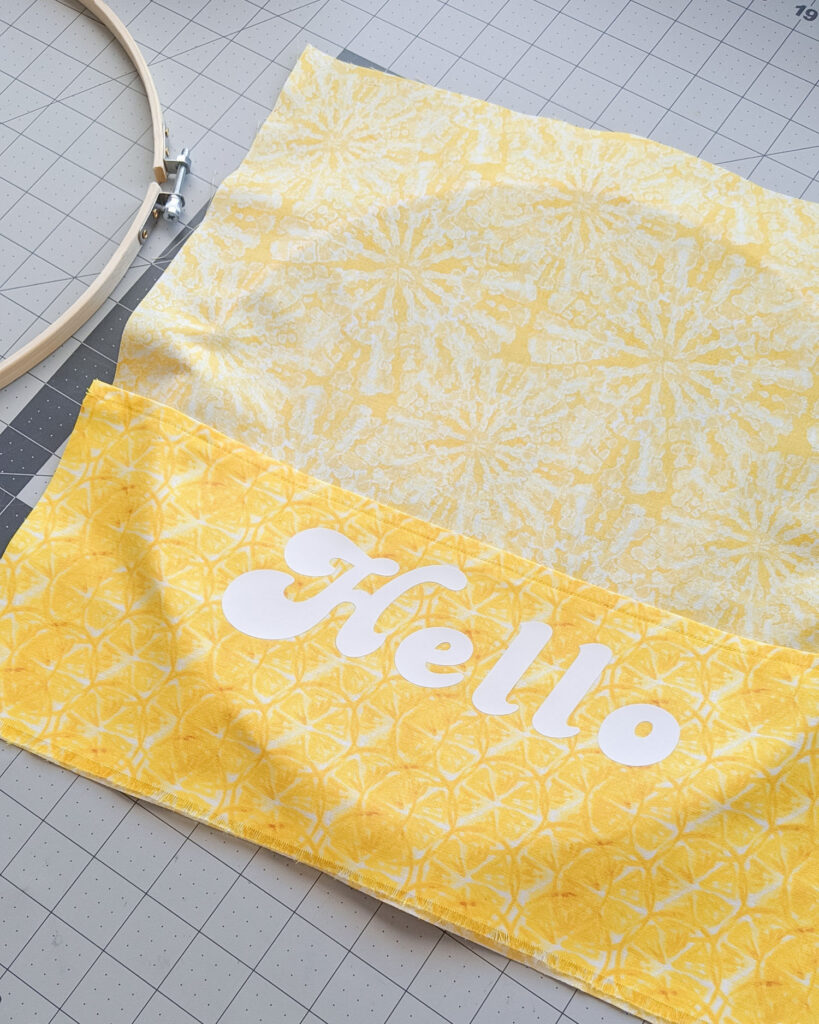
Cotton fabric – one for background, one for pocket (fat quarters work great for this project!)
Pom pom fringe trim
Ribbon (I used 5/8 inch grosgrain ribbon)
Fabric scissors
Sewing machine or fabric glue
Hot glue gun
Instructions
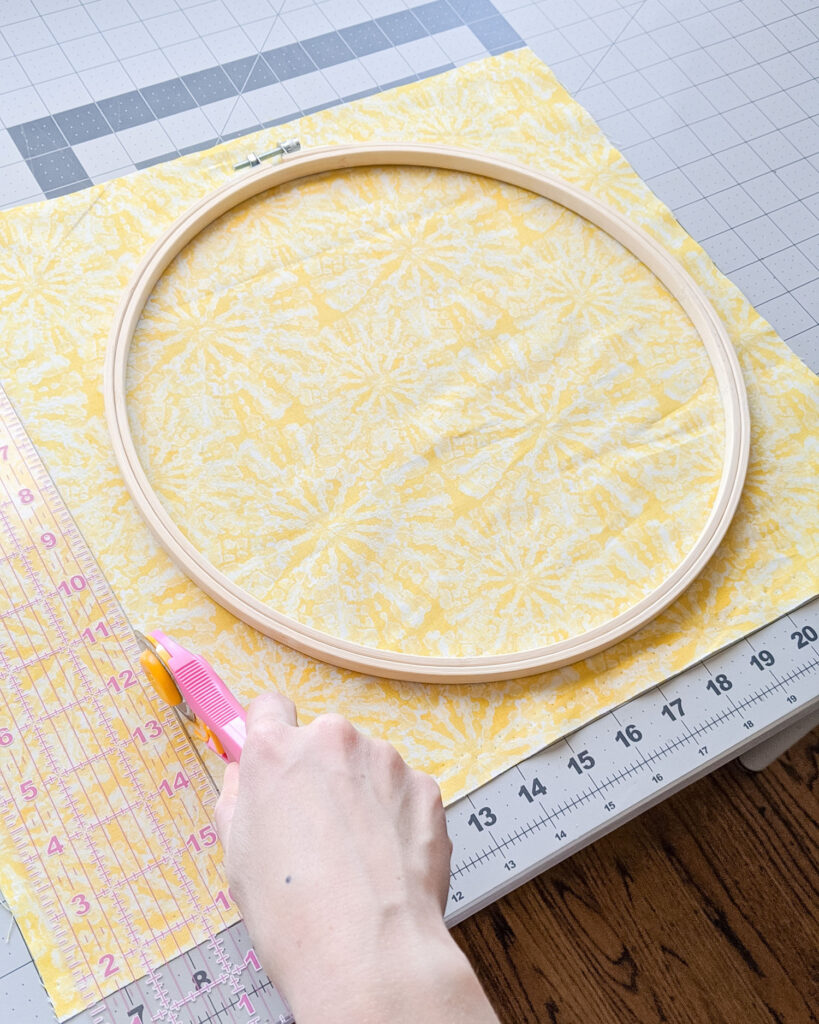
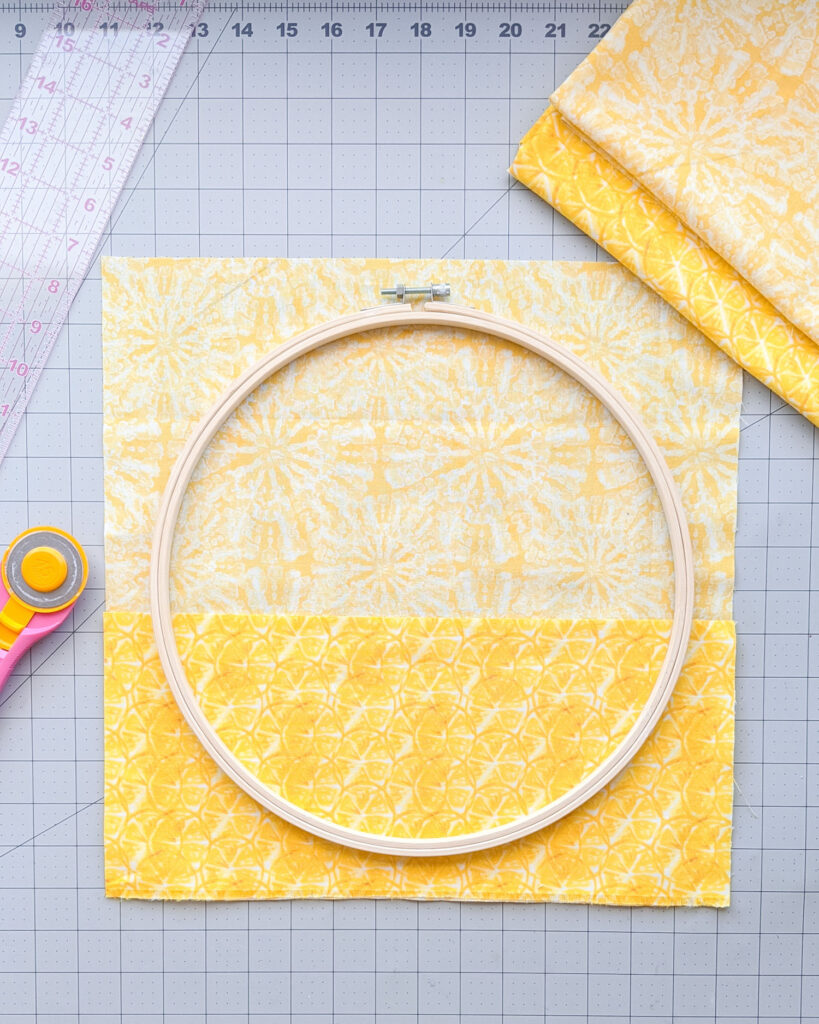
- Cut a 14.5” x 14.5” square of fabric for the background. Cut a 14.5” x 9.5” piece of fabric for the pocket. For the pocket, fold over the top edge 1/2 inch and either top stitch (with sewing machine) or use fabric glue to finish it.
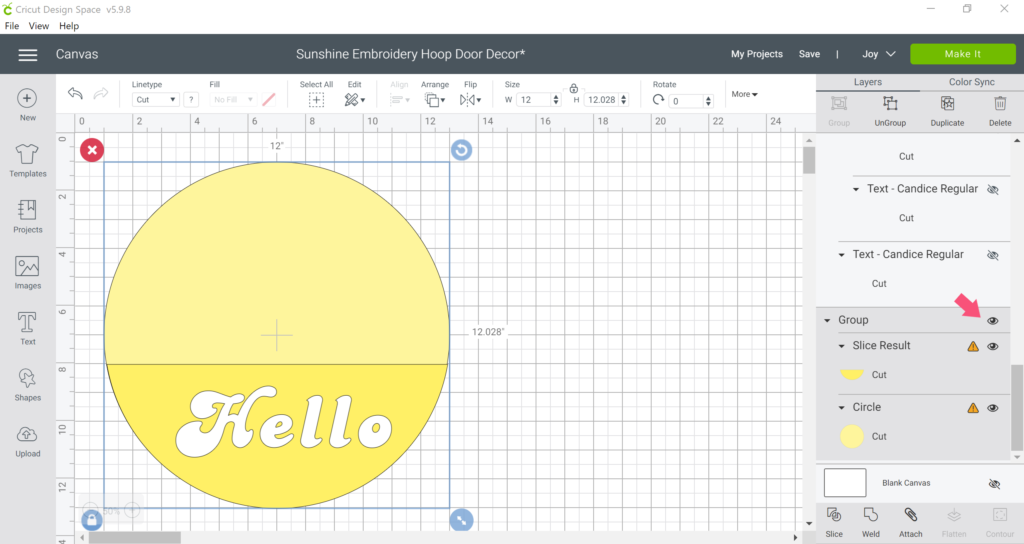
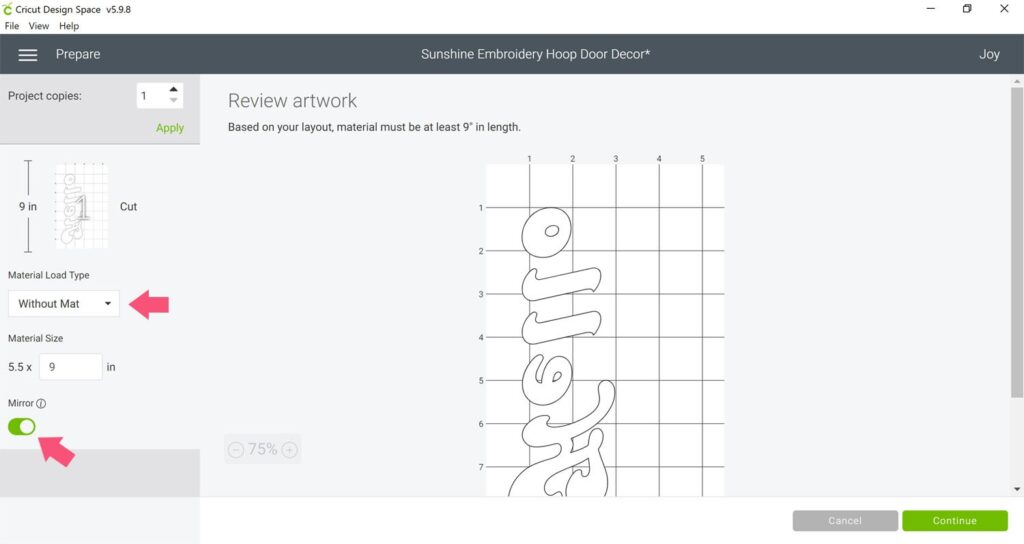
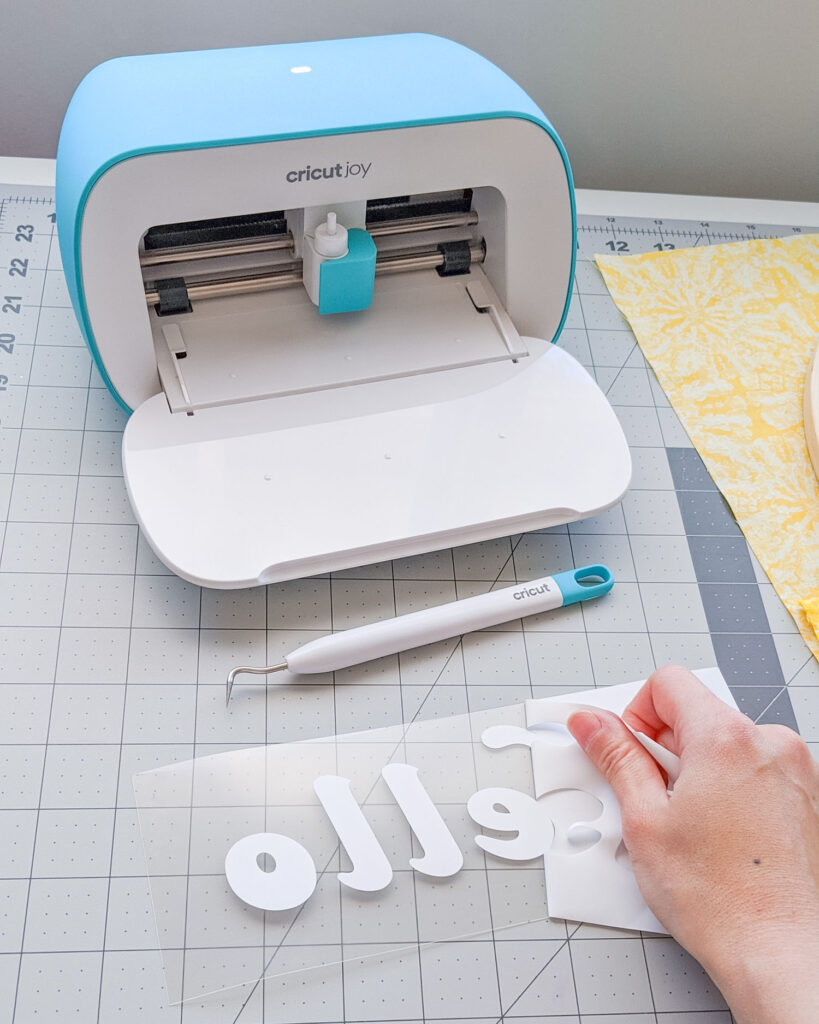
2. Follow this link to open my project in Design Space. Hide the yellow template (for sizing purposes) and hit the Make It button. Change type to Without Mat and turn on the Mirror feature.
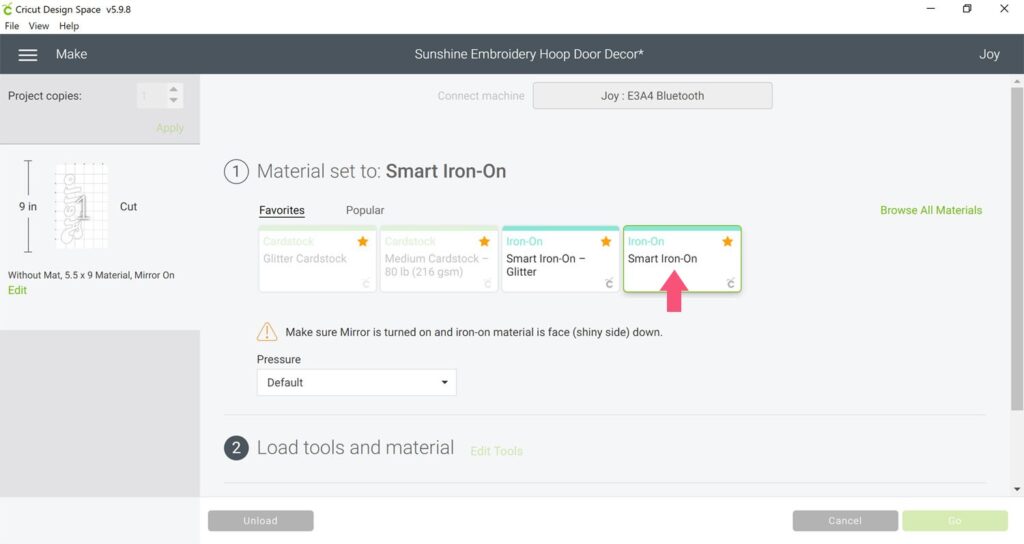
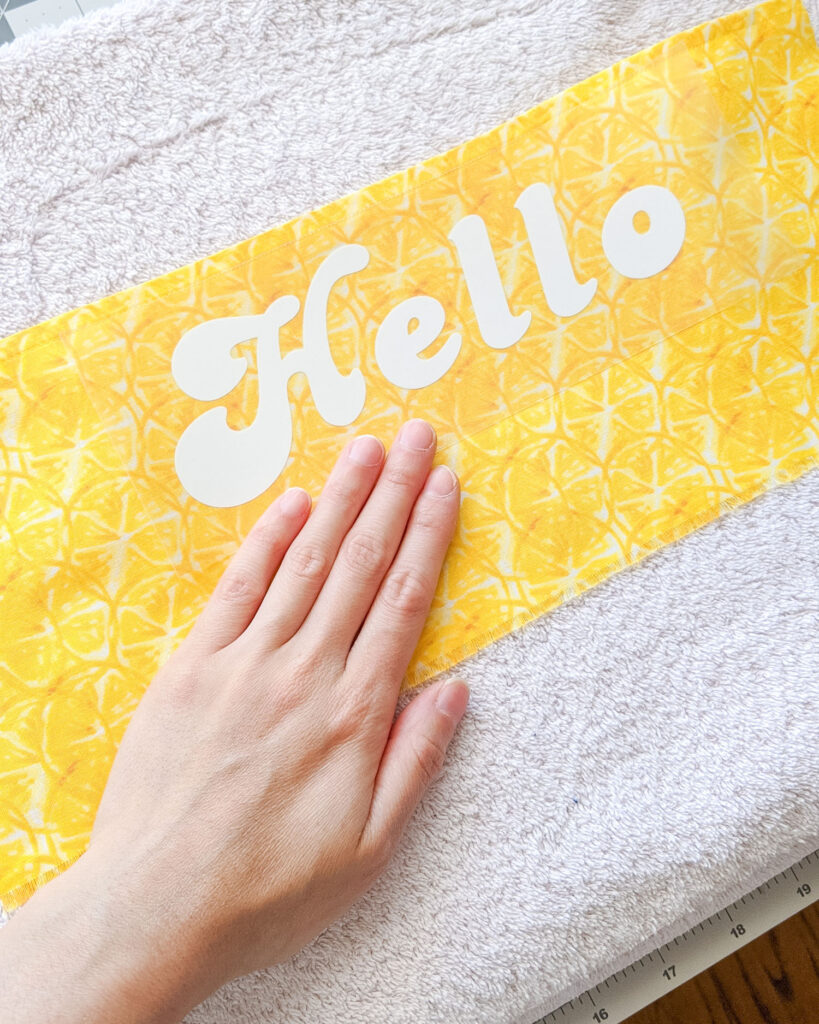
3. Set material to Smart Iron-On and load it shiny side down into your Cricut Joy (no mat required!). Allow your machine to cut out the design and unload when completed. Weed excess material.
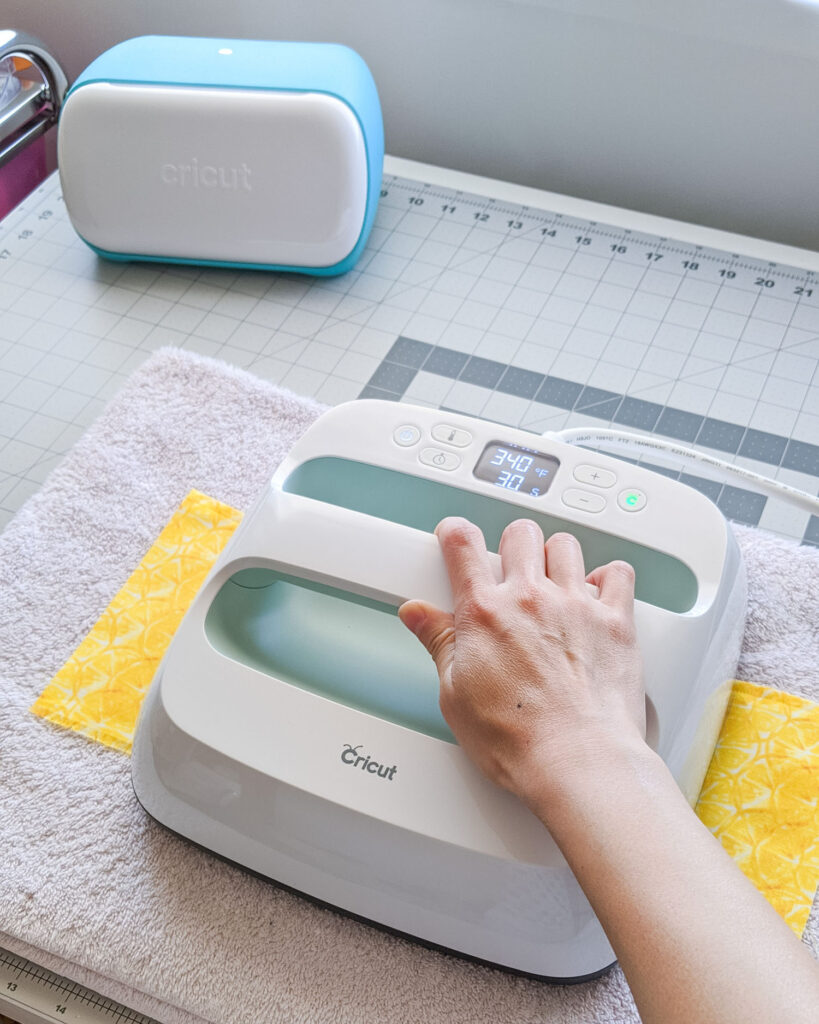
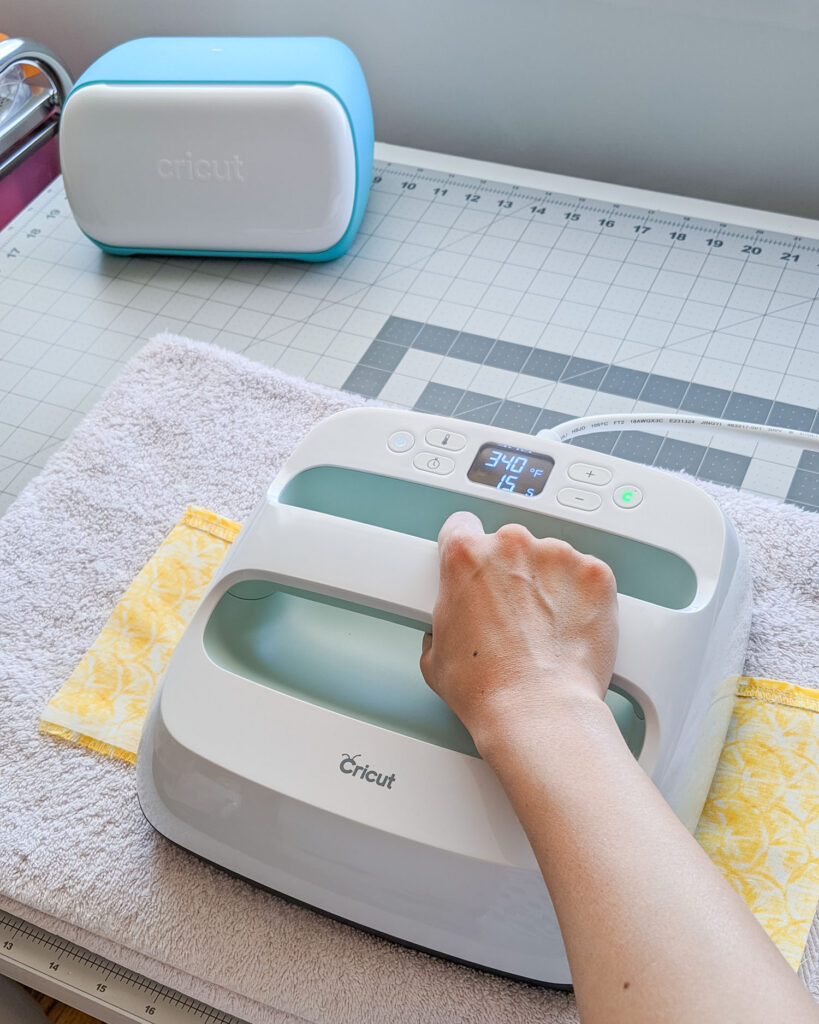
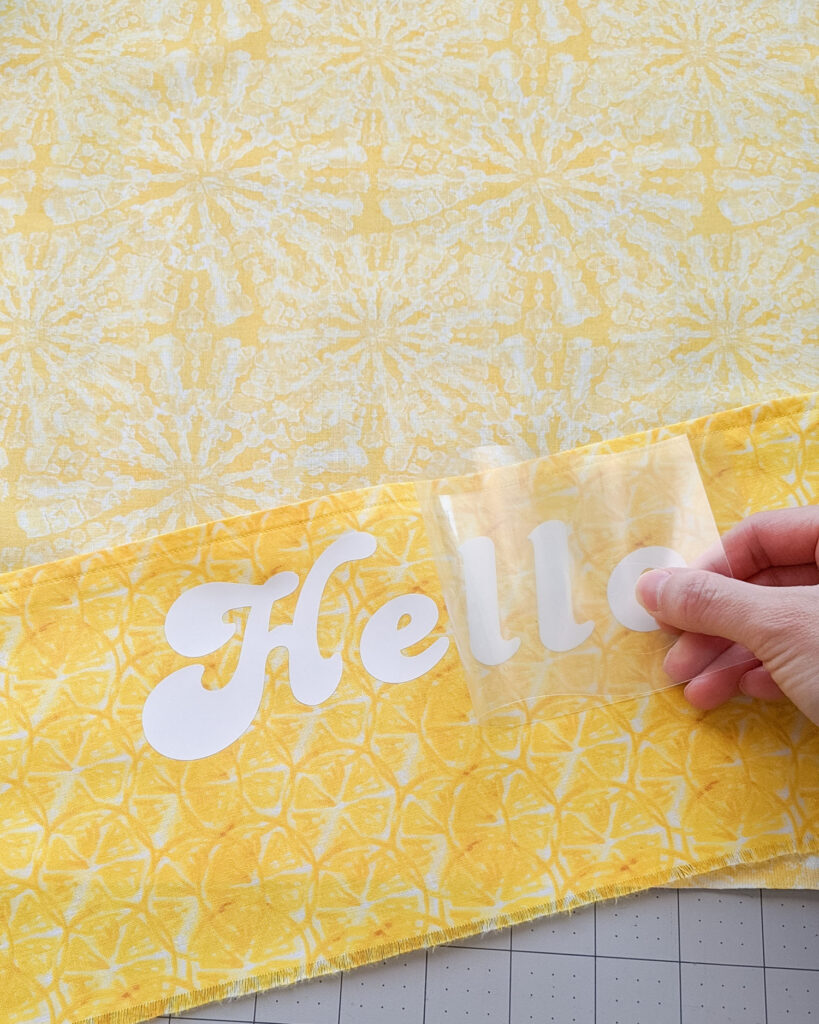
4. Test placement of design with your fabric and embroidery hoop. Lay out a fluffy towel and preheat EasyPress 2 to 340oF. Preheat cotton pocket fabric for 5 seconds. Place Smart Iron-On face down, liner side up. Press with light pressure for 30 seconds. Then flip over to reverse side and press for 15 seconds. Carefully remove liner when cool to touch. (Refer to the Heat Guide if you are using a different type of fabric or ironing surface.)
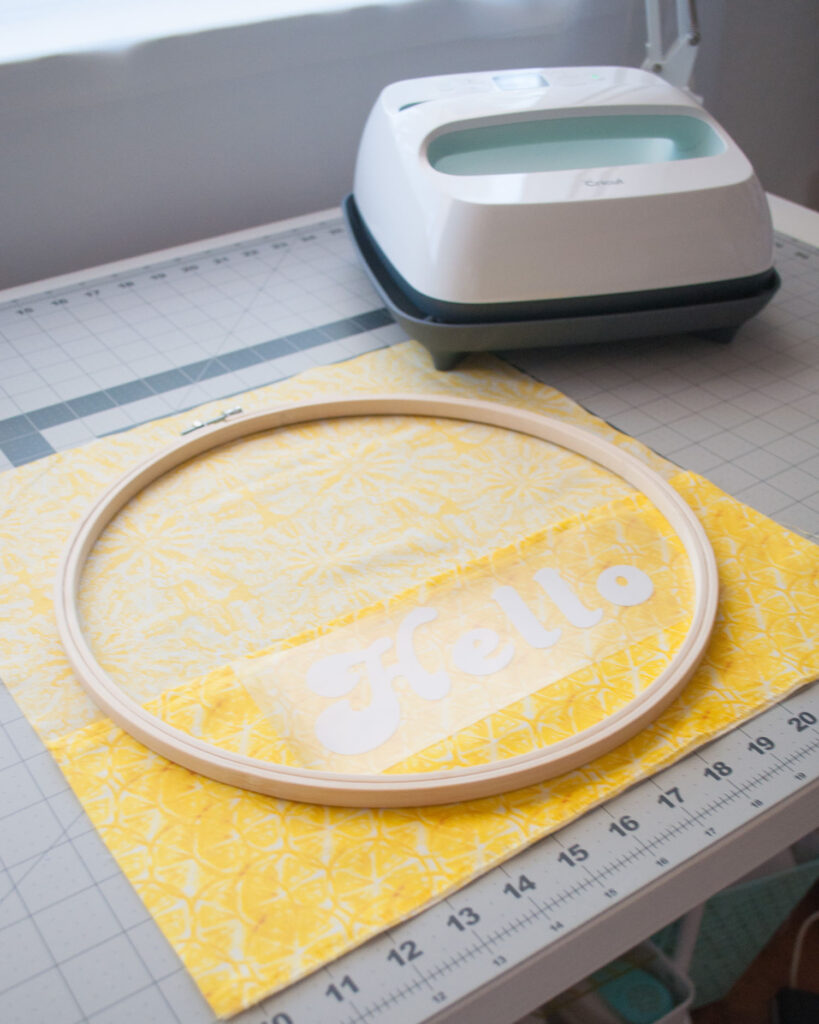
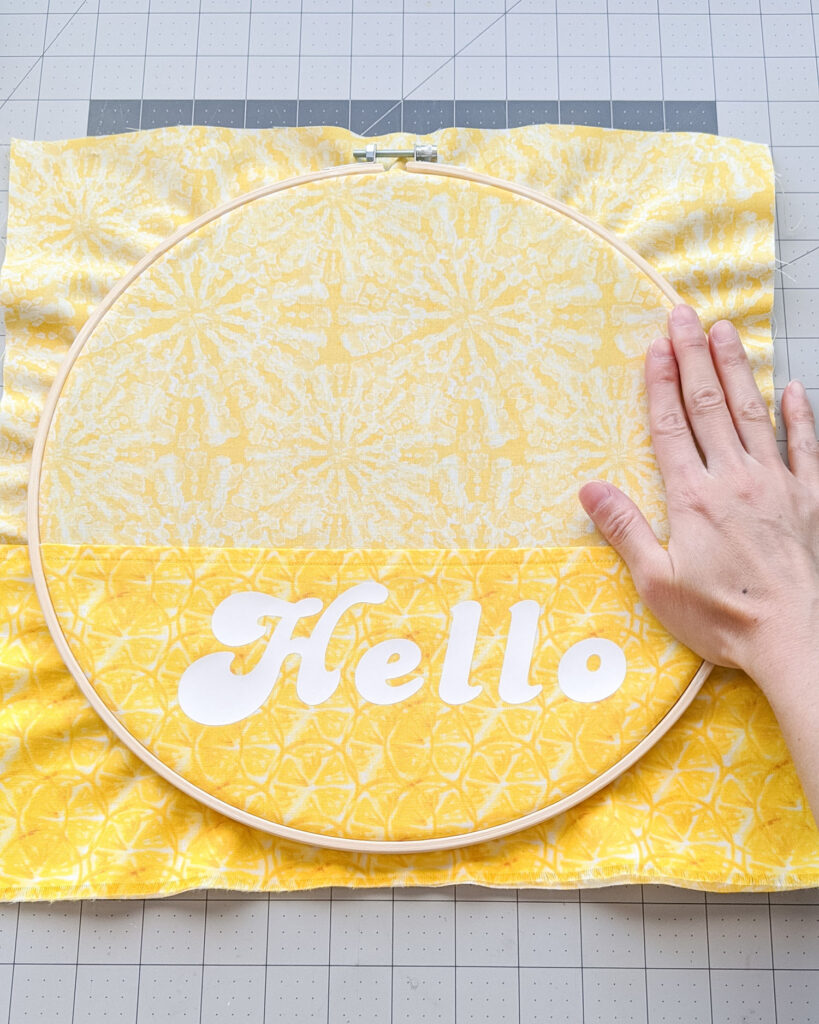
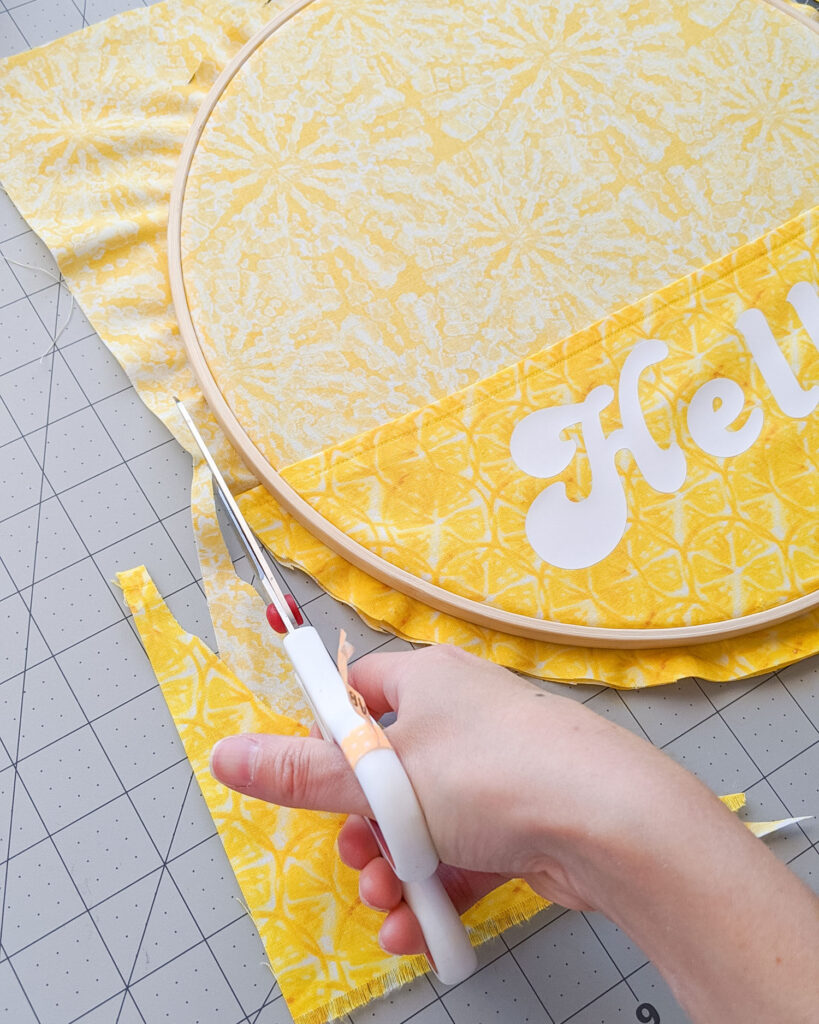
5. Separate the two parts of the embroidery hoop. Place the inner hoop on a flat surface and lay the background fabric on top. Lay the pocket fabric on top making sure your design fits within the inner ring. Place the outer ring on top sandwiching both fabric layers. Pull fabric to adjust the tension and tighten ring once you’re satisfied.
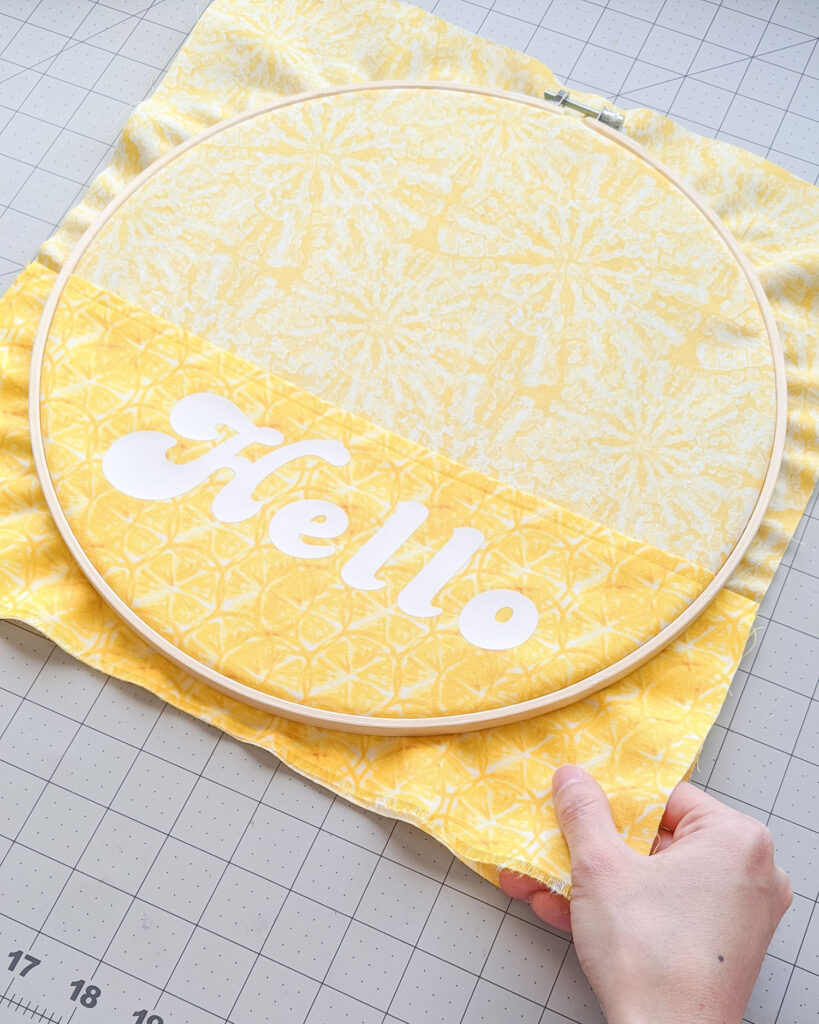
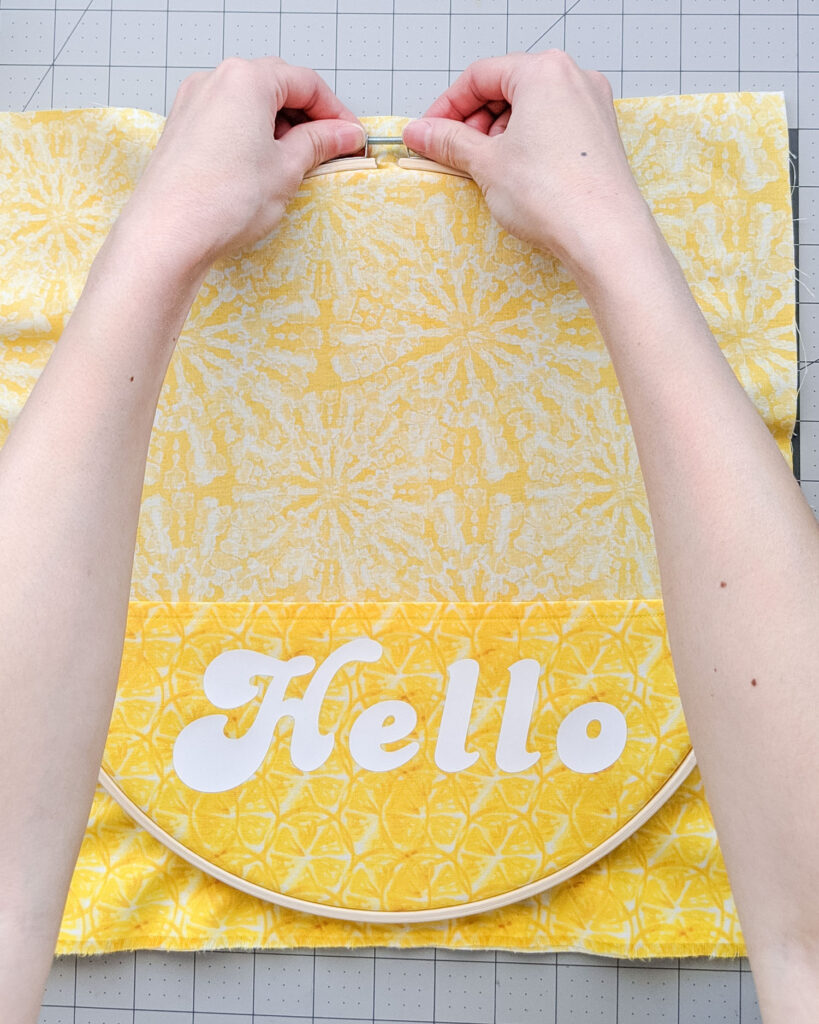
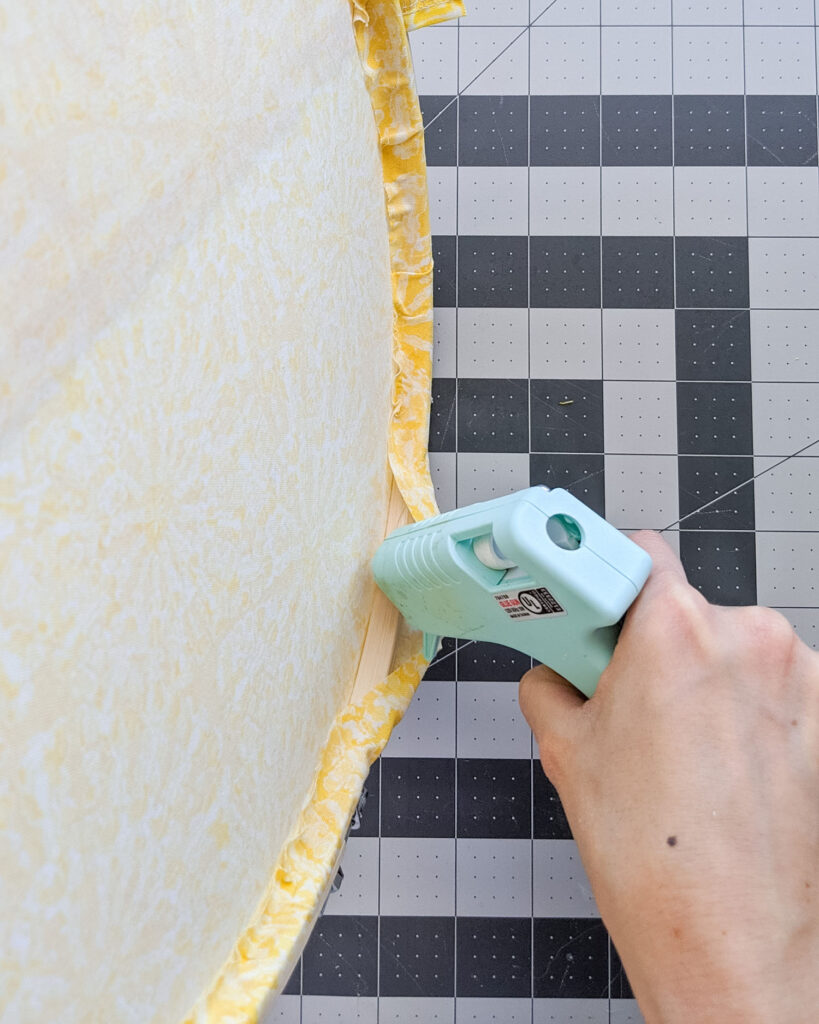
6. Trim excess fabric leaving a 1/2 inch border. Fold over and hot glue to the inner hoop.
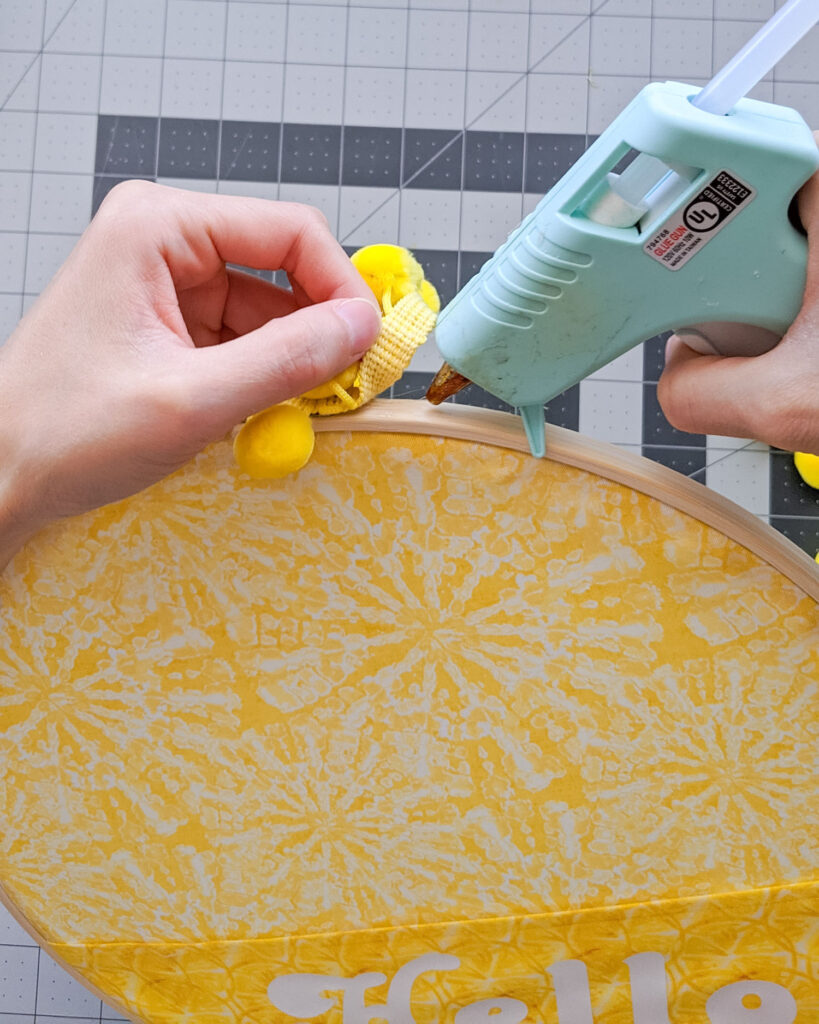
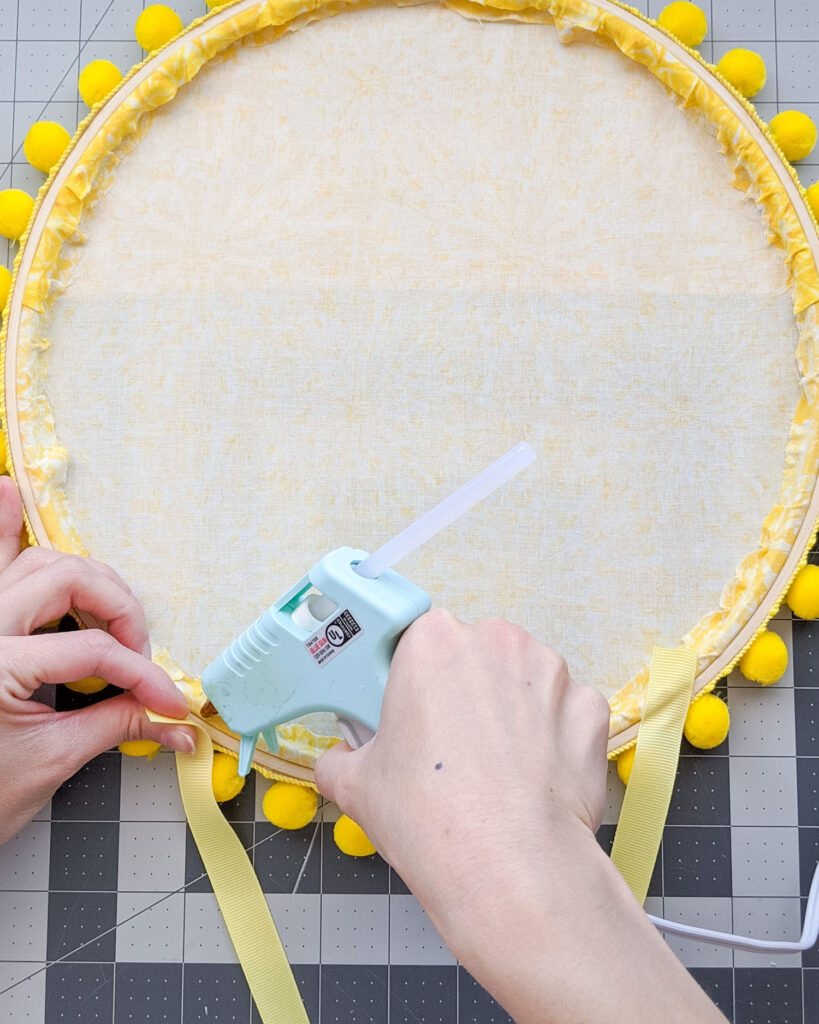
7. Hot glue the pom pom trim around the edge of the hoop. Hot glue a length of ribbon for hanging. (I used 18 inches so I can still use the peephole in my door! I recommend testing it out before you glue it down).
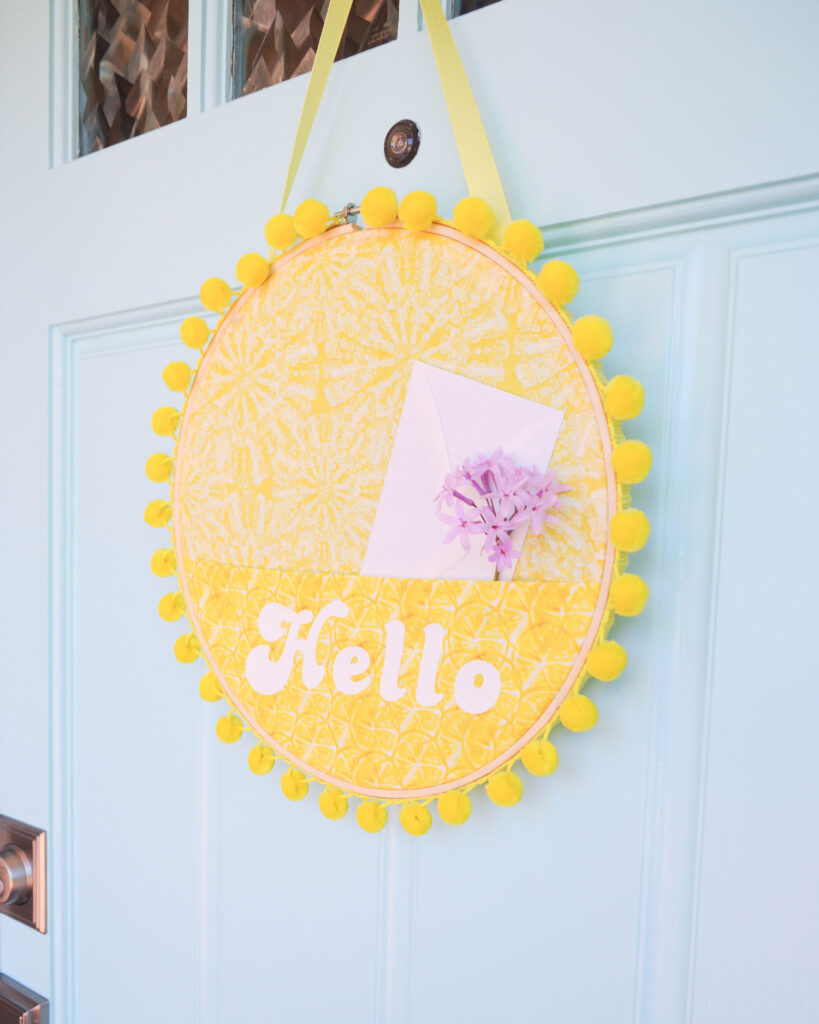
Optional: Fill with faux flowers or other accessories
If you loved this project, check out my Cricut Joy Gift Guide to find out what to need to get started. Happy crafting!