


Adjustable Face Mask Tutorial
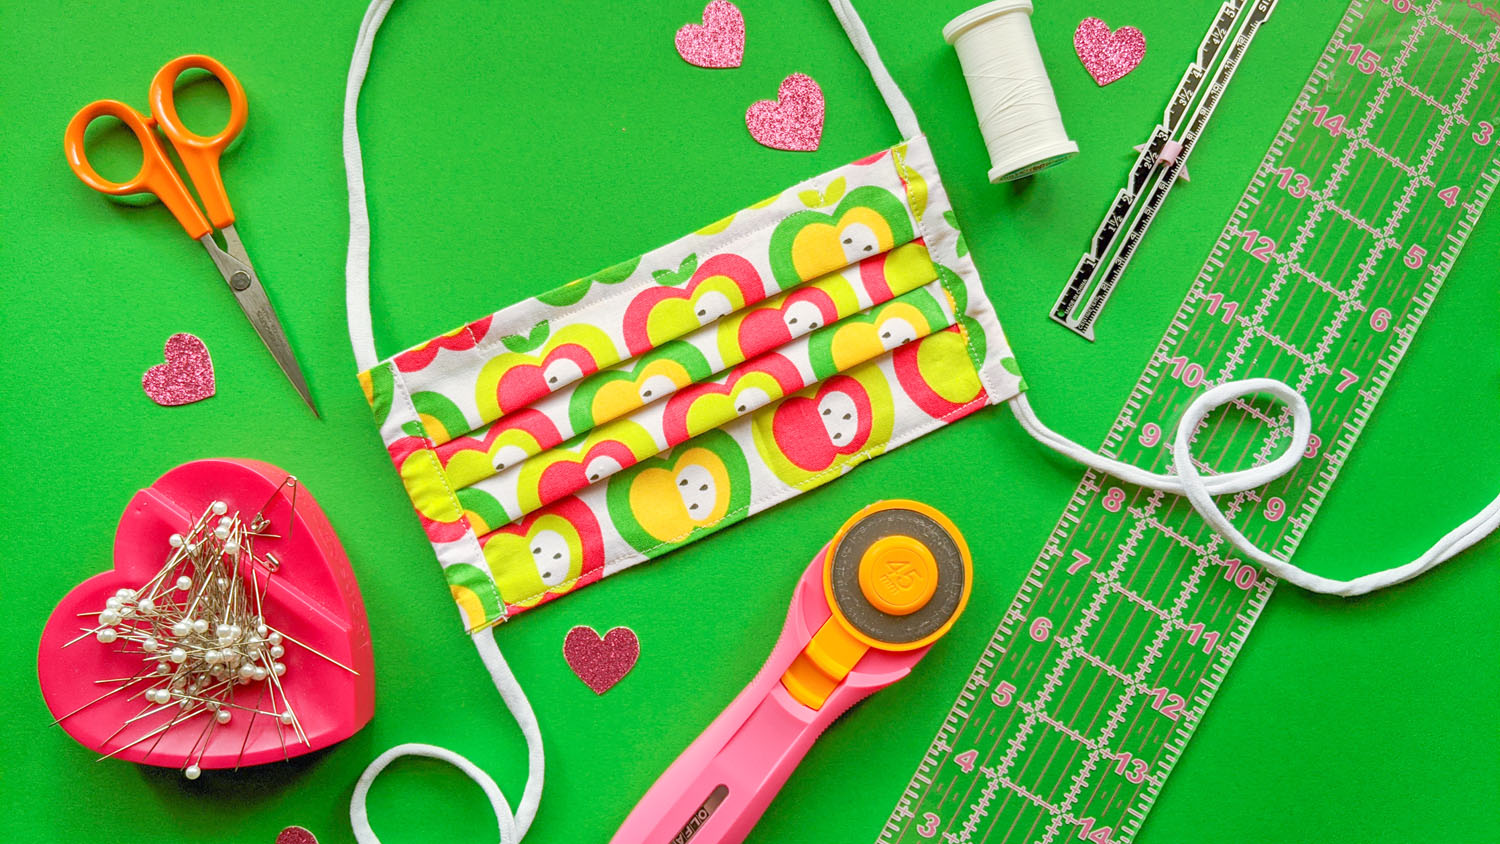
Learn how to sew an adjustable pleated face mask with a flexible nose wire, filter pocket and t-shirt yarn ties. Scroll down to see my video tutorial with captions.
Wearing a face mask in public has become the new norm for many people around the globe during this COVID-19 pandemic. If worn correctly, face masks can help prevent the spread of infection. At this time, the CDC is recommending “wearing cloth face coverings in public settings where other social distancing measures are difficult to maintain (e.g., grocery stores and pharmacies), especially in areas of significant community-based transmission.” It is important to note that face masks are not a replacement for good hygiene or social distancing, but should be used in conjunction with these practices. Face mask guidelines may differ depending on wear you live. Please follow your local jurisdictions.
In the last few months in the United States, there has been a huge surge in the production of fabric face masks to offset the use of medical grade face masks reserved for healthcare workers and first responders. I have seen so many crafters and businesses step up to the plate to sew face masks. The massive number of fabric face masks produced and donated by different individuals and organizations has truly shown the power of human kindness. Face masks have even become a fashion statement as different brands revamp their factories to produce designer versions. I’ve tried so many mask patterns over the last few weeks and found myself frustrated with the appearance, fit, function and/or process. Some were so thick I could barely breathe or even sew through the layers of fabric. Others relied on elastic ear loops, which one, quickly dug into the back of my ears and two, made it difficult to adjust for different head sizes. Some looked great but as soon as I started moving or talking, they would slip down my face exposing my nose! I probably have high standards (I’ve been sewing since I was 8), but I do think a good face mask should look good, feel good and most importantly, DO IT’S JOB! Don’t you agree? I wanted to make a face mask that checked all the boxes, so I put on my thinking cap and designed this face mask pattern with you in mind. I’m walking you STEP-BY-STEP through my exact process so YOU CAN SEW MASKS to help protect yourself, loved ones, essential workers, and others in your community.
This fabric face mask has been designed with following features:
100% cotton fabric – Studies have shown that doubled cotton fabrics with a tight weave are most effective at filtering out small particles (like SARS-CoV-2) without sacrificing breathability. Read more about face mask material efficacy here.
Pleats – Unlike some fitted face masks, this pleated style is much more forgiving to different face shapes and sizes. It also allows for more flexibility, so you can move and talk without having to touch your mask to readjust.
Nose wire – The nose wire channel at the top of the mask allows it to conform to your face and lessens gaps for the entry of unfiltered air.
Filter pocket – The bottom filter pocket gives you the option to insert your filter material of choice. Please do your research and contact the product manufacturer before using various filter materials near your face.
T-shirt yarn ties – The t-shirt yarn was my favorite discovery! Unlike elastic or bias tape, t-shirt yarn allows for an adjustable and comfortable fit. It’s also quick and easy to make (compared to bias tape). There are lots of tutorials online for how to make your own t-shirt yarn from t-shirts you have at home! Please note the t-shirt you use should not have any screenprint or side seams.
Materials
- 100% cotton fabric
- Floral wire (22 gauge or similar)
- Thread
- 55” t-shirt yarn
- Sewing machine
- Serger machine
- Iron and ironing board
- Scissors
- Pliers and wire cutter
- Sewing gauge
- Pins
- Small safety pin
- Optional: rotary cutter, ruler, self-healing mat
Instructions
Please use the below instructions together with this video for best results.
Use a 3/8″ seam allowance unless noted otherwise.
I recommend using a 90/14 needle for sewing because the side casing ends up being a bit thick.
Cut and prep
- Cut out two 8” x 8” squares – one for the mask front, one for the mask lining.
- Cut out two 4.5” x 2” rectangles for the casing – this will be called “casing piece”. Don’t forget to think about the orientation of your print.
- Serge the top and bottom edges of the mask front and mask lining. If you do not have a serger machine you can also use pinking shears or the zigzag stitch on your sewing machine.
Mask bottom and filter pocket
- Place your mask front and mask lining right sides together. Rotate so the bottom edge is on the top. Measure and pin 2.5” from the side edges. Sew this bottom edge leaving a 3” gap in the middle. The gap will serve as an opening for your filter pocket
- Press seam open. Place a pin on both ends of the filter pocket. Topstitch 1/8” around opening.
Mask top and nose wire
- Place the mask front with the mask lining right sides together and pin. Sew across the whole top edge.
- Cut a 5” piece of floral wire. Bend both ends into a loop. Straighten wire as much as you can.
- Flip the mask right sides out through the side opening. Press top and bottom seams so the mask front is facing you. Place a pin 1.5” from left top edge. Open the right edge and slide in your wire, sandwiching it between the seam. Pin next to wire and 1.5” from the right edge to secure wire in place. Sew along the pin lines encasing the wire. Make sure to backstitch at the beginning and end.
- Topstitch 1/8” along the bottom edge to meet the stitching around the pocket opening. Backstitch once you reach the opening.
Creating pleats
- With the mask front facing you, fold over the top edge 1.25” and press. Flip the mask back to the front and create a 1/2” pleat. Press in place.
- Create two more 1/2” pleats, pressing each one. There should be a total of 3 pleats.
- Measure both sides to make sure they are even.The final measurement should be ~3.5” to 3.75” high.
- Pin the pleats and sew into place. Leave the pins in until the last moment to prevent the pleats from shifting as you’re sewing.
Creating the side casings
- Fold up the bottom edge (2” side) of the casing piece ~1/4” and press. Pin the bottom edge to the bottom side of the mask, right sides together. Fold over the top edge to match the top edge of the mask and press. Add a few more pins to secure the casing piece to the mask. Repeat with the other casing piece on the other side. Pay attention to the orientation of the print.
- Sew both casing pieces to mask with 1/2” seam. Be sure to backstitch at the beginning and end.
- Press the casing open on each side. Flip mask so the mask lining is facing you. Fold the edges of the casing piece in twice so raw edges are inside. The folded edge of the casing piece should align with the stitching on the mask. Press and pin in place. Repeat on the other side. Flip mask so mask front is facing you and topstich 1/8” from front seams.
Insert the ties
17. Attach a safety pin to one end of t-shirt yarn. Using the safety pin as a guide, thread the yarn through the casing from the bottom of one side of the mask. Pull some of the yarn through. Thread the yarn through the top opening of the other side of the mask. Remove safety pin and knot both ends.
Fabric Face Mask Hygiene
- Wash your hands (if not an option, apply hand sanitizer) before donning your mask.
- Adjust face mask so it is snug, but comfortable.
- Avoid touching or adjusting the mask while wearing it.
- Avoid touching your eyes, nose and mouth when removing your mask. Wash hands immediately after removal.
- Wash your mask regularly – ideally after every use, but especially if visibly soiled. This mask is machine washable and should be air dried if possible. It can be put in the dryer on low heat if necessary. Once dry, you may use an iron to recreate the pleats.
Please let me know how this pattern works for you. I would love to hear your feedback. Tag me on Instagram if you make one! Stay safe and happy crafting!
Sara A. Tompkison
Fabulous job Blaire. Loved the precision and details. My only question is where can I purchase your masks. They look so comfortable. Take care and stay well. Auntie Sara from Honolulu .