Colorful Pantry Organization Inspired by The Home Edit

Pantry organization can be functional, pretty and fun! When “Get Organized with The Home Edit” aired on Netflix I was immediately hooked. I loved watching Clea and Joanna (and The Home Edit team) transform homeowner’s spaces from cluttered and chaotic to organized and beautiful. They shared so many amazing tips that can be applied all over your home. Since we’re all still spending more time at home, it’s the perfect opportunity to get organized and create spaces we love.
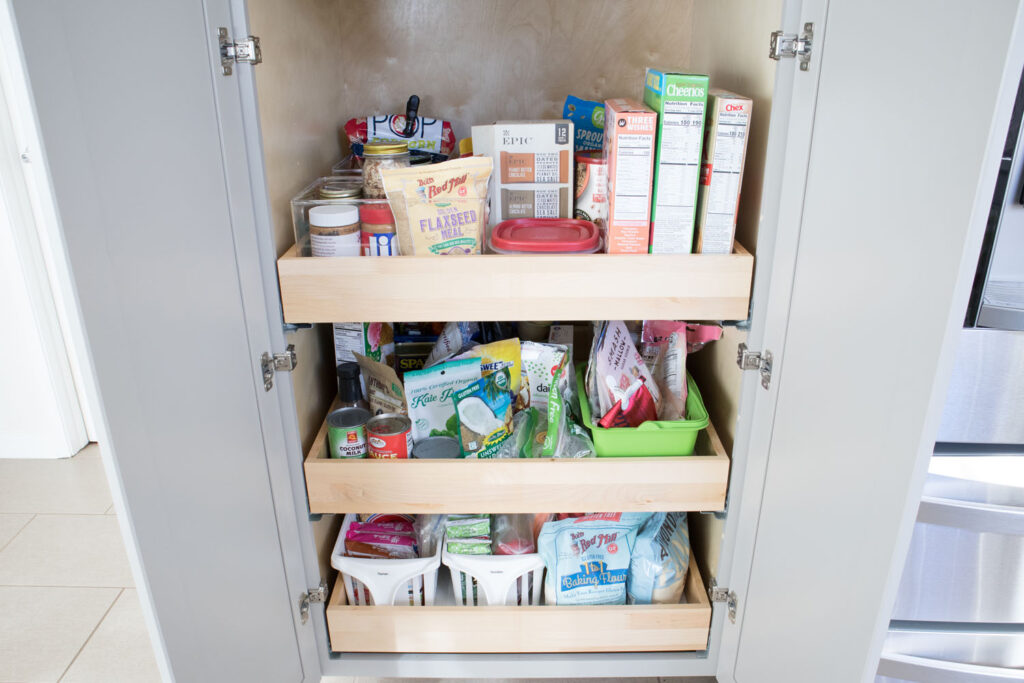
One of the messiest places in my home was my pantry. I don’t have a walk-in pantry (what a dream!) so most of my food storage happens in one cabinet next to the refrigerator. To call it a hot mess would be an understatement! It was filled to the brim with half eaten snacks (I’m a snack girl) and food we didn’t eat. Nothing really had its place. I even bought clear bins last year but didn’t commit to labeling them so random things ended up inside. It was always so stressful trying to find stuff, plan meals and make shopping lists!
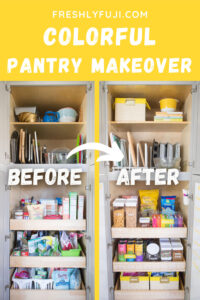
BEFORE

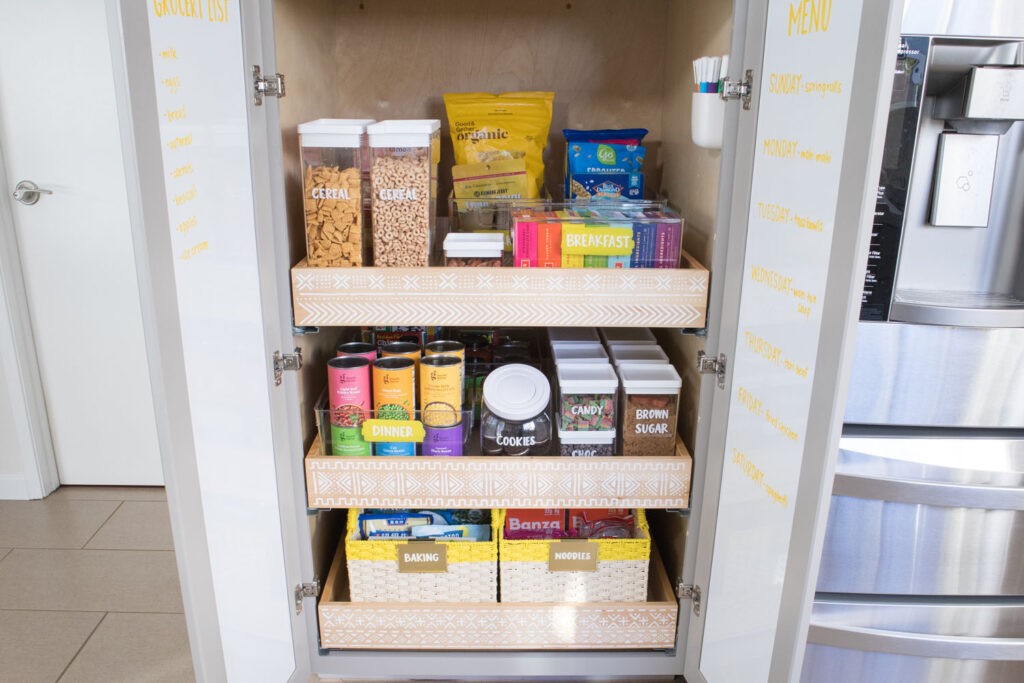
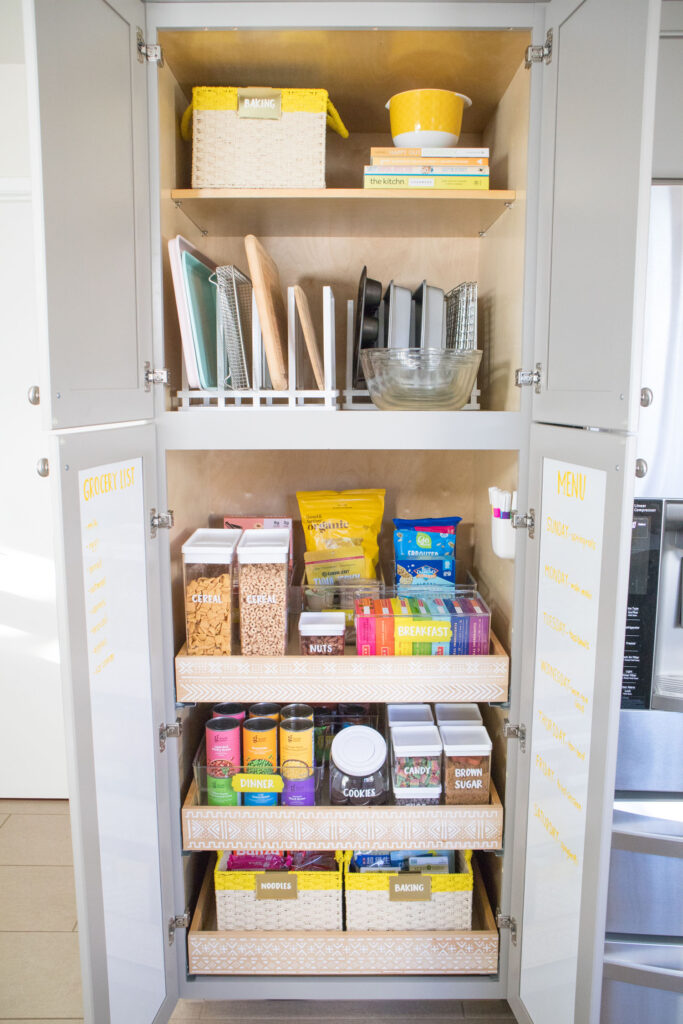
With the help from my friends at COLORSHOT, I was able to create an organized AND stylish pantry inspired by The Home Edit! I chose 2021 Pantone colors of the year – Ultimate Gray and Illuminating (a bright yellow) with white as my color palette. My cabinets were already gray, so I used Emoji yellow to add sunny pops of color in my pantry. I even added a stencil and whiteboard for extra design and function. Isn’t it all so refreshing?
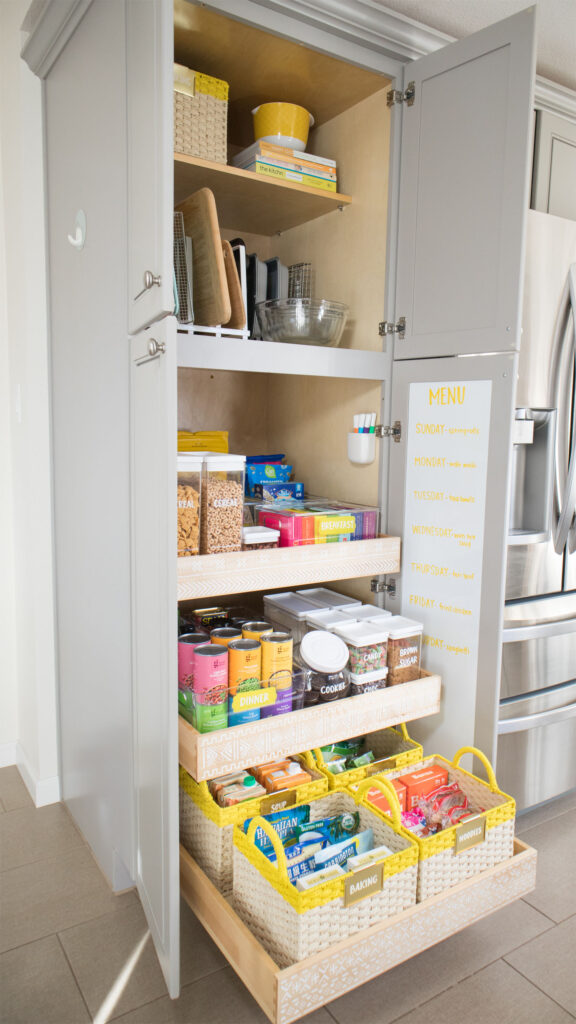
AFTER
Keep reading for my pantry organization tips and video tutorial!
This pantry organization tutorial and video was created in partnership with COLORSHOT. As always, the concept and content are all my own. Some of the below links are affiliate links and if clicked, I may make a small commission at no cost to you. As an Amazon Associate I earn from qualifying purchases.
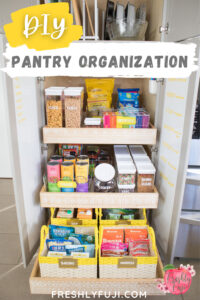
PANTRY ORGANIZATION
I used the pantry organization steps suggested by The Home Edit: Edit, categorize, contain, maintain. (Admittedly I haven’t done much of the maintain step since it’s still pretty new!) I added a few extra DIYs to lend even more style to this space! Scroll down to the DIY Tutorial section to get the detailed steps.
Step 1: Empty
Take everything out of your pantry and place it on a countertop or tabletop. This allows you to get a grasp of what and how much you have. While it’s empty, wipe down any shelves and drawers.
Step 2: Edit
Remove anything expired or you no longer need. Consider donating non-perishables to your local food bank if they’re unopened and still within the expiration date.
Step 3: Categorize
Group items into categories. For example: breakfast, snacks, dinner, baking, etc. If you have family members with allergies or dietary restrictions, consider making a category just for them.
Step 4: Contain and Label
Measure the size of shelves and drawers in your pantry.
Find storage items that will fit your space. Test them out in your pantry before committing to using them. Label each item with the name of it’s contents. Ideas for labeling are found in the DIY Tutorial section below.
Here are storage items that worked for me:
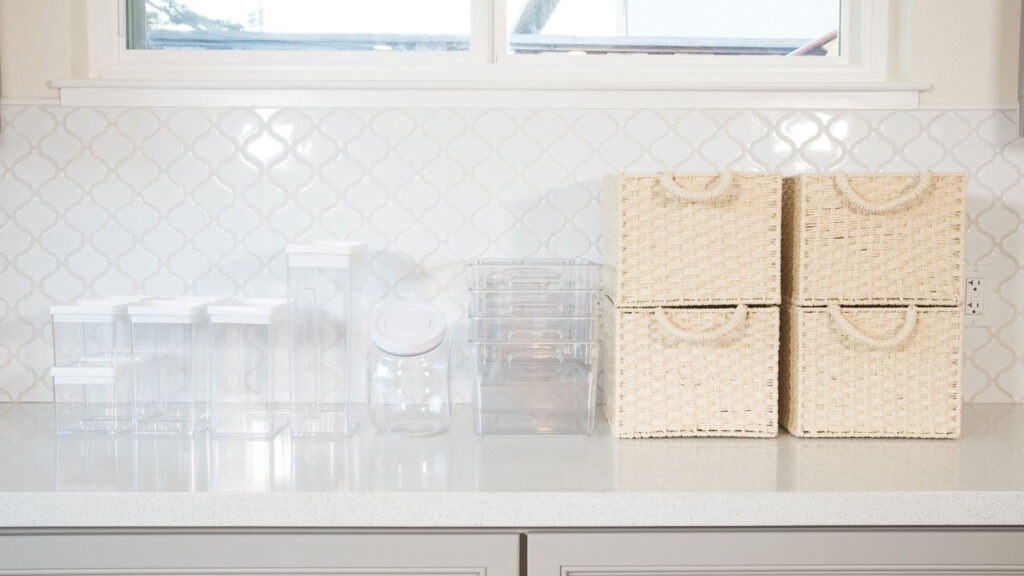
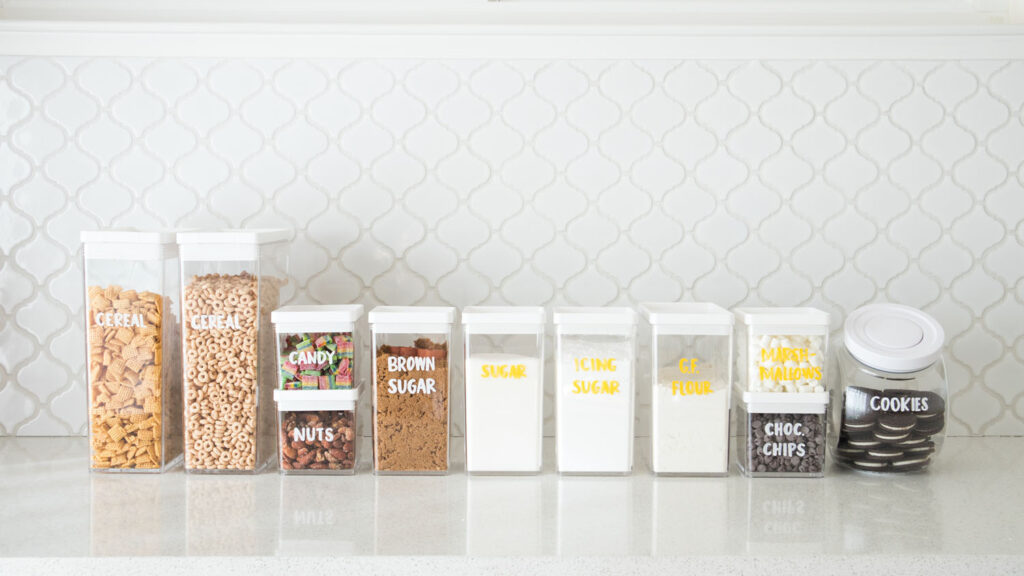
Clear Food Containers
Decant frequently used food products into clear containers. This helps you see what you have and track when you’re low on inventory. These containers I used are air-tight, stackable, have a modern design and are affordably priced!
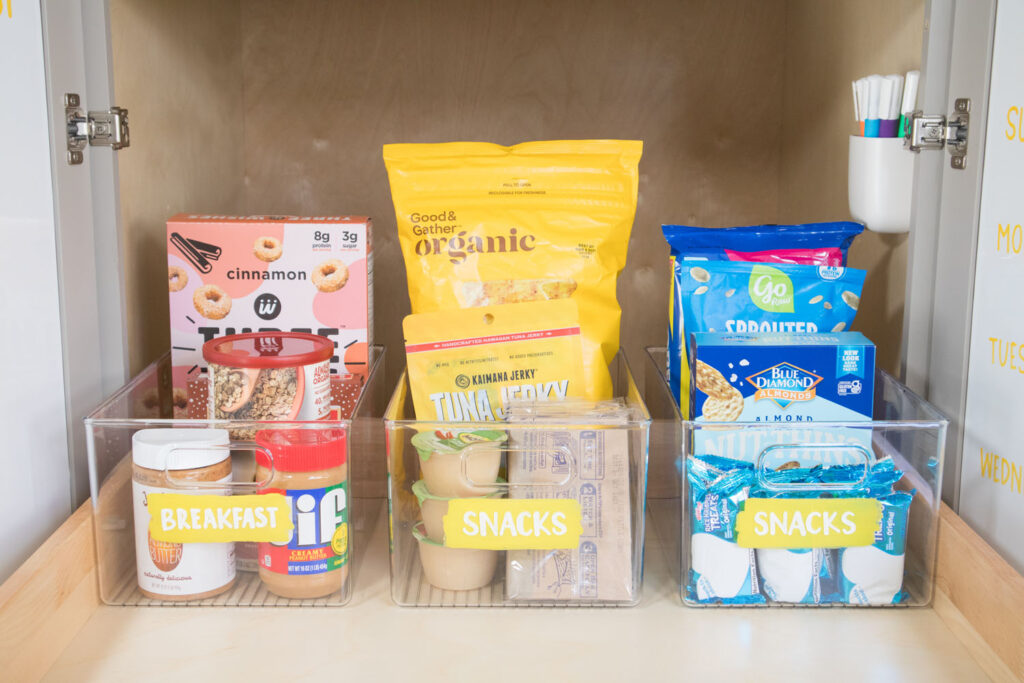
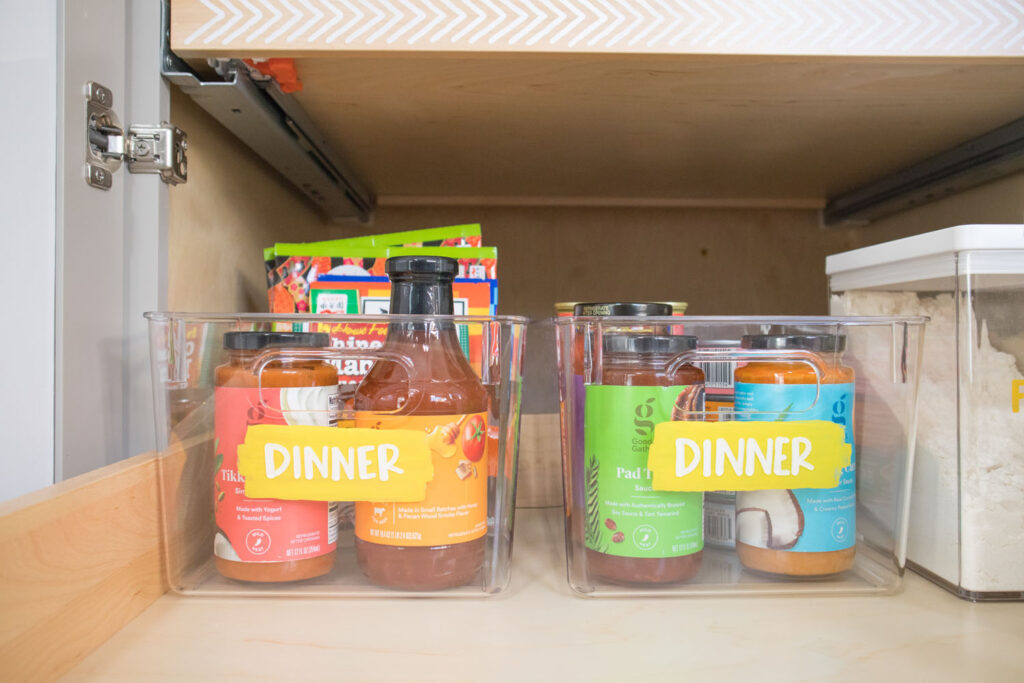
Clear Bins
Clear plastic bins are great because they allow you to see everything inside. These clear bins are a great dupe for the popular Container Store ones and are a fraction of the price. Keep reading to see how I added a fun label to them!
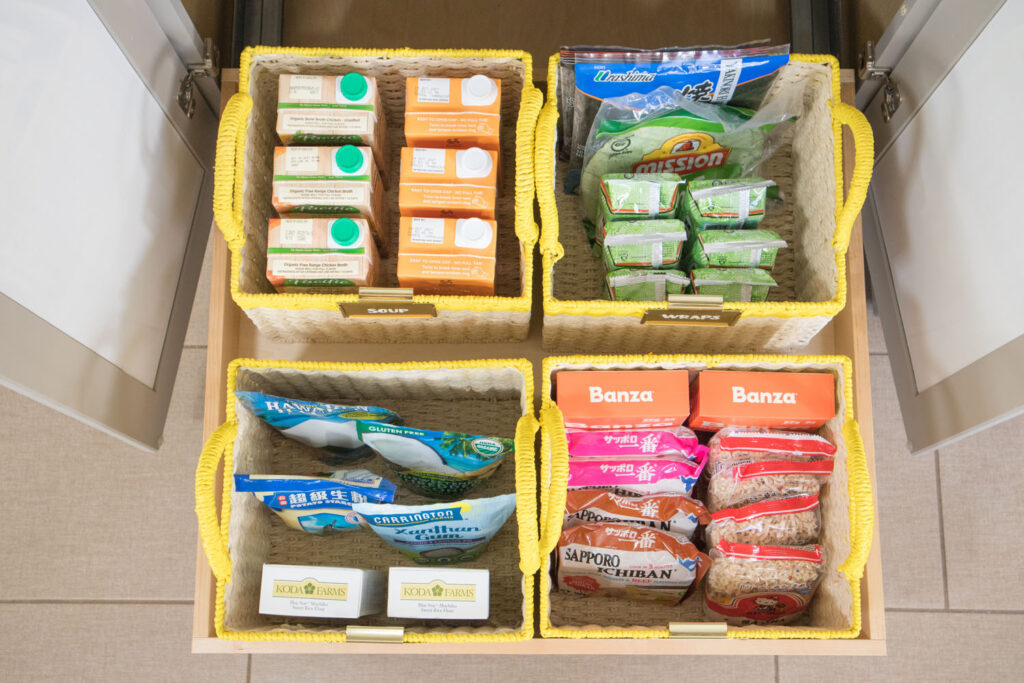
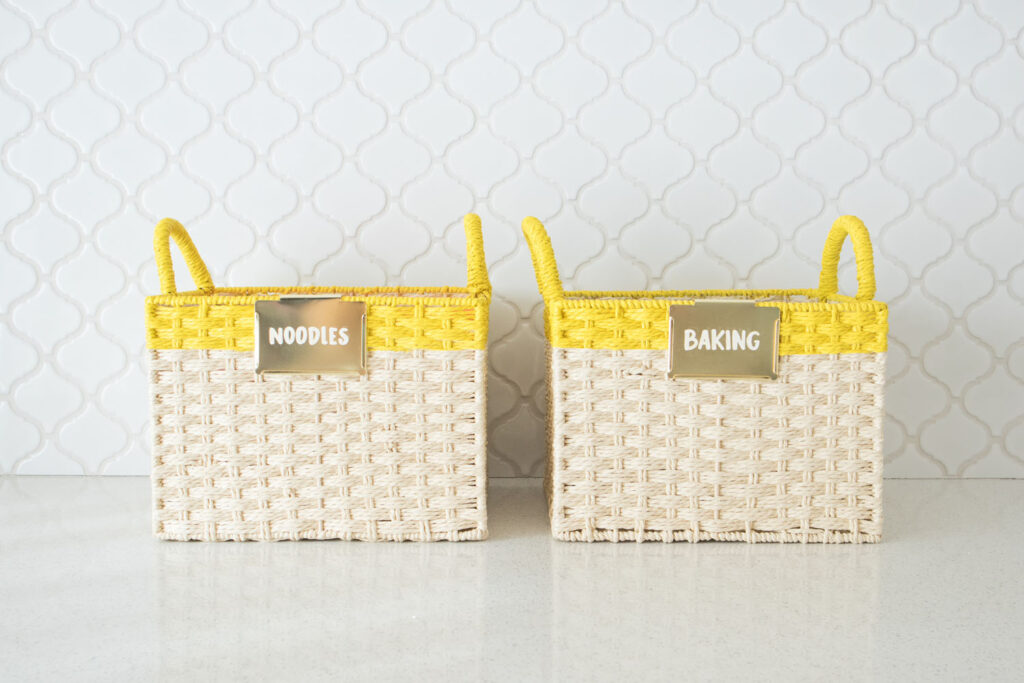
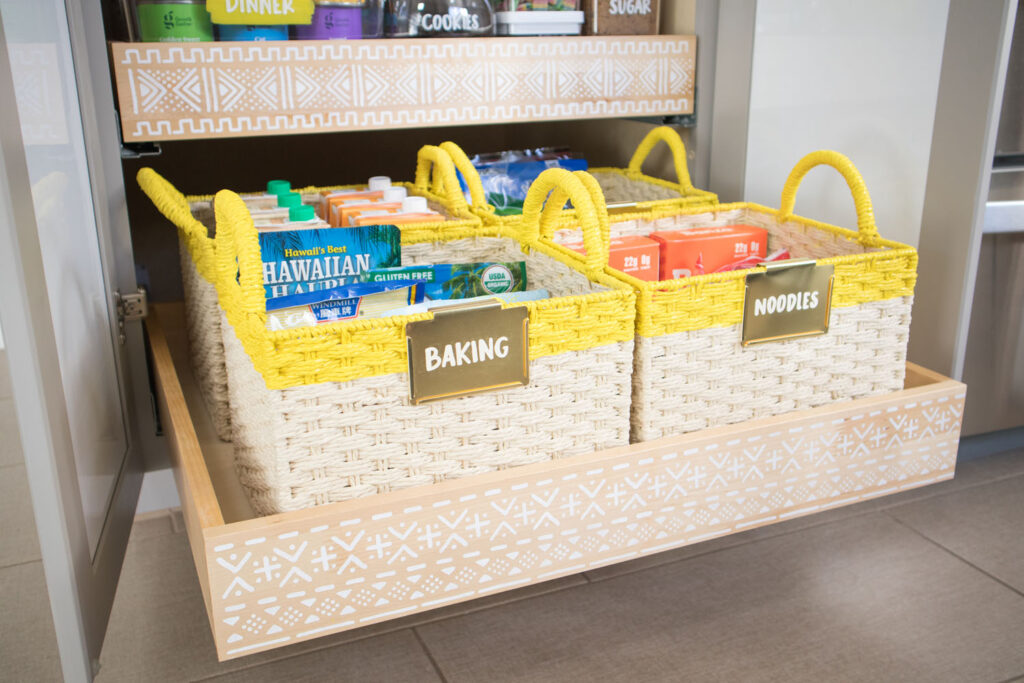
Baskets
Woven baskets are functional, stylish and perfect for storing large items and back stock (extra items) you don’t want to display. I loved the price point and handles on these baskets I used. Keep reading to see the makeover I gave them!
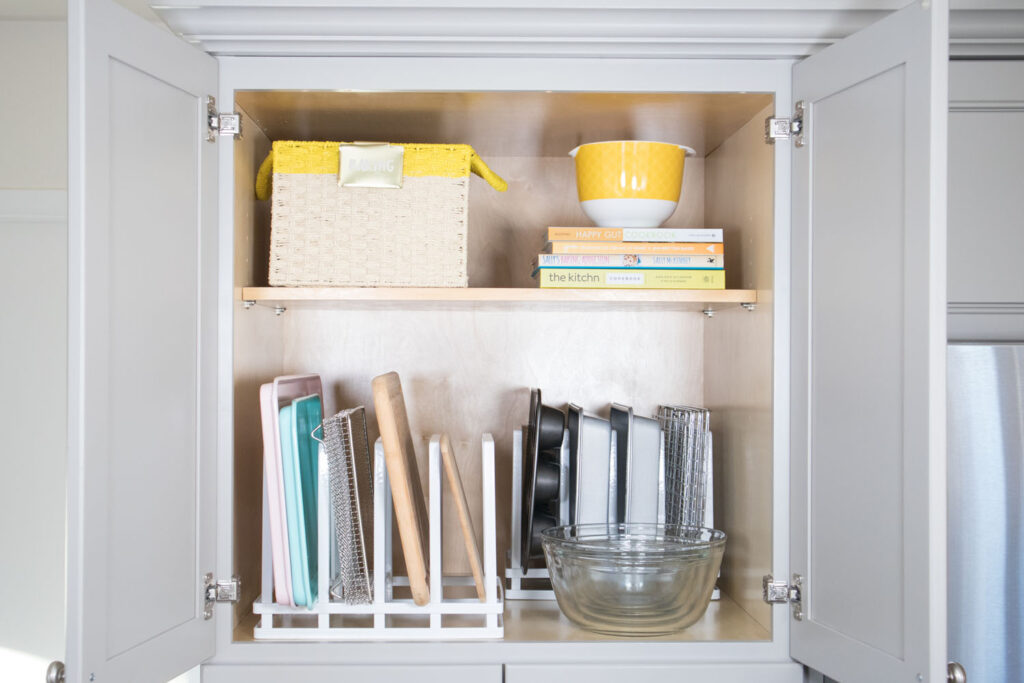
Pan Dividers
Storing cutting boards, cookie sheets and baking pans can be tricky. I’ve found that storing them vertically makes the best use of space, while allowing them to be easily accessible. If your pantry does not contain built in dividers, you can purchase pan dividers like these. I like that this one is durable and looks modern.
Please note that you do not have to go out and buy everything new. Purchasing storage items for your pantry can add up quickly if you’re not careful. If you need to stick within a budget, reuse what you already have and get creative! You can always save up for nicer containers and add them in later.
Step 5: Restock and Enjoy!
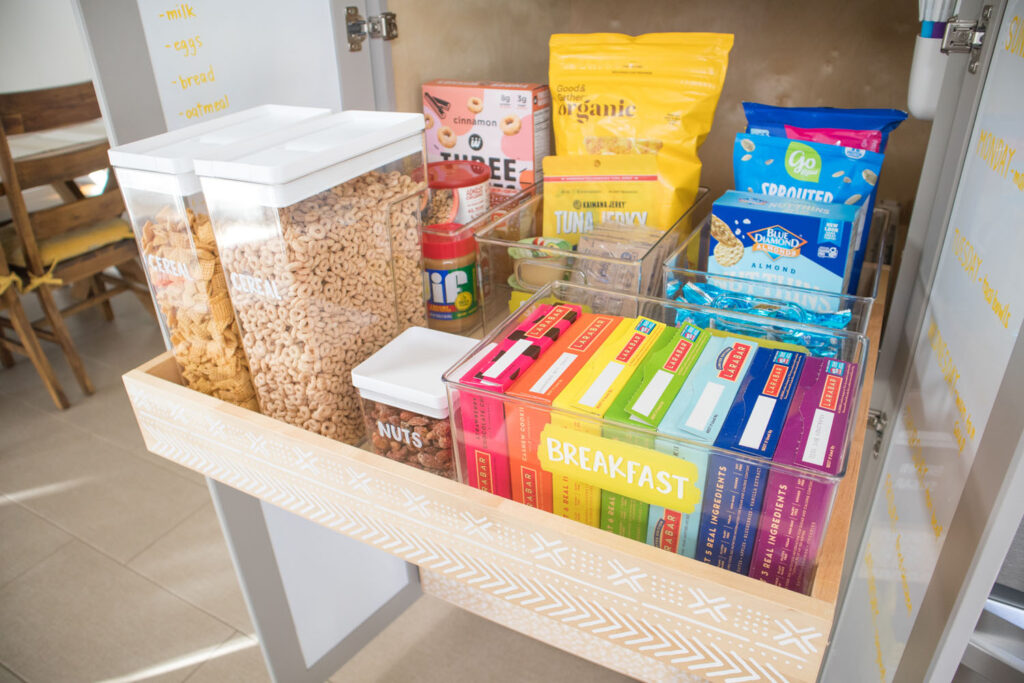
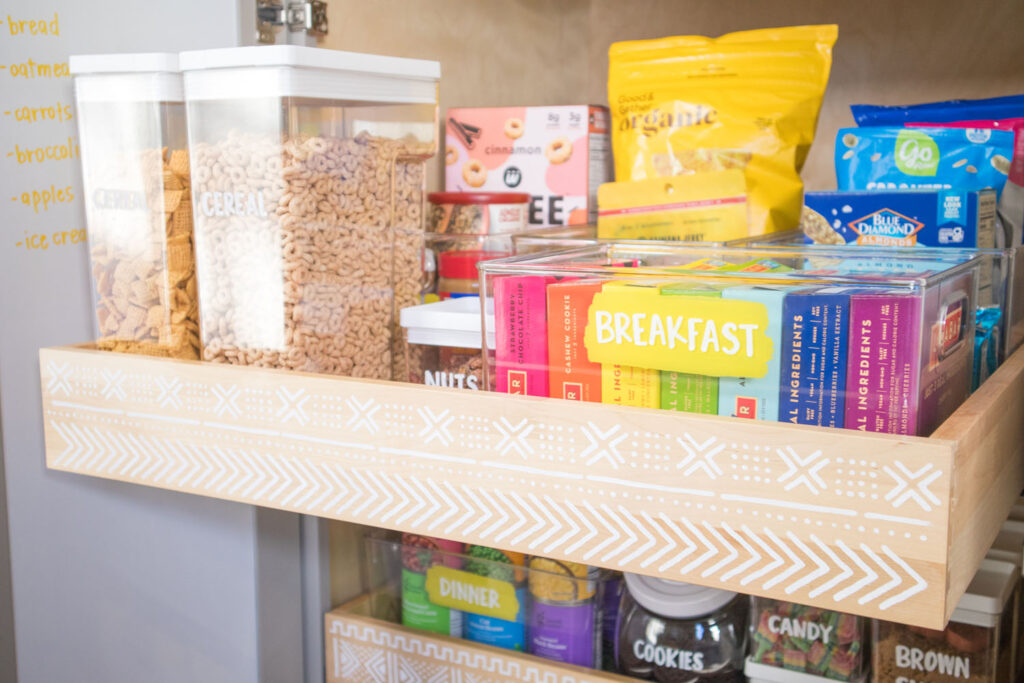
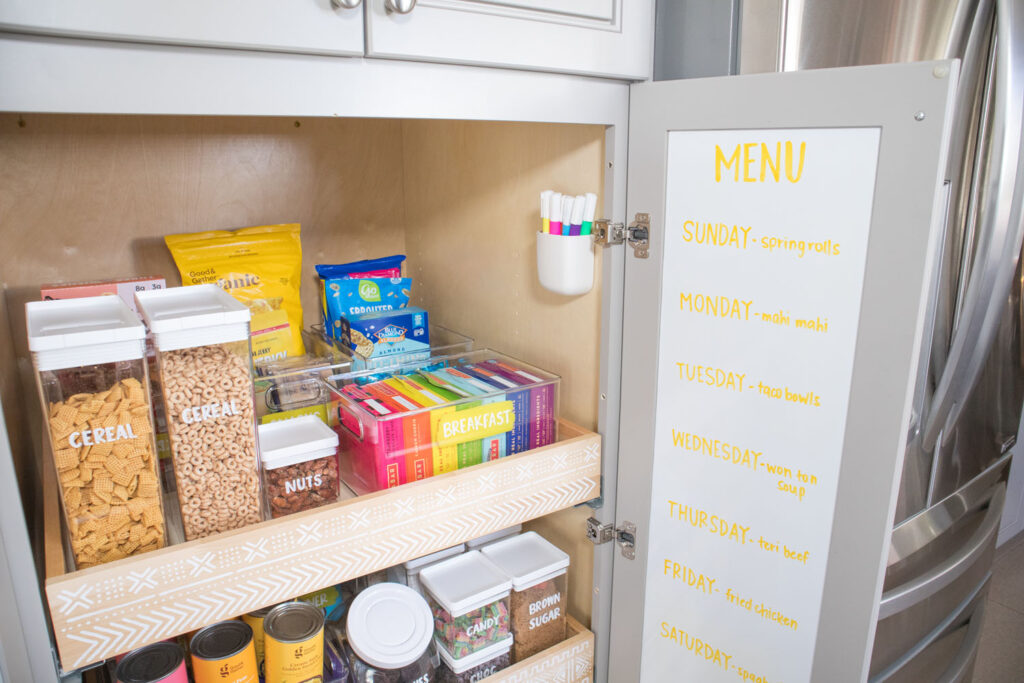
Restock your pantry, placing the most frequently used items at eye level. For my household, that’s breakfast items and snacks. Place larger and heavier items at the bottom. Place items you don’t use as frequently near the top. I placed a basket filled with specialty baking pans on my top shelf. Now I can stand on a step stool and pull out the basket when I’m looking for a specific one (instead of digging through piles of bakeware). If you have children in your household, consider placing their foods at their eye level so they can access them at snack time or while packing their own lunches.
The Home Edit gals are notorious for arranging things in rainbow order! Have you seen the cover of their latest book?! Being the rainbow lover I am, I decided to test this one out for myself. It does make my pantry look way prettier, but I’m not sure it’s sustainable for me in the long term. I would really have to plan out my shopping trips to make sure I achieve ROYGBIV. I will admit that it does add some much needed joy to my pantry (and snacking routine!).
DIY TUTORIALS
Check out the 5 tutorials below to take your pantry organization up a notch! These projects are by no means mandatory, but do help to add some personality to an often lackluster space.
Watch this quick video to see my colorful pantry makeover!
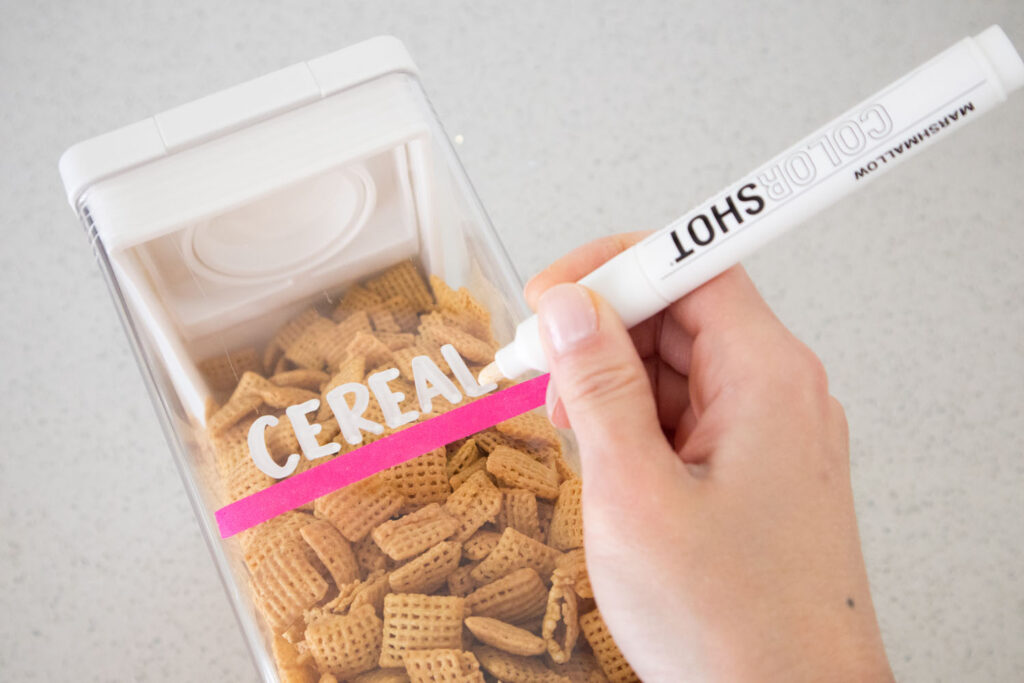
Labeled Food Containers
Food container labels don’t have to be boring. Use hand lettering to add some personality to your pantry!
Materials: COLORSHOT Premium Chalk Markers
Instructions: COLORSHOT Premium Chalk Markers are designed to write on a variety of non-porous surfaces like plastic, metal and glass. Use them to label the contents of your food containers. The best part is if the contents change or you make a mistake while labeling, you can easily wipe it off with a damp cloth and start over! Consider using a contrasting color for food contents that are white to improve visibility. To make sure your letters are opaque, trace over them while they’re still wet. To get the letters straight I used a piece of washi tape as a guide and peeled it off once I was done.

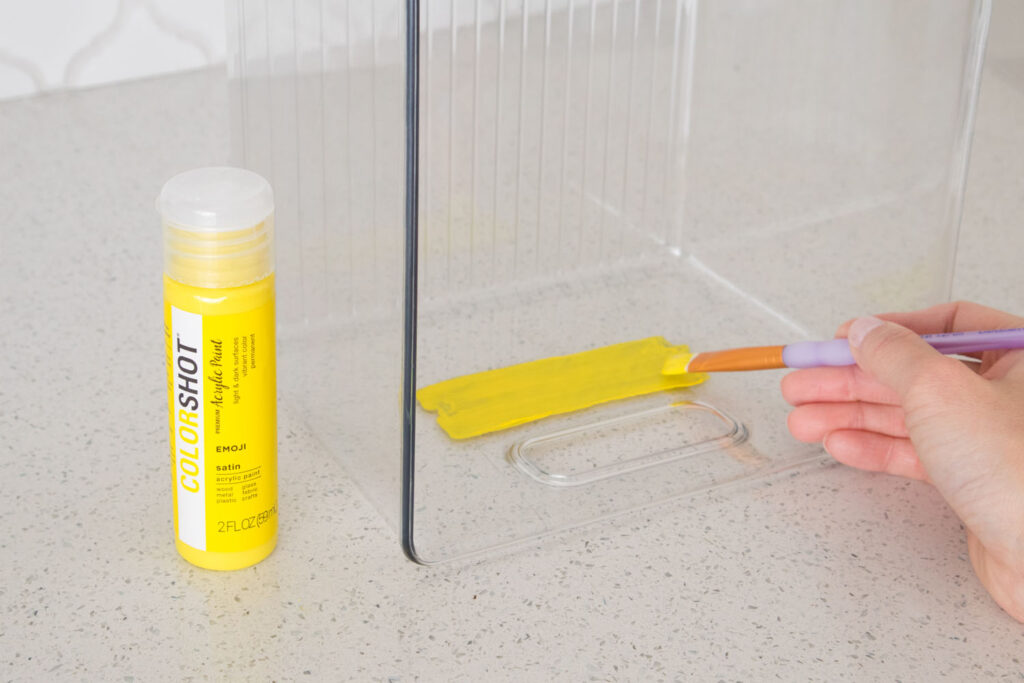
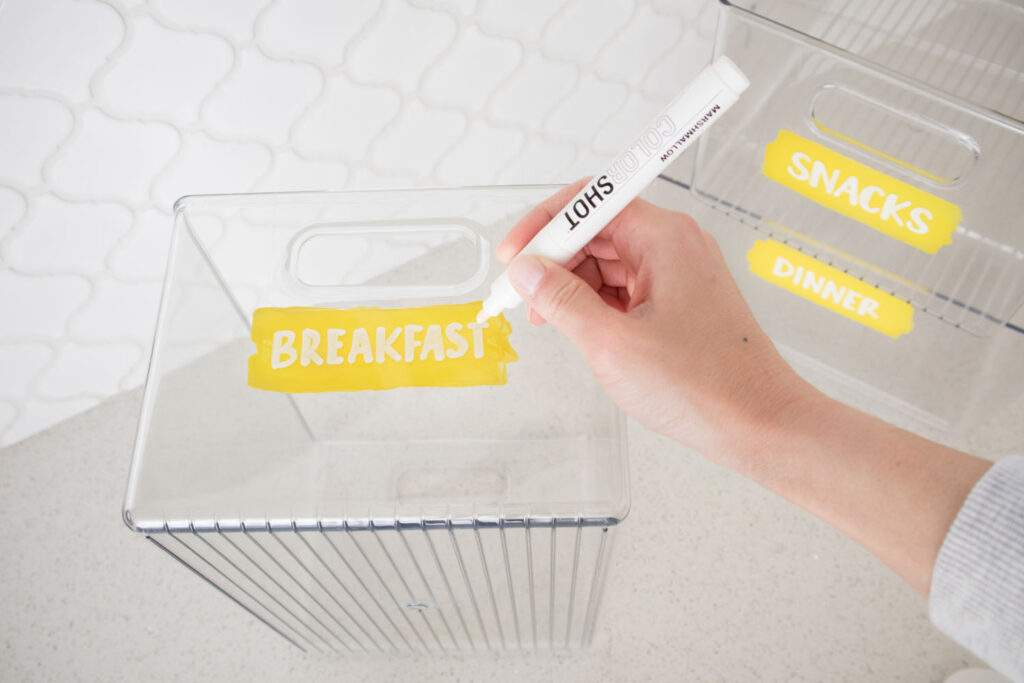
Colorful Bin Labels
This DIY project is super easy, but makes a big impact. The pop of color makes reaching for your favorite snack even more fun!
Materials: COLORSHOT Premium Acrylic Paint, COLORSHOT Premium Chalk Markers, paint brush
Instructions: Paint a section inside of the clear bins with acrylic paint. You can pick one of COLORSHOT’s fun colors or mix your own! This paint dries quickly so you can paint on several layers for a bolder look. Once dry, use a contrasting chalk marker to label the outside of the bin right over the painted section. This makes reading the labels easier. Again, if the contents change, you can wipe off the chalk marker without disturbing the paint on the interior. Make sure the paint has completely dried before adding in your food items.
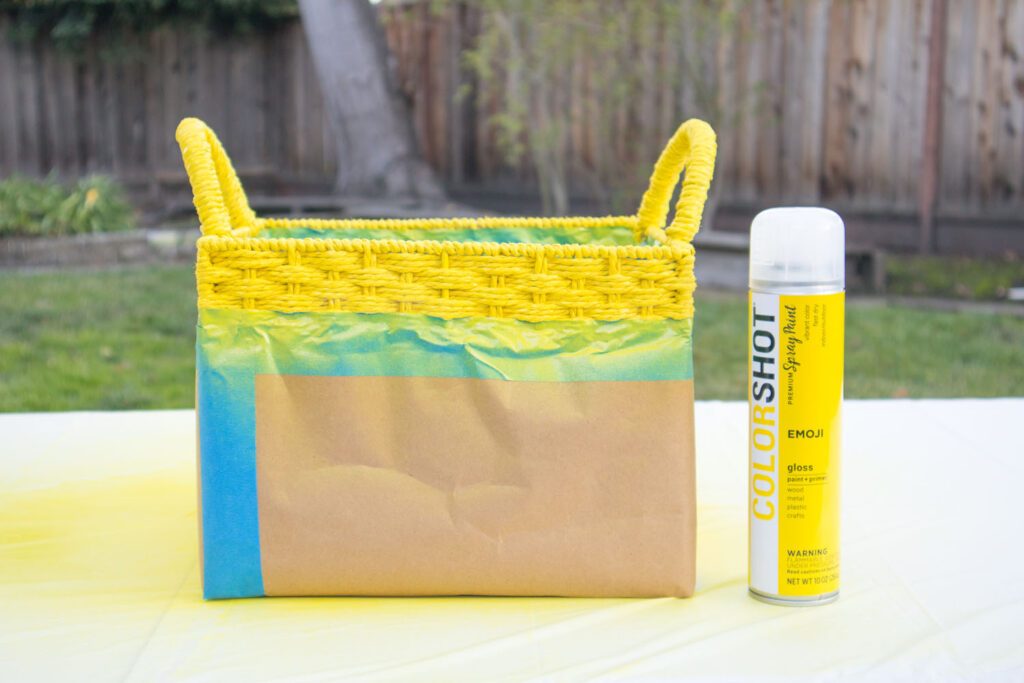
Striped Woven Baskets
I wanted to add some color to these simple baskets so I spray painted the top edge and handles yellow. I love the bright and shiny finish of the Emoji color I picked! Add even more function and style with gold metal bin clips!
Materials: COLORSHOT Premium Spray Paint, painters tape, thick kraft paper, bin clip labels, COLORSHOT Premium Chalk Markers
Instructions: Tape off the bottom portion of a basket with kraft paper and painter’s tape. You’ll want to press the tape into any grooves in order to get crisp lines. Make sure to cover the inside to protect it from overspray. Spray the exposed top section with your choice of spray paint. This spray paint dries fast so you can apply a second coat soon after the first. It leaves a durable finish since it’s intended for indoor and outdoor use. Peel off tape and paper once dry.
To label the basket contents, write on bin clip labels with a chalk marker. Then simply attach to your basket.
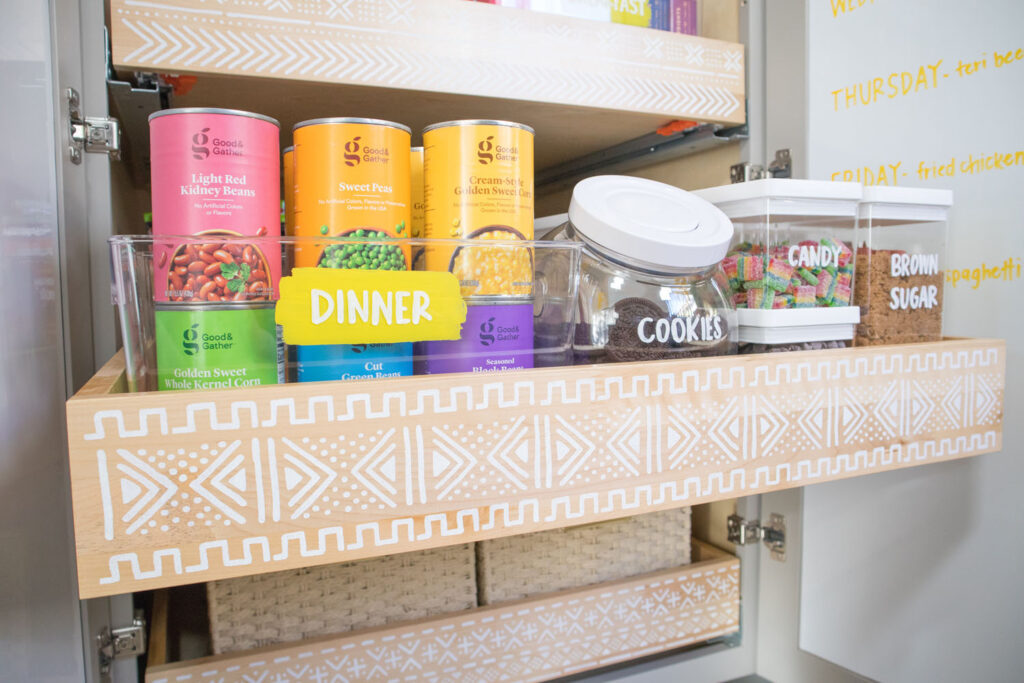
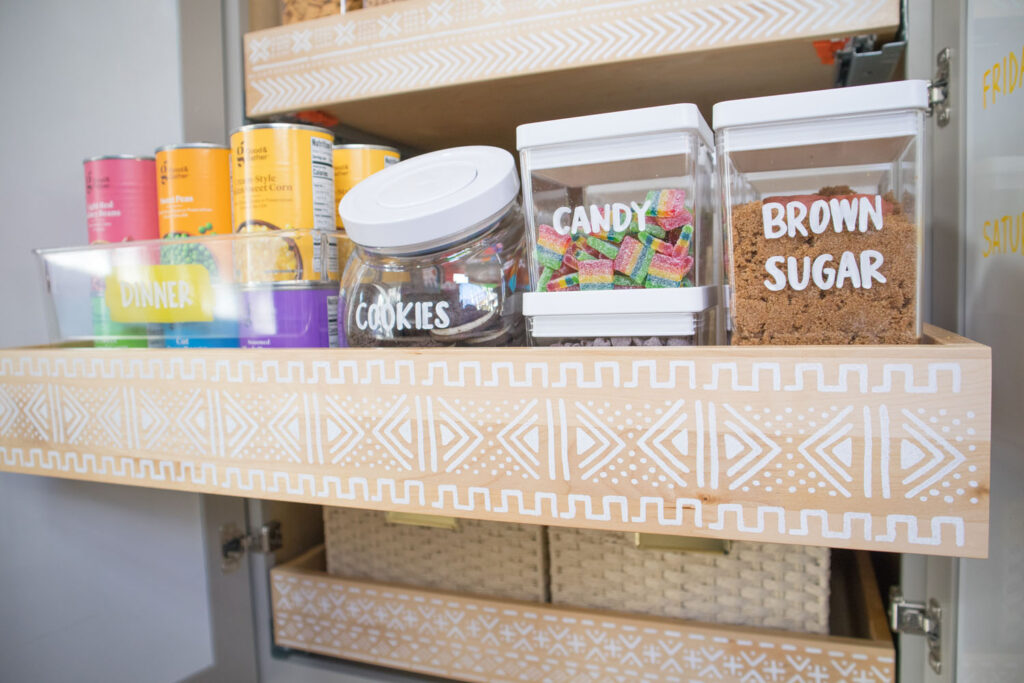
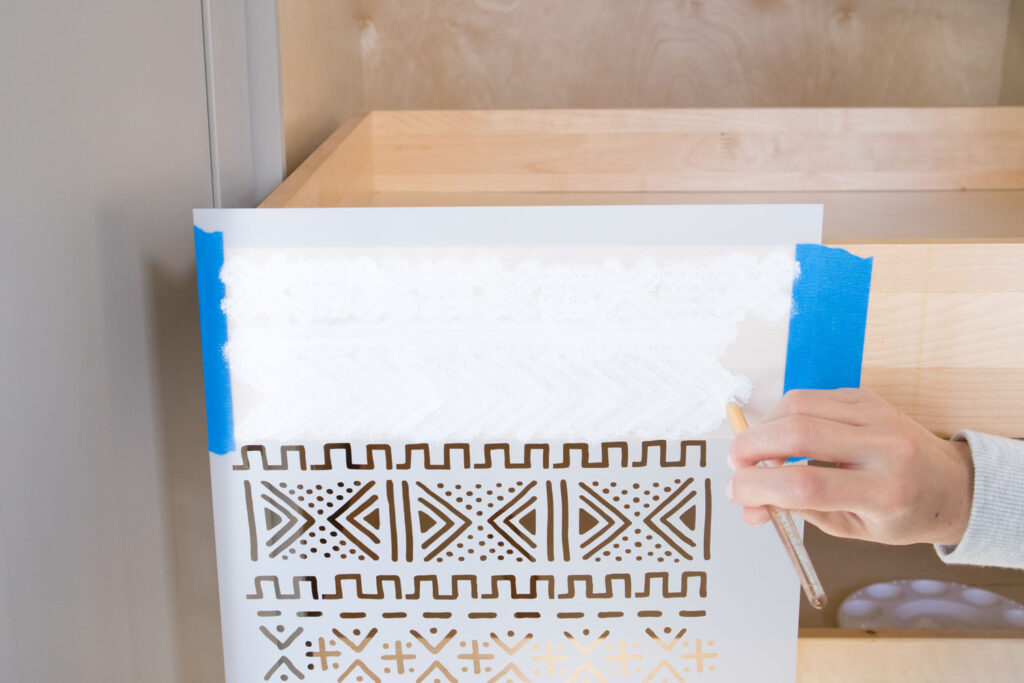
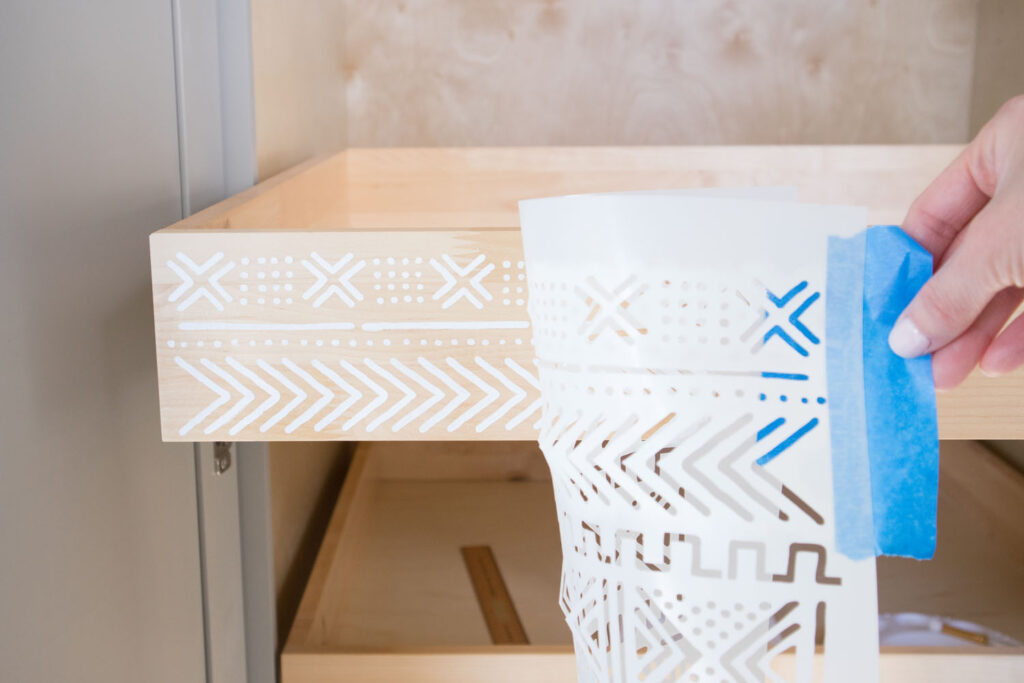
Stenciled Drawer Fronts
I love the pull out drawers in my pantry but I found them a bit plain. I decided to add a stenciled design to the drawer fronts and love how it turned out! This mud cloth stencil was the perfect size for my narrow pull-out drawers and completely elevates them!
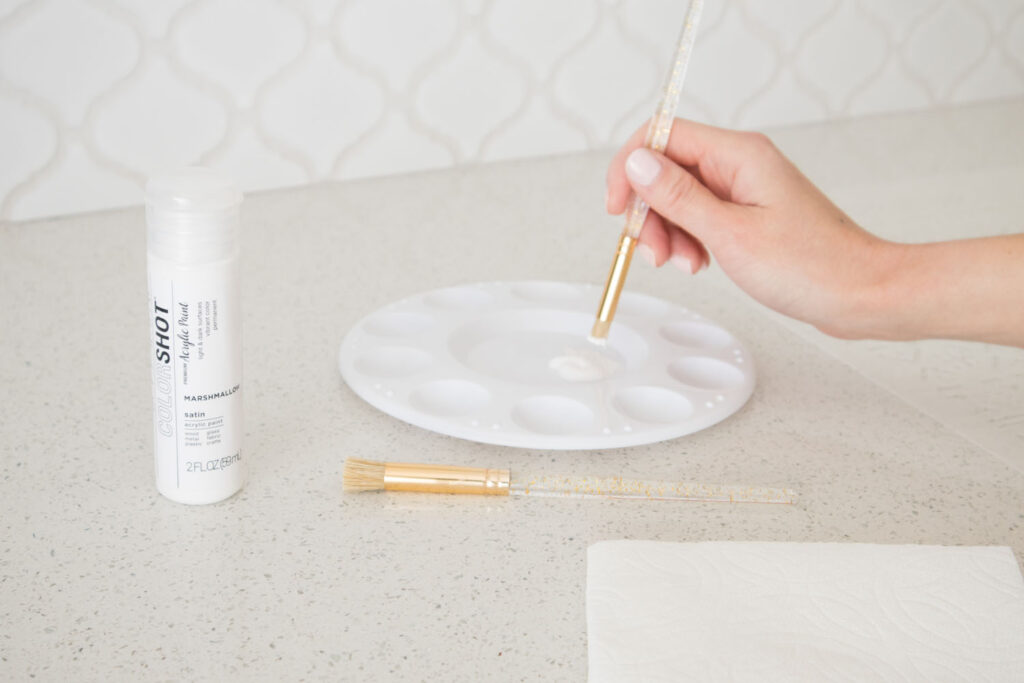
Materials: COLORSHOT Premium Acrylic Paint, furniture stencil, repositionable spray adhesive, painters tape, stencil brush, paint palette/plate, paper towel, ruler
Instructions: Find a furniture stencil that compliments your style and drawer dimensions. Apply spray adhesive to the back of the stencil and wait 3-5 minutes. This helps to stick your stencil to the drawer and prevents paint seeping. Position the stencil on your drawer front and use painter’s tape to secure. Use a ruler to help guide the placement. Pour acrylic paint onto a painter’s palette or plate. Load a small amount of paint onto a stencil brush, swirl, then dab off excess on a paper towel. Lightly dab the paint onto the stencil openings using a tapping motion. Apply a second coat for more coverage. Carefully peel back the stencil and allow the paint to dry. Reposition the stencil and repeat until the project is complete.
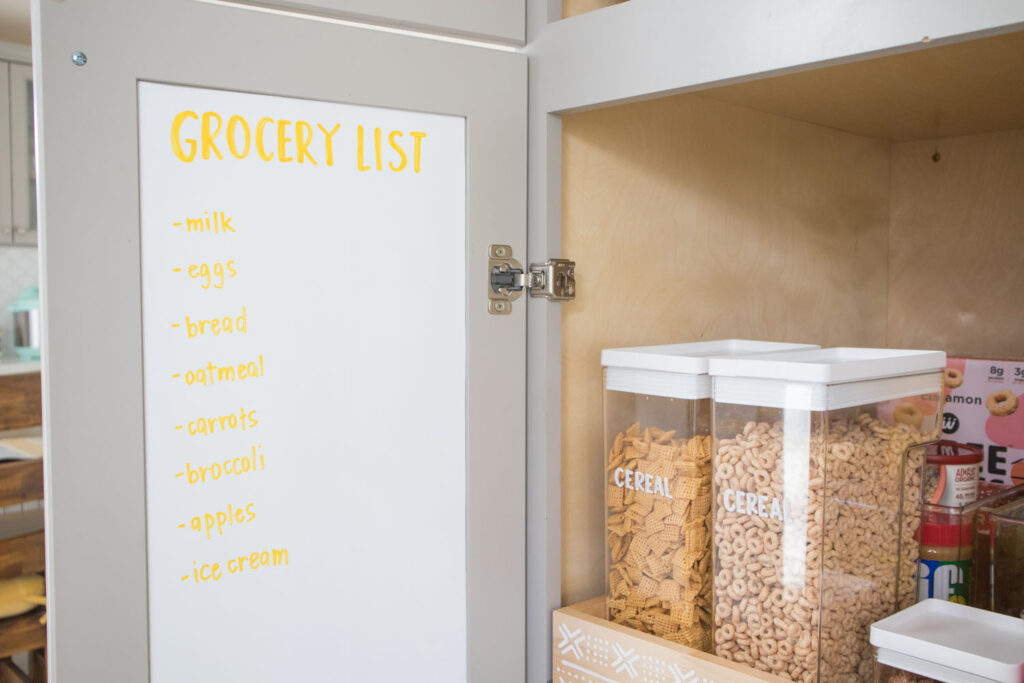
Whiteboard Cabinet Doors
Utilizing the inside of cabinet doors is a smart way to stay organized. I love that this DIY takes up almost no space but provides a huge surface for me to write on. Now I can assess the contents of my pantry, plan my grocery list and menu all in one place! It’s also a fun way to involve your kids in the kitchen!
Materials: COLORSHOT Premium Chalk Markers, white chalkboard adhesive paper, scraper tool, craft knife, adhesive pen caddy
Instructions: Measure the inside surface of your cabinet doors and trim the chalkboard paper to fit. Peel off a few inches of the liner and apply the chalkboard adhesive to the top portion of the door. Repeat this process removing a little bit of the liner at a time until you get to the bottom. Use a scraper tool to smooth out any bubbles as you go. Trim off any excess adhesive paper with a craft knife. Attach the caddy inside the cabinet to hold your colored chalk markers. Use your chalk markers to write your grocery list and plan out your weekly menu. Wipe off with a damp cloth when you’re ready for next week!
An organized pantry SPARKS JOY!
Now that my pantry organization is complete, I feel so relieved! It’s so nice to open the doors and quickly find what I’m looking for. I’m especially loving the clear food containers and bins as I’m able to see exactly what I have and what I need to shop for. The painted mud cloth design on the pull out drawers makes this space feel special and almost furniture-like. I would totally leave the doors open and stare at them all day if I could! Most of all I love the pops of yellow in here. I can’t help but smile when I see the bright yellow rimmed baskets and hand painted bin labels. Yes, pantries CAN spark joy! Have I inspired you to get organized and creative in your pantry? What pantry organization questions do you have? Tag me on Instagram to show me your pantry makeovers!
Save these pins!
For more colorful DIY projects and inspiration, go to my blog.
For more paint project ideas, visit mycolorshot.com.
Jackie Wallace
This pantry organization is so satisfying. I love it soooo much. The colors and everything looks so neat! I am going to try and use some of your tips in my kitchen here in Titusville, FL. We are having some kitchen cabinet refinishing done next week and once that is finished it is time to organize! Thanks for sharing your beautiful pantry!
Blaire
I’m so glad you like my pantry, Jackie. I think it’s so exciting that you get to upgrade your kitchen! Please let me know if you try any of the projects I shared. 🙂